Signing PDFs without embedded forms under Linux
Edit: I’ve added a couple more methods for modifying PDF files with suggestions from readers. Thanks everyone!
Picture the following situation: someone sends you a PDF document and asks you to send it back signed. Some problems, though:
-
The PDF doesn’t have an embedded form, it’s just something they exported from their word processor.
-
They’re not using any signing service like DocuSign, Dropbox Sign or any other.
Sounds implausible? I’ve faced the situation multiple times. From the top of my head:
-
When I joined Igalia some years ago I had to do that with a few documents.
-
Multiple times, one of them very recent, when interacting with some electronic administration websites, where the definition of electronic administration is:
-
We make the form available to you as a PDF document (thank us we don’t give you a .docx file at least).
-
You can send the form filled back to us through the internet, by attaching a file somehow.
-
No, we don’t have an HTML version of the form.
-
No, we don’t have anything set up so you can sign the document with your official electronic certificate or anything similar.
-
-
With documents from the homeowner association management company.
If you’re like me, what do you do? Print the document, fill it, scan it, attach it.
Side quest: scanning pages
No, I’m not taking pictures of the document with my phone to send it back. For me, that’s a solved problem now. The scanning system on Linux is called SANE (standing for Scanner Access Now Easy) and it has an official non-HTTPS site. If you want to properly scan an A4 or US-Letter sized document, you can get a desktop scanner. The SANE website has a list of supported devices, indicating how well-supported each is. Long story short? I’m partial to Canon scanners because I know they work reasonably well. In their website, as of the time I’m writing this, they list a couple of them: the CanoScan LIDE 300 and the CanoScan LIDE 400. Both of them are very well supported under SANE. I got the 300 model some time ago. Plug it in, open the document scanner Gnome app and start scanning. No setup needed.
Back to signing
Can we do better than the print+scan cycle? Can you insert your scanned signature into the document easily? For that, you have to solve two separate problems.
-
Getting a nice version of your signature in image form.
-
Ideally, as a PNG with a transparent background.
-
If not, a clear image with a light background could do it.
-
-
Inserting that image on the PDF somehow.
I don’t know if this sounds surprising to you, but the hardest problem is the first one. However, you only have to solve it once. Let’s start, then, by the second one.
Inserting the signature
Thanks Emma Anholt for mentioning you can open PDFs with LibreOffice Draw and use it to insert images and text anywhere in the document! Thanks also to Alyssa Rosenzweig for also mentioning Xournal (or Xournal++), which I’ve found to work much better at that task compared to LibreOffice. Also special thanks to everybody who contacted me mentioning different methods and tools! I really enjoy posting these articles just for the reactions, comments and suggestions.
Method 1: Xournal++
Xournal++ is an open source program you can typically install from your distribution repositories. I installed it from Gnome Software on Fedora without issues, and selected the official RPM as the source.

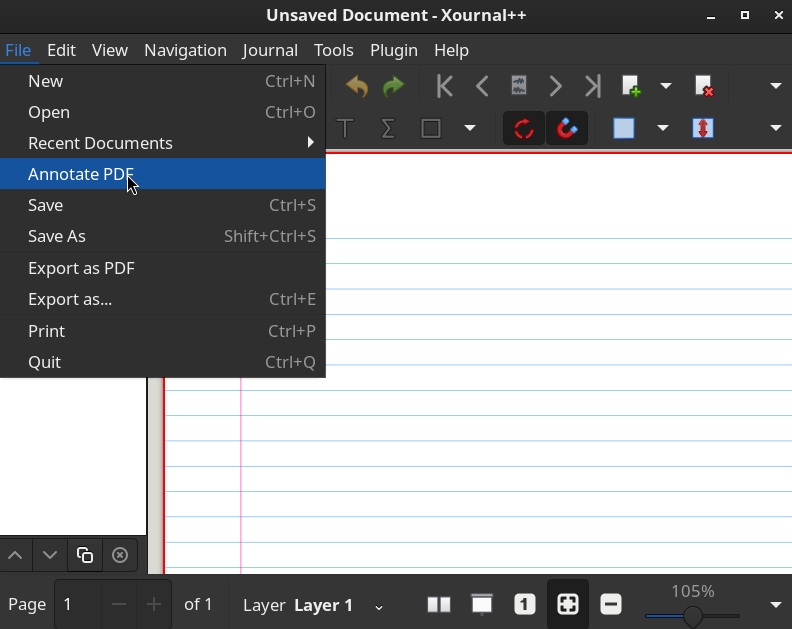
The application is designed to create notes in general, using images, text or typically a graphics tablet, but it turns out it has an option to annotate an existing PDF.

It will open the PDF and let you put anything on it. You can use a wide variety of tools to insert images, text boxes or even draw anything on top by hand, if you have a graphics tablet or incredible mouse skills. You should take a look at the toolbar and/or the tools menu to see what it can do. The easiest option is clicking on the image insertion tool, click anywhere in the document and select the image you want to insert. If it turns out to be too big or small, you can drag the corner to increase or decrease size preserving the image aspect, and you can move it around freely. The text insertion tool is also handy to fill complex forms that can’t be filled as a proper form. When done, use “File > Export as PDF” to generate a new document. End of the journey!
Method 2: Firefox
Amazingly, I wasn’t aware of this option until it was mentioned to be by a couple of people. Thanks to Sasi Péter and an anonymous user for the tip.
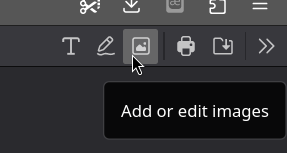
When you open a PDF file under Firefox, there’s a toolbar that lets you insert text, draw and insert images, much like Xournal++.

If, as it was my case, you don’t have the image insertion button, you need to take a look at the pdfjs.enableStampEditor in about:config.
Once you’ve finished modifying the document click on the Save icon (folder with an arrow pointing down) to save the modified version.
Method 3: LibreOffice Draw
You can also open PDFs with LibreOffice Draw and you can use its incredibly wide variety of tools to modify the document. That includes inserting images, text or whatever you need. However, I’ve found LibreOffice Draw to be a bit lacking when preserving the original PDF contents. For example, one of the documents I had to sign had an appended Latex-generated subdocument in the last pages, and LibreOffice Draw was not able to preserve the font and style of those last pages after inserting the signature. Xournal++, on the other hand, preserved it without issues.
Method 4: falsisign
Suggested by Anisse on Mastodon.
falsisign is a tool intended to be used for automation and it probably falls out of what most people would consider a friendly tool. However, it looks incredibly practical if you need to sign a lot of pages in a document, and its default behavior allows the final document to look like if it had been printed, signed and then scanned again, if you want or need your document to look that way. There are options to disable that behavior, though.
Creating a nice version of your signature as a PNG file
This is getting long so I’ll cut it short: follow one of the available video tutorials on YouTube. I used the one I just linked, and I can boil it down to the following steps, but please follow the video in case of doubt:
-
If possible, scan your signature on a white paper using a pen that leaves a clear mark, like a marker pen or Pilot V5 or something like that.
-
If you don’t have a scanner, take a picture with your phone trying not to create a shadow from your body or the phone on the paper.
-
Import the image into Gimp and crop it as you see fit.
-
Decrease saturation to make it gray-scale.
-
Play with the color value curves, moving up the highest part of the curve so the white (or almost white) background becomes fully white, and moving down the lowest part of the curve so the trace becomes even more dark and clear, until you’re satisfied with the results.
-
Remove any specks from the white background using the drawing tools.
-
Duplicate the main layer adding a copy of it.
-
Invert the colors of the layer copy so it becomes white-on-black.
-
Add a transparency mask to the original layer, with black as transparent.
-
Copy the inverted layer and paste it into the transparency mask of the original layer (this will make the white background transparent).
-
Export the final result as a PNG.
Caveats
Take into account it’s easy to extract images from PDF files, so using this method it may be easy for someone to extract your signature from the generated document. However, this can also be easily done if you scan or take a picture of a physical document already signed, even if the signature crosses some lines in the document, with minimal image manipulation skills, so I don’t think it changes the threat model in a significant way compared to the most common solution.