Year-end donations round, 2025 edition
One more year, one more year-end donations round before reaching the next one. As every year, I highly encourage you to do the same. Please think about organizations that make a difference to you and software that you may use every day. Your contribution may make a difference to them in return.
This year I went with:
-
Signal because I still use it every day. In reality, I’ve promoted this donation to a monthly recurring one and I’ve been donating throughout all the year, but I’m still mentioning it here.
-
KDE because I’ve recently switched to it on my personal computer, just to try something different, and it’s really nice. I’ve been using it now for multiple weeks and it works great!
-
RPM Fusion because I continue to use their Fedora repositories all the time.
-
Pi-Hole similarly. My Pi-Hole box has been running on my home network for years without trouble.
-
EFF because it had been a few years since I donated, and I continue to admire their work on the defense of civil liberties and digital rights.
-
SFC is similar and, as I mentioned before, they are now the fiscal sponsor of the X.Org Foundation, which is closely related to my professional life.
-
Internet Archive because they are critical in preserving culture and digital content around the globe.
-
LibreOffice because, to me, it’s a super-important project in the context of making the Linux Desktop viable.
Grub no longer detected my Windows installation
Christmas Eve 2025. It’s late at night and I should really go to bed because Santa is coming tonight. I’m installing a new hard drive in my computer to replace my existing Fedora Linux drive. The new one is larger and faster, and I decide to start from scratch with a new Fedora 43 KDE Plasma Desktop Edition installation. After the system is installed (super-fast!) I copy data over from my old drive into my new one. Mostly the home directory and a few other bits. Grub is showing me the kernels for the new OS installation, as well as options to boot several kernels from the previous drive, Windows and the UEFI Firmware Settings option.
Prior to unplugging the old drive that I’m not going to use anymore, I wipe its contents with zeros. I regenerate the Grub boot entries and reboot, hoping that the entries from the old drive would no longer be present, but I immediately notice something weird. The computer now boots directly to the new Fedora installation. Maybe I missed the Grub menu because I was distracted? I reboot, mash the Escape key repeatedly and it finally shows up. Multiple options are present, including UEFI Firmware Settings, but no trace of the Windows boot option. From Linux, I can still see the Windows drive and even mount its contents, but I have no way of booting into that. Why?
The problem is a misconception I had about what happens when you have separate drives for each OS. In the BIOS days, Windows would install a boot loader into the “header” of its own partition, as well as the disk’s MBR after installation. Linux would install Grub to the MBR of its own disk and detect the Windows installation in the other drive, allowing you to chain-load the Windows boot loader from its partition. If you suddenly were to unplug the Linux disk, you could still boot from the Windows disk.
With UEFI, it’s not like that. UEFI systems typically have an active or main EFI partition in one of the drives, and that’s the one used to boot the system. The Windows installer places files in the existing EFI partition to allow you to boot Windows, and Grub or, more accurately, the tooling around it, is able to see those and add a Windows boot option. If you only have Windows installed, probably in a computer with a single disk, the EFI partition is also in the Windows disk. But if you have Linux installed on one drive, which contains the EFI partition, and you decide to reinstall Windows, Windows will place its boot loader files into the EFI partition of the Linux drive. That’s what happened to me. The Linux installation was older, because I had recently reinstalled Windows when I switched from an NVIDIA to an AMD GPU. Thus, the EFI partition was in the old Linux drive and Windows had put its boot loader files there. When I plugged in my new drive and installed Fedora from scratch on it, the installer created a new EFI partition in that disk to make it a bootable drive, but the installer and OS prober were nice enough to detect the previous EFI partition in the old drive, and allowed me to boot the old Linux installation, as well as Windows. However, after I cleared the old drive, I accidentally erased the Windows boot loader files in addition to the old Linux entries.
The hardest part of the solution was identifying and understanding the situation.
fdisk -l prints only one entry labeled EFI System, it’s mounted somewhere, and there is no Microsoft directory to be found in it.
Once that was clear, the solution was not hard because the Internet has multiple blog posts describing what to do in these cases. I found the guide from Github user meroupatate to be super-clear and helpful. Summarizing the main steps:
-
Download a Windows ISO from Microsoft.
-
Create a bootable USB drive with it using
woeusb. -
Boot from it, press Shift+F10 on the main screen to open a command-line window.
-
Run the
diskparttool. -
While in it, use
list diskto locate the drive containing the Windows installation, and useselect disk Nto select it. -
Use
list volumeto list its partitions and locate the main one containing the Windows installation, taking note of the drive letter currently assigned to it. -
Exit the tool and use
bcdboot X:\Windowswhere X is the drive letter you found in the previous step.
That will install the Windows boot loader back to the current EFI boot partition, preparing it to boot the chosen Windows installation. Then, you should be able to boot into Linux, regenerate the Grub configuration file and entries again, and that should restore the option to boot Windows.
Notes about VK_EXT_custom_resolve
Vulkan 1.4.333, released on November 14th, includes VK_EXT_custom_resolve, an extension that is closely related to the work we have been doing at Igalia to help Valve release the Steam Frame. It’s an extension that allows you to use a custom fragment shader to specify how to resolve a multisample image into a single-sample image, typically so the latter can be presented on screen. CTS tests for that extension were written by yours truly in close collaboration with Turnip developers, and are now public.
When using classic render passes from Vulkan, the extension only adds a flag that you can use to mark a subpass as a custom resolve one. That subpass will typically use the multisample attachment as an input attachment in the fragment shader, and the single-sample attachment as the output. Nothing you could do already without the extension.
However, by marking the subpass as a custom resolve, you’re basically promising that, in practice, you will only draw a single full-screen quad in that subpass, and use that draw to resolve the multisample image. In tiling GPUs, as used on mobile devices like the one that powers the Steam Frame, that allows the driver to make sure everything is worked on a tile-by-tile basis and is super-optimized to be as efficient as possible.
Naturally, a custom resolve is not going to be faster than the fixed-function hardware that normally performs resolves so, if you’re only interested in doing a standard resolve operation, do not bother using the extension and programming a fragment shader. However, sometimes applications want to do more than just the resolve. For example, you may be interested in applying tone-mapping to the final resolved image. Without a custom resolve, you’d be forced to wait for the resolve operation to complete and perform tone-mapping in a separate render pass, which implies new inefficient tile load and store operations. Mobile vendors always insist that you use subpasses if possible, as that allows them to work more efficiently per-tile, avoiding costly loads and stores to and from tile memory. With custom resolves, you can do the resolve and the tone-mapping operations in a single efficient shader, giving every hint to the Vulkan driver about what you are doing so the GPU usage is optimal.
The extension is based on VK_QCOM_render_pass_shader_resolve, but Valve contractors and Mesa contributors Mike Blumenkrantz and Connor Abbott spearheaded an effort to improve it and to support dynamic rendering cases.
This moved the extension from being vendor-specific to being a multi-vendor one, with implementations on Turnip, RADV, ANV, lavapipe and NVIDIA, so far.
This paves the way for applications to require this extension unconditionally, avoiding the need to have multiple code paths depending on extension support, and making sure their code performs optimally everywhere.
If the application uses dynamic rendering instead of classic render passes, the extension allows you to start using custom resolves efficiently. The way it works with dynamic rendering is interesting and merits some words, but the essentials are described in the extension proposal document.
When you start a dynamic render pass, you can specify two image views for each attachment: the main view, which is multisample when doing multisample rendering, and the resolve view (which is null if the main view is already single-sample).
The extension adds a new command that you can call in the middle of a dynamic render pass: vkCmdBeginCustomResolveEXT.
This command remaps the output attachments of the fragment shader so that the location corresponding to a particular attachment is connected to the single-sample resolve view instead of the usual multisample view.
This remapping does not affect how input attachments work with dynamic rendering: reading from an attachment as an input attachment continues to read from the multisample view.
However, writing to it redirects writes to the single-sample view instead.
This is how you can easily read values from the multisample view while writing the result directly, using a shader, to the resolve view.
Again, you could already do that in Vulkan with a separate dynamic render pass and separate attachments (or descriptors) for multi-views and single-sample views, but this again may lead to inefficient loads and stores on mobile GPUs, derived from having to use multiple render passes.
Now your dynamic render pass is effectively split into two pseudo-subpasses: regular draws come before the begin-custom-resolve command, and resolve draws come after that command.
As with classic render passes, typically the resolve part contains a single draw for a full-screen quad, and the fragment shader uses it to read from multisample view N as an input attachment while writing to output location N, which is now the single-sample resolve view.
Device-Generated Commands at Vulkanised 2025
A month ago I attended Vulkanised 2025 in Cambridge, UK, to present a talk about Device-Generated Commands in Vulkan. The event was organized by Khronos and took place in the Arm Cambridge office. The talk I presented was similar to the one from XDC 2024, but instead of being a lightning 5-minutes talk, I had 25-30 minutes to present and I could expand the contents to contain proper explanations of almost all major DGC concepts that appear in the spec.
I attended the event together with my Igalia colleagues Lucas Fryzek and Stéphane Cerveau, who presented about lavapipe and Vulkan Video, respectively. We had a fun time in Cambridge and I can sincerely recommend attending the event to any Vulkan enthusiasts out there. It allows you to meet Khronos members and people working on both the specification and drivers, as well as many other Vulkan users from a wide variety of backgrounds.
The recordings for all sessions are now publicly available, and the one for my talk can be found embedded below. For those of you preferring slides and text, I’m also providing a transcription of my presentation together with slide screenshots further down.
In addition, at the end of the video there’s a small Q&A section but I’ve always found it challenging to answer questions properly on the fly and with limited time. For this reason, instead of transcribing the Q&A section literally, I’ve taken the liberty of writing down the questions and providing better answers in written form, and I’ve also included an extra question that I got in the hallways as bonus content. You can find the Q&A section right after the embedded video.
Vulkanised 2025 recording
Questions and answers with longer explanations
Question: can you give an example of when it’s beneficial to use Device-Generated Commands?
There are two main use cases where DGC would improve performance: on the one hand, many times game engines use compute pre-passes to analyze the scene they want to draw and prepare some data for that scene. This includes maybe deciding LOD levels, discarding content, etc. After that compute pre-pass, results would need to be analyzed from the CPU in some way. This implies a stall: the output from that compute pre-pass needs to be transferred to the CPU so the CPU can use it to record the right drawing commands, or maybe you do this compute pre-pass during the previous frame and it contains data that is slightly out of date. With DGC, this compute dispatch (or set of compute dispatches) could generate the drawing commands directly, so you don’t stall or you can use more precise data. You also save some memory bandwidth because you don’t need to copy the compute results to host-visible memory.
On the other hand, sometimes scenes contain so much detail and geometry that recording all the draw calls from the CPU takes a nontrivial amount of time, even if you distribute this draw call recording among different threads. With DGC, the GPU itself can generate these draw calls, so potentially it saves you a lot of CPU time.
Question: as the extension makes heavy use of buffer device addresses, what are the challenges for tools like GFXReconstruct when used to record and replay traces that use DGC?
The extension makes use of buffer device addresses for two separate things. First, it uses them to pass some buffer information to different API functions, instead of passing buffer handles, offsets and sizes. This is not different from other APIs that existed before. The VK_KHR_buffer_device_address extension contains APIs like vkGetBufferOpaqueCaptureAddressKHR, vkGetDeviceMemoryOpaqueCaptureAddressKHR that are designed to take care of those cases and make it possible to record and reply those traces. Contrary to VK_KHR_ray_tracing_pipeline, which has a feature to indicate if you can capture and replay shader group handles (fundamental for capture and replay when using ray tracing), DGC does not have any specific feature for capture-replay. DGC does not add any new problem from that point of view.
Second, the data for some commands that is stored in the DGC buffer sometimes includes device addresses. This is the case for the index buffer bind command, the vertex buffer bind command, indirect draws with count (double indirection here) and ray tracing command. But, again, the addresses in those commands are buffer device addresses. That does not add new challenges for capture and replay compared to what we already had.
Question: what is the deal with the last token being the one that dispatches work?
One minor detail from DGC, that’s important to remember, is that, by default, DGC respects the order in which sequences appear in the DGC buffer and the state used for those sequences. If you have a DGC buffer that dispatches multiple draws, you know the state that is used precisely for each draw: it’s the state that was recorded before the execute-generated-commands call, plus the small changes that a particular sequence modifies like push constant values or vertex and index buffer binds, for example. In addition, you know precisely the order of those draws: executing the DGC buffer is equivalent, by default, to recording those commands in a regular command buffer from the CPU, in the same order they appear in the DGC buffer.
However, when you create an indirect commands layout you can indicate that the sequences in the buffer may run in an undefined order (this is VK_INDIRECT_COMMANDS_LAYOUT_USAGE_UNORDERED_SEQUENCES_BIT_EXT). If the sequences could dispatch work and then change state, we would have a logical problem: what do those state changes affect? The sequence that is executed right after the current one? Which one is that? We would not know the state used for each draw. Forcing the work-dispatching command to be the last one is much easier to reason about and is also logically tight.
Naturally, if you have a series of draws on the CPU where, for some of them, you change some small bits of state (e.g. like disabling the depth or stencil tests) you cannot do that in a single DGC sequence. For those cases, you need to batch your sequences in groups with the same state (and use multiple DGC buffers) or you could use regular draws for parts of the scene and DGC for the rest.
Question from the hallway: do you know what drivers do exactly at preprocessing time that is so important for performance?
Most GPU drivers these days have a kernel side and a userspace side. The kernel driver does a lot of things like talking to the hardware, managing different types of memory and buffers, talking to the display controller, etc. The kernel driver normally also has facilities to receive a command list from userspace and send it to the GPU.
These command lists are particular for each GPU vendor and model. The packets that form it control different aspects of the GPU. For example (this is completely made-up), maybe one GPU has a particular packet to modify depth buffer and test parameters, and another packet for the stencil test and its parameters, while another GPU from another vendor has a single packet that controls both. There may be another packet that dispatches draw work of all kinds and is flexible to accomodate the different draw commands that are available on Vulkan.
The Vulkan userspace driver translates Vulkan command buffer contents to these GPU-specific command lists. In many drivers, the preprocessing step in DGC takes the command buffer state, combines it with the DGC buffer contents and generates a final command list for the GPU, storing that final command list in the preprocess buffer. Once the preprocess buffer is ready, executing the DGC commands is only a matter of sending that command list to the GPU.
Talk slides and transcription
Hello, everyone! I’m Ricardo from Igalia and I’m going to talk about device-generated commands in Vulkan.
First, some bits about me. I have been part of the graphics team at Igalia since 2019. For those that don’t know us, Igalia is a small consultancy company specialized in open source and my colleagues in the graphics team work on things such as Mesa drivers, Linux kernel drivers, compositors… that kind of things. In my particular case the focus of my work is contributing to the Vulkan Conformance Test Suite and I do that as part of a collaboration between Igalia and Valve that has been going on for a number of years now. Just to highlight a couple of things, I’m the main author of the tests for the mesh shading extension and device-generated commands that we are talking about today.
So what are device-generated commands? So basically it’s a new extension, a new functionality, that allows a driver to read command sequences from a regular buffer: something like, for example, a storage buffer, instead of the usual regular command buffers that you use. The contents of the DGC buffer could be filled from the GPU itself. This is what saves you the round trip to the CPU and, that way, you can improve the GPU-driven rendering process in your application. It’s like one step ahead of indirect draws and dispatches, and one step behind work graphs. And it’s also interesting because device-generated commands provide a better foundation for translating DX12. If you have a translation layer that implements DX12 on top of Vulkan like, for example, Proton, and you want to implement ExecuteIndirect, you can do that much more easily with device generated commands. This is important for Proton, which Valve uses to run games on the Steam Deck, i.e. Windows games on top of Linux.
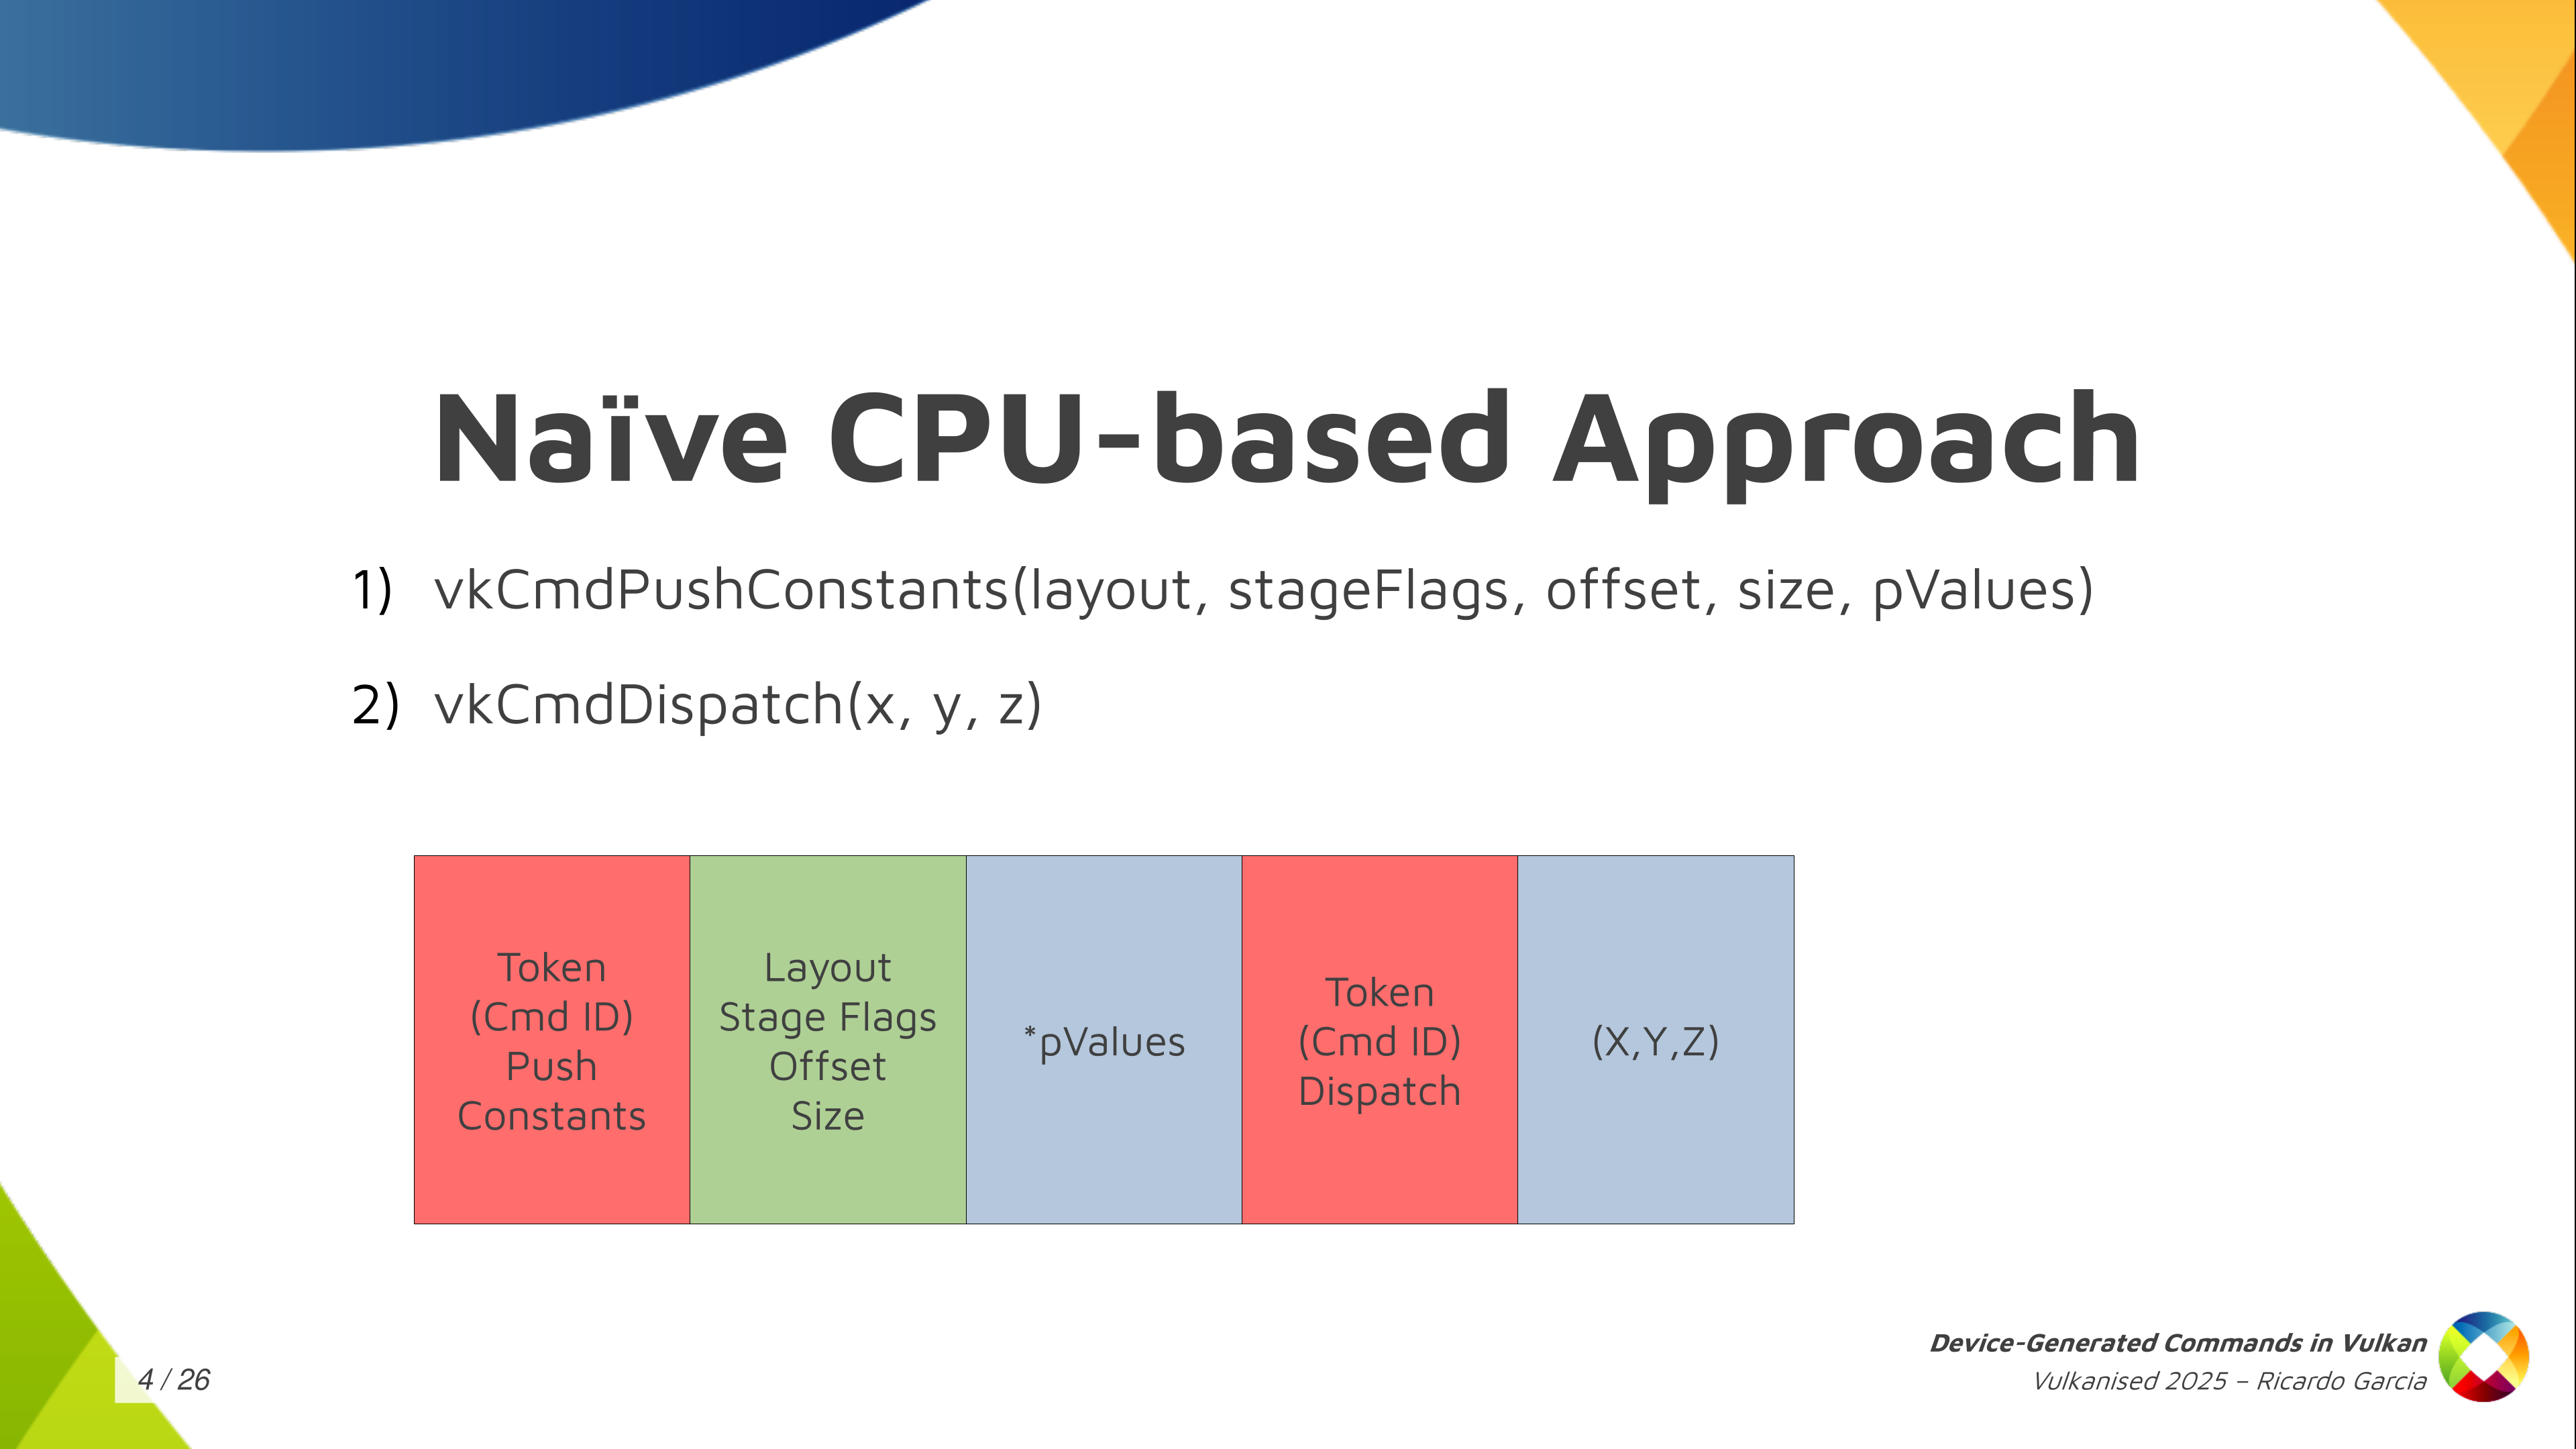
If we set aside Vulkan for a moment, and we stop thinking about GPUs and such, and you want to come up with a naive CPU-based way of running commands from a storage buffer, how do you do that? Well, one immediate solution we can think of is: first of all, I’m going to assign a token, an identifier, to each of the commands I want to run, and I’m going to store that token in the buffer first. Then, depending on what the command is, I want to store more information.
For example, if we have a sequence like we see here in the slide where we have a push constant command followed by dispatch, I’m going to store the token for the push constants command first, then I’m going to store some information that I need for the push constants command, like the pipeline layout, the stage flags, the offset and the size. Then, after that, depending on the size that I said I need, I am going to store the data for the command, which is the push constant values themselves. And then, after that, I’m done with it, and I store the token for the dispatch, and then the dispatch size, and that’s it.
But this doesn’t really work: this is not how GPUs work. A GPU would have a hard time running commands from a buffer if we store them this way. And this is not how Vulkan works because in Vulkan you want to provide as much information as possible in advance and you want to make things run in parallel as much as possible, and take advantage of the GPU.
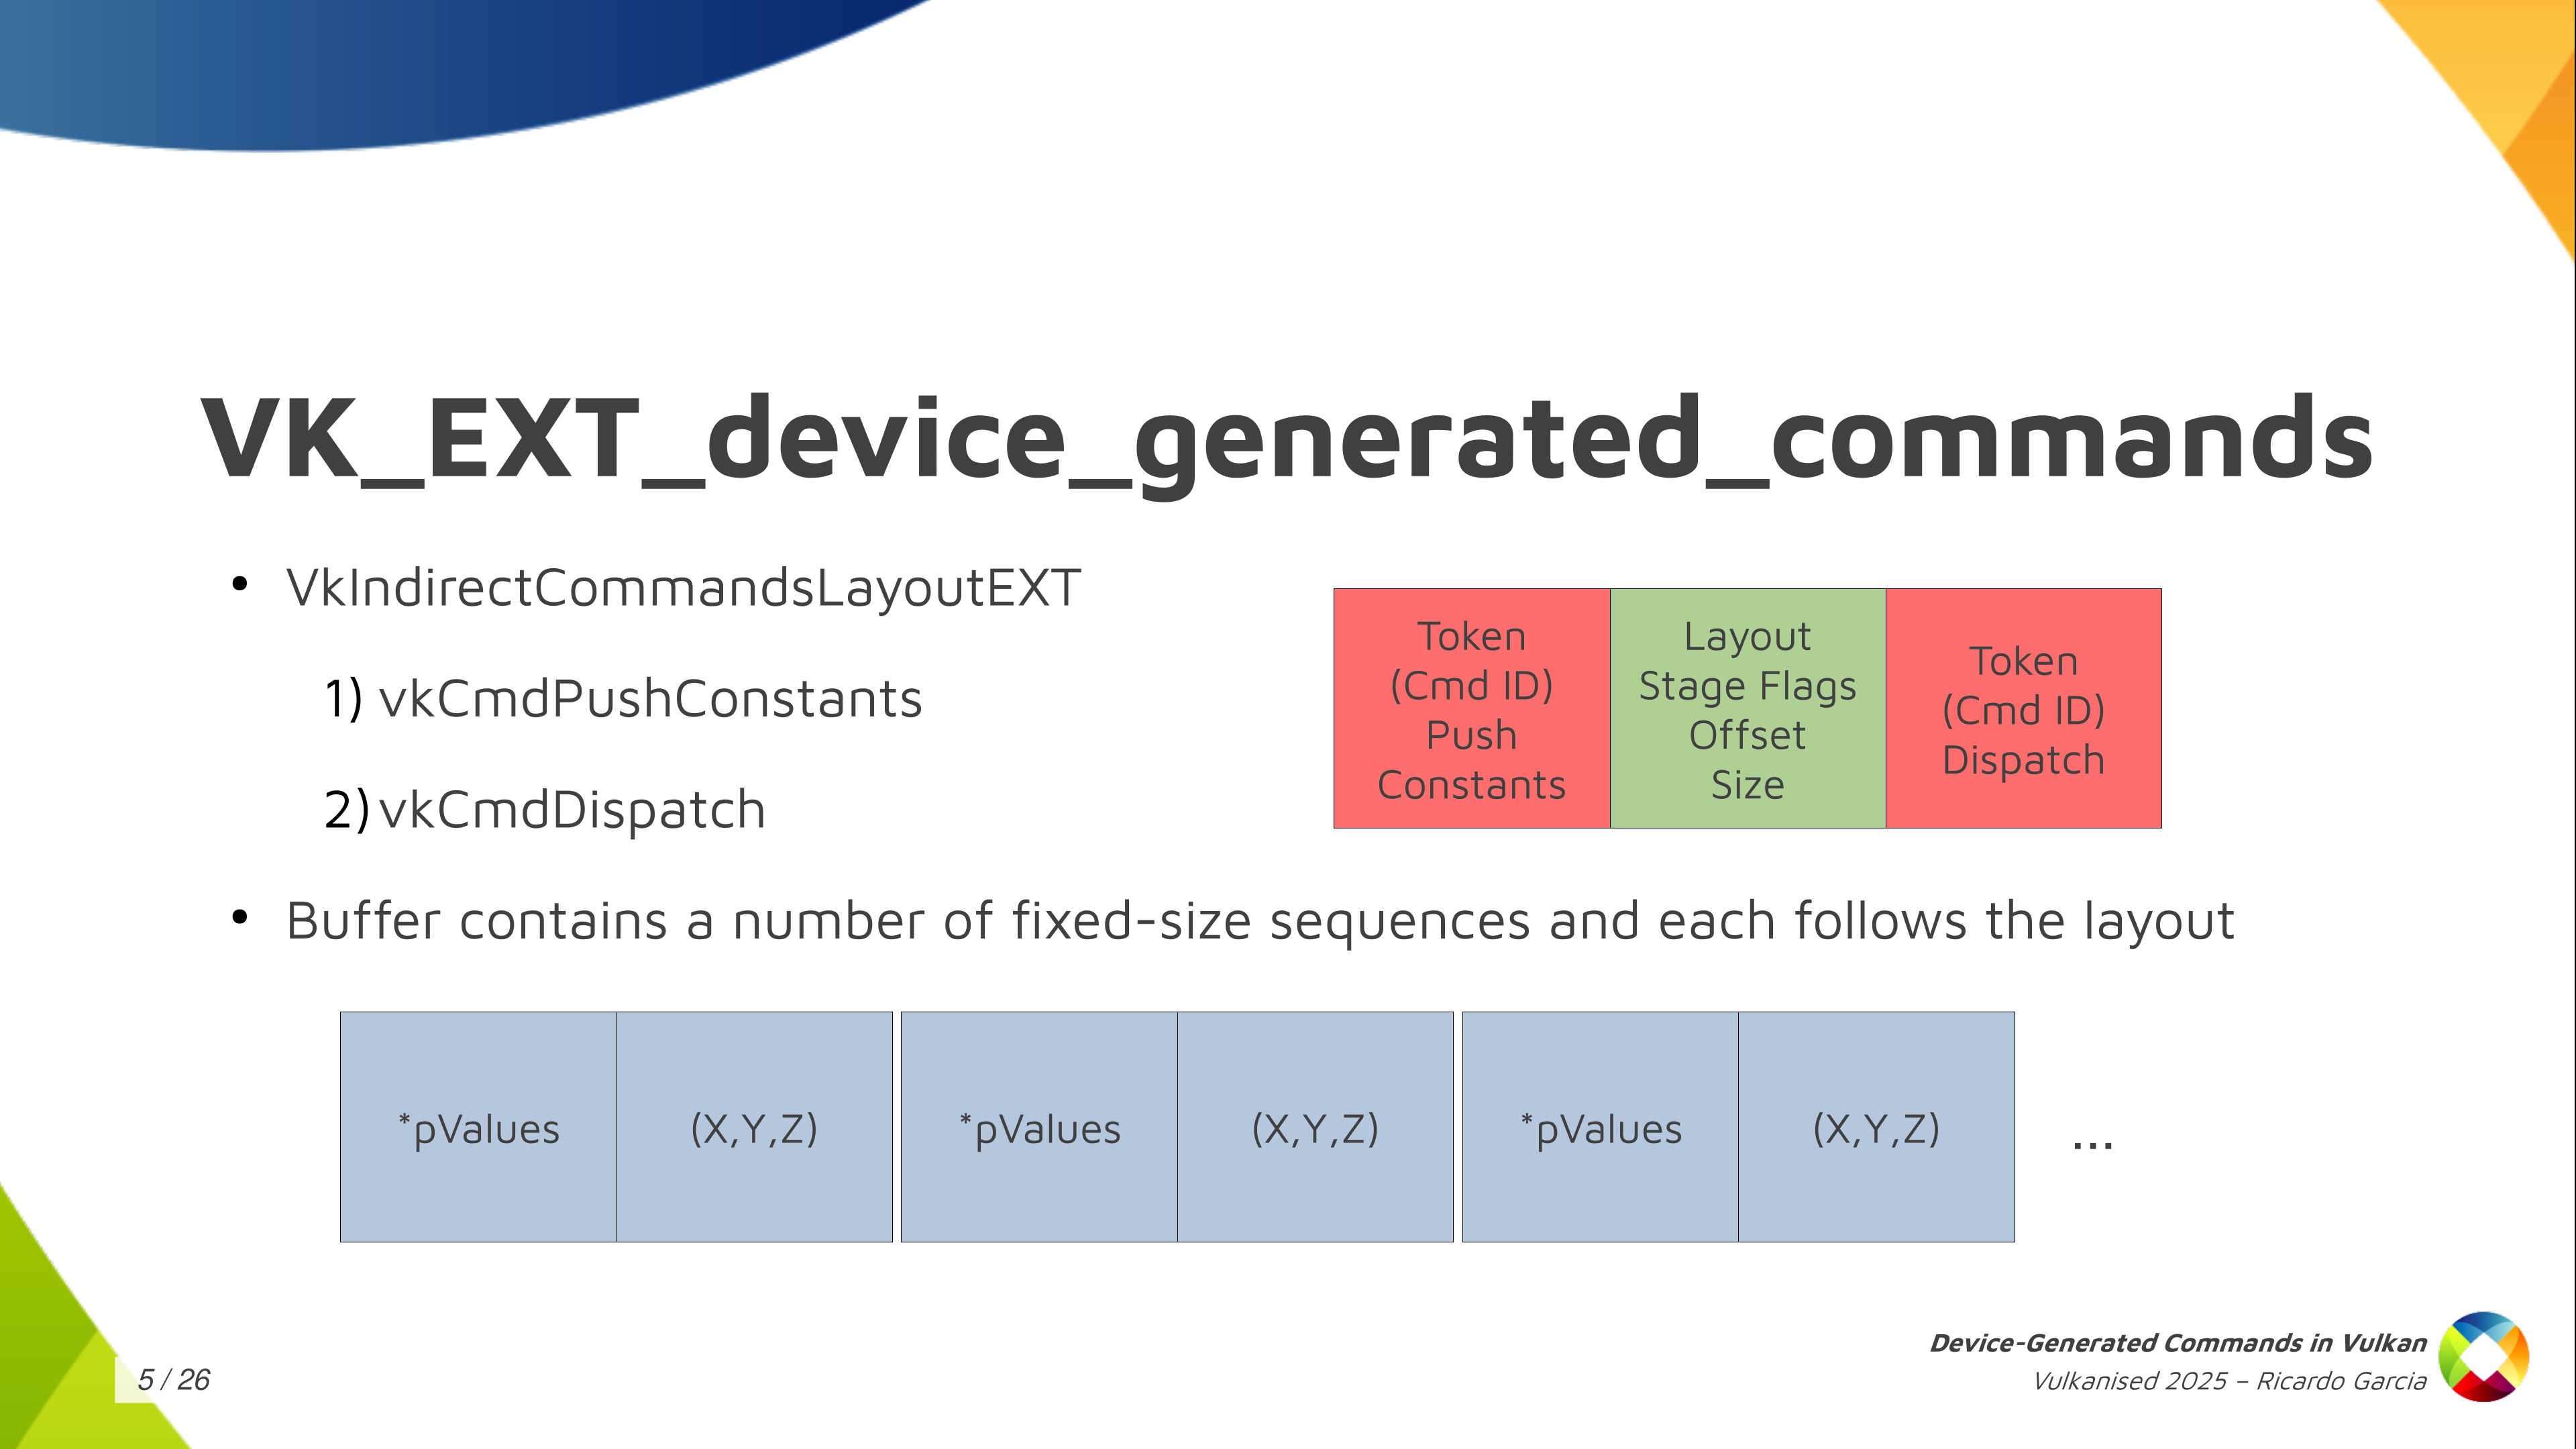
So what do we do in Vulkan? In Vulkan, and in the Vulkan VK_EXT_device_generated_commands extension, we have this central concept, which is called the Indirect Commands Layout. This is the main thing, and if you want to remember just one thing about device generated commands, you can remember this one.
The indirect commands layout is basically like a template for a short sequence of commands. The way you build this template is using the tokens and the command information that we saw colored red and green in the previous slide, and you build that in advance and pass that in advance so that, in the end, in the command buffer itself, in the buffer that you’re filling with commands, you don’t need to store that information. You just store the data for each command. That’s how you make it work.
And the result of this is that with the commands layout, that I said is a template for a short sequence of commands (and by short I mean a handful of them like just three, four or five commands, maybe 10), the DGC buffer can be pretty large, but it does not contain a random sequence of commands where you don’t know what comes next. You can think about it as divided into small chunks that the specification calls sequences, and you get a large number of sequences stored in the buffer but all of them follow this template, this commands layout. In the example we had, push constant followed by dispatch, the contents of the buffer would be push constant values, dispatch size, push content values, dispatch size, many times repeated.
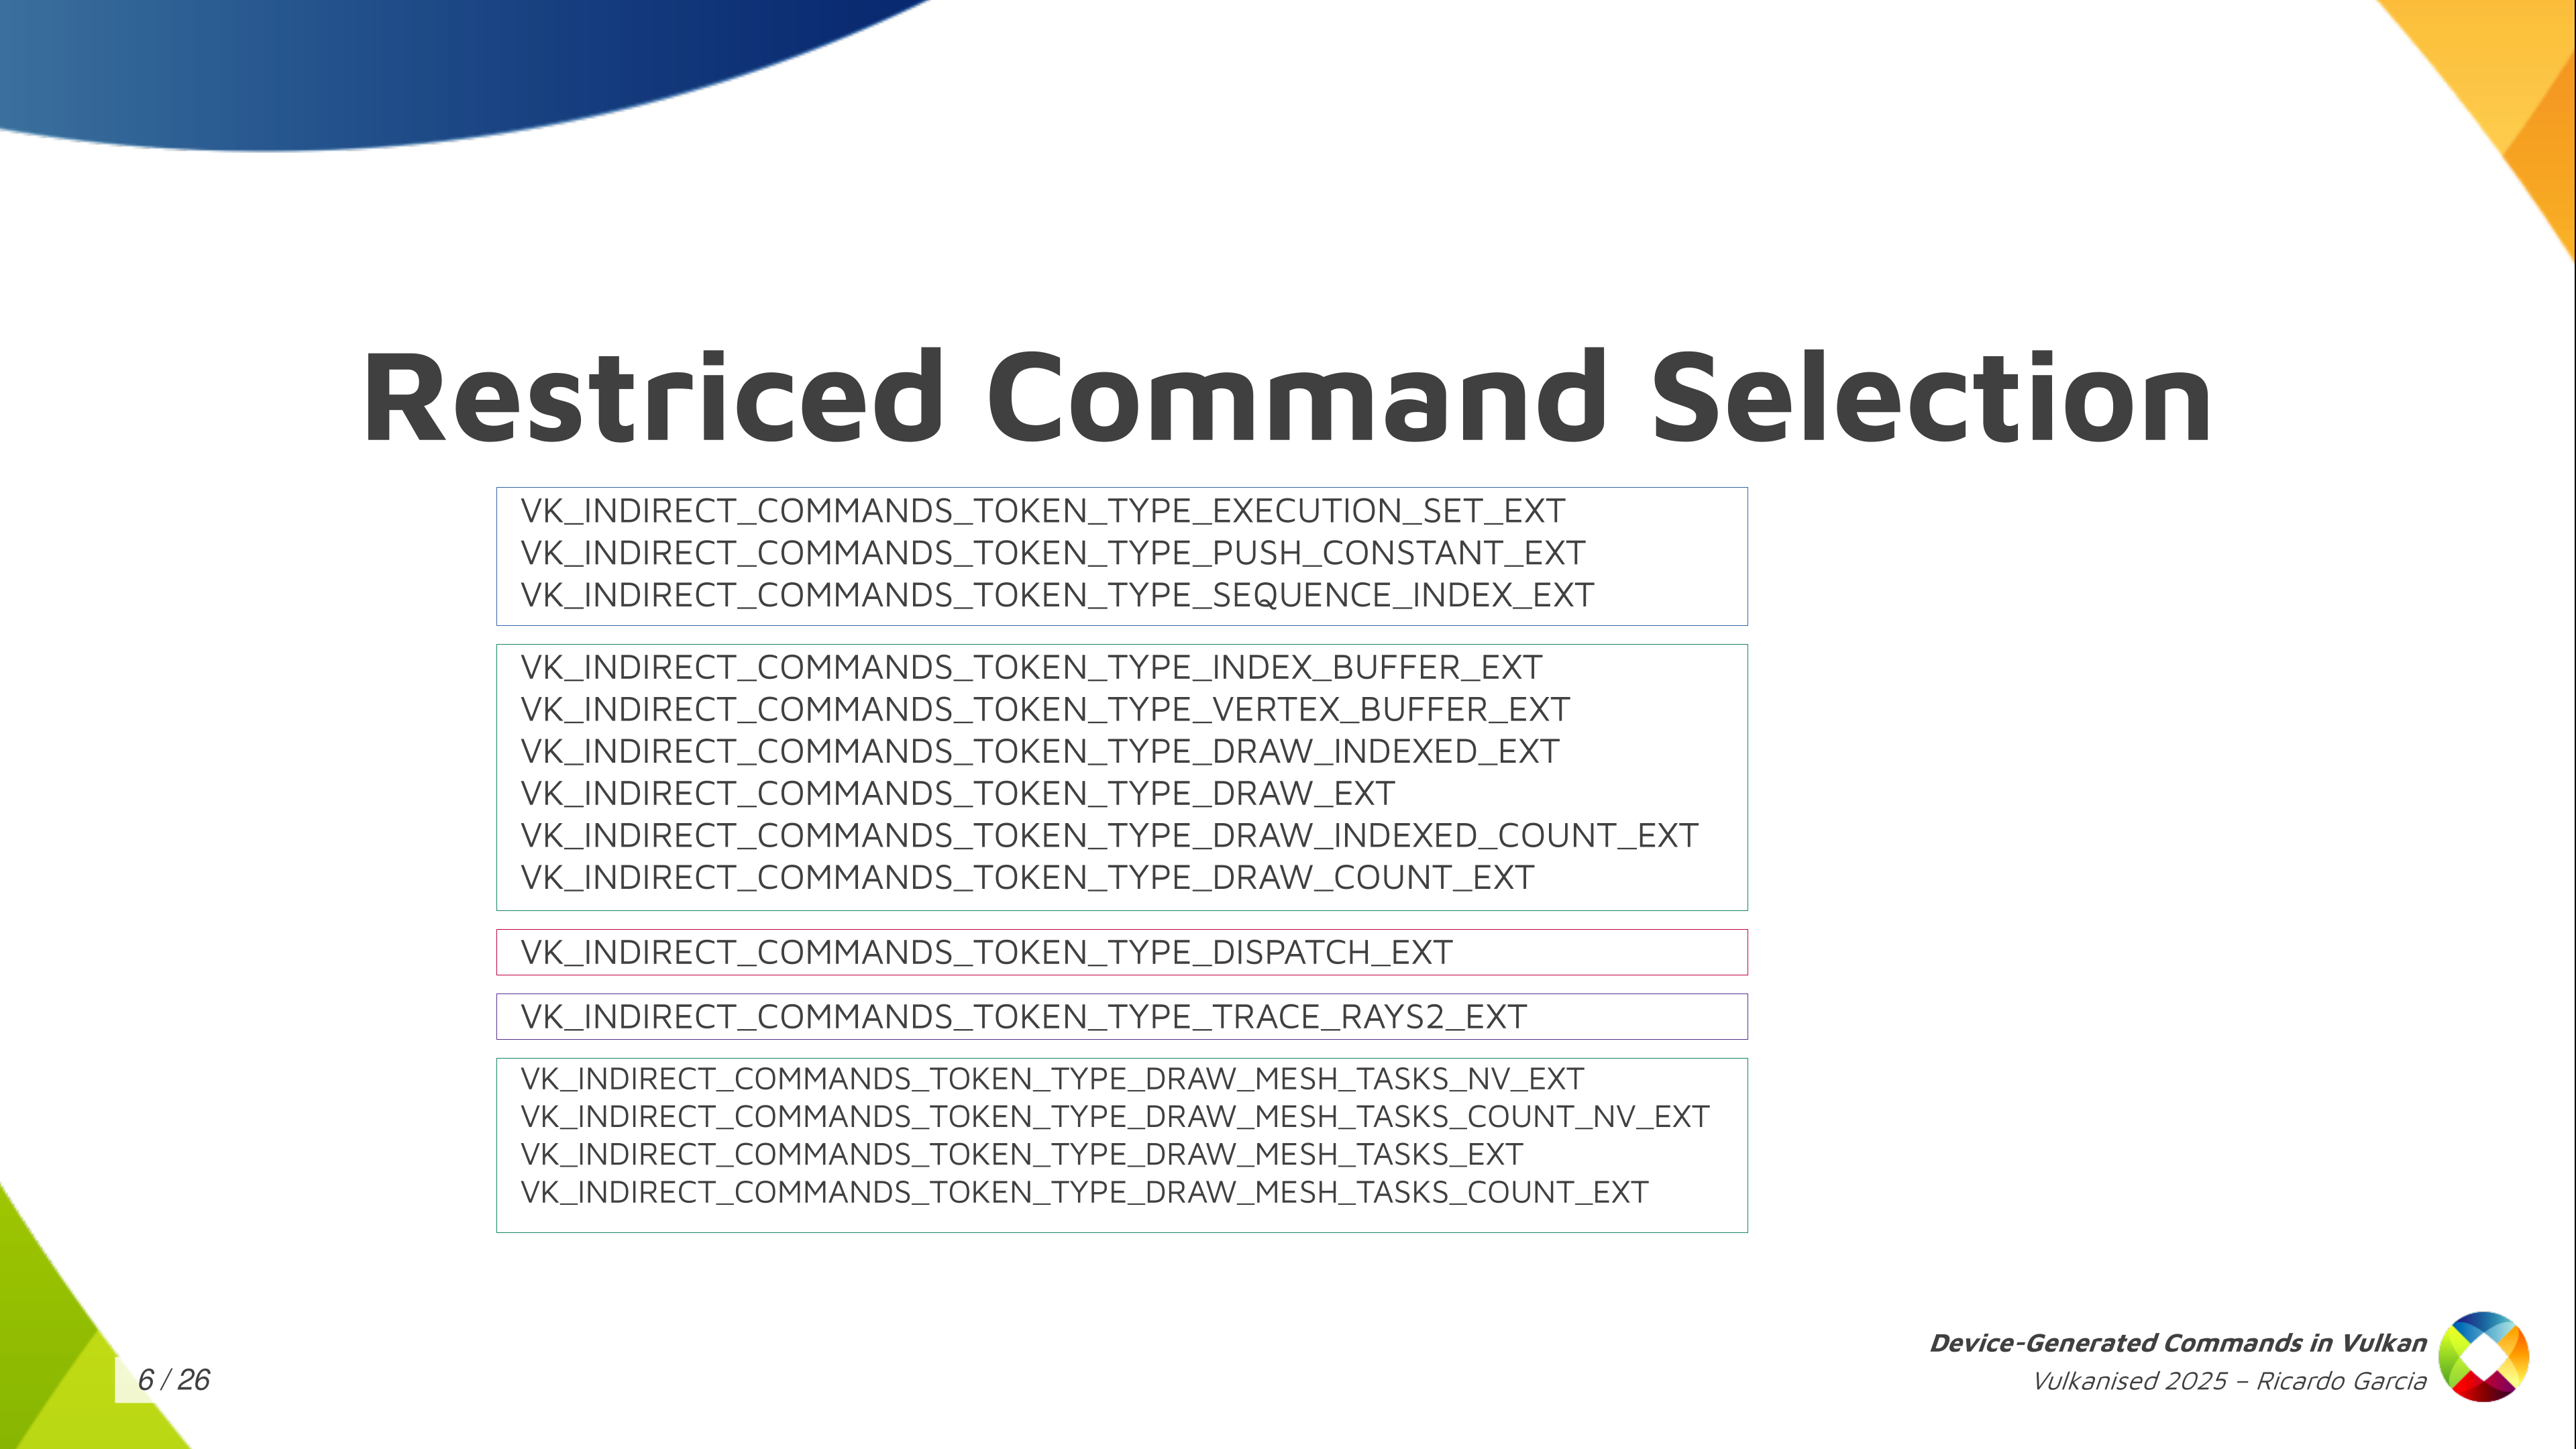
The second thing that Vulkan does to be able to make this work is that we limit a lot what you can do with device-generated commands. There are a lot of things you cannot do. In fact, the only things you can do are the ones that are present in this slide.
You have some things like, for example, update push constants, you can bind index buffers, vertex buffers, and you can draw in different ways, using mesh shading maybe, you can dispatch compute work and you can dispatch raytracing work, and that’s it. You also need to check which features the driver supports, because maybe the driver only supports device-generated commands for compute or ray tracing or graphics. But you notice you cannot do things like start render passes or insert barriers or bind descriptor sets or that kind of thing. No, you cannot do that. You can only do these things.
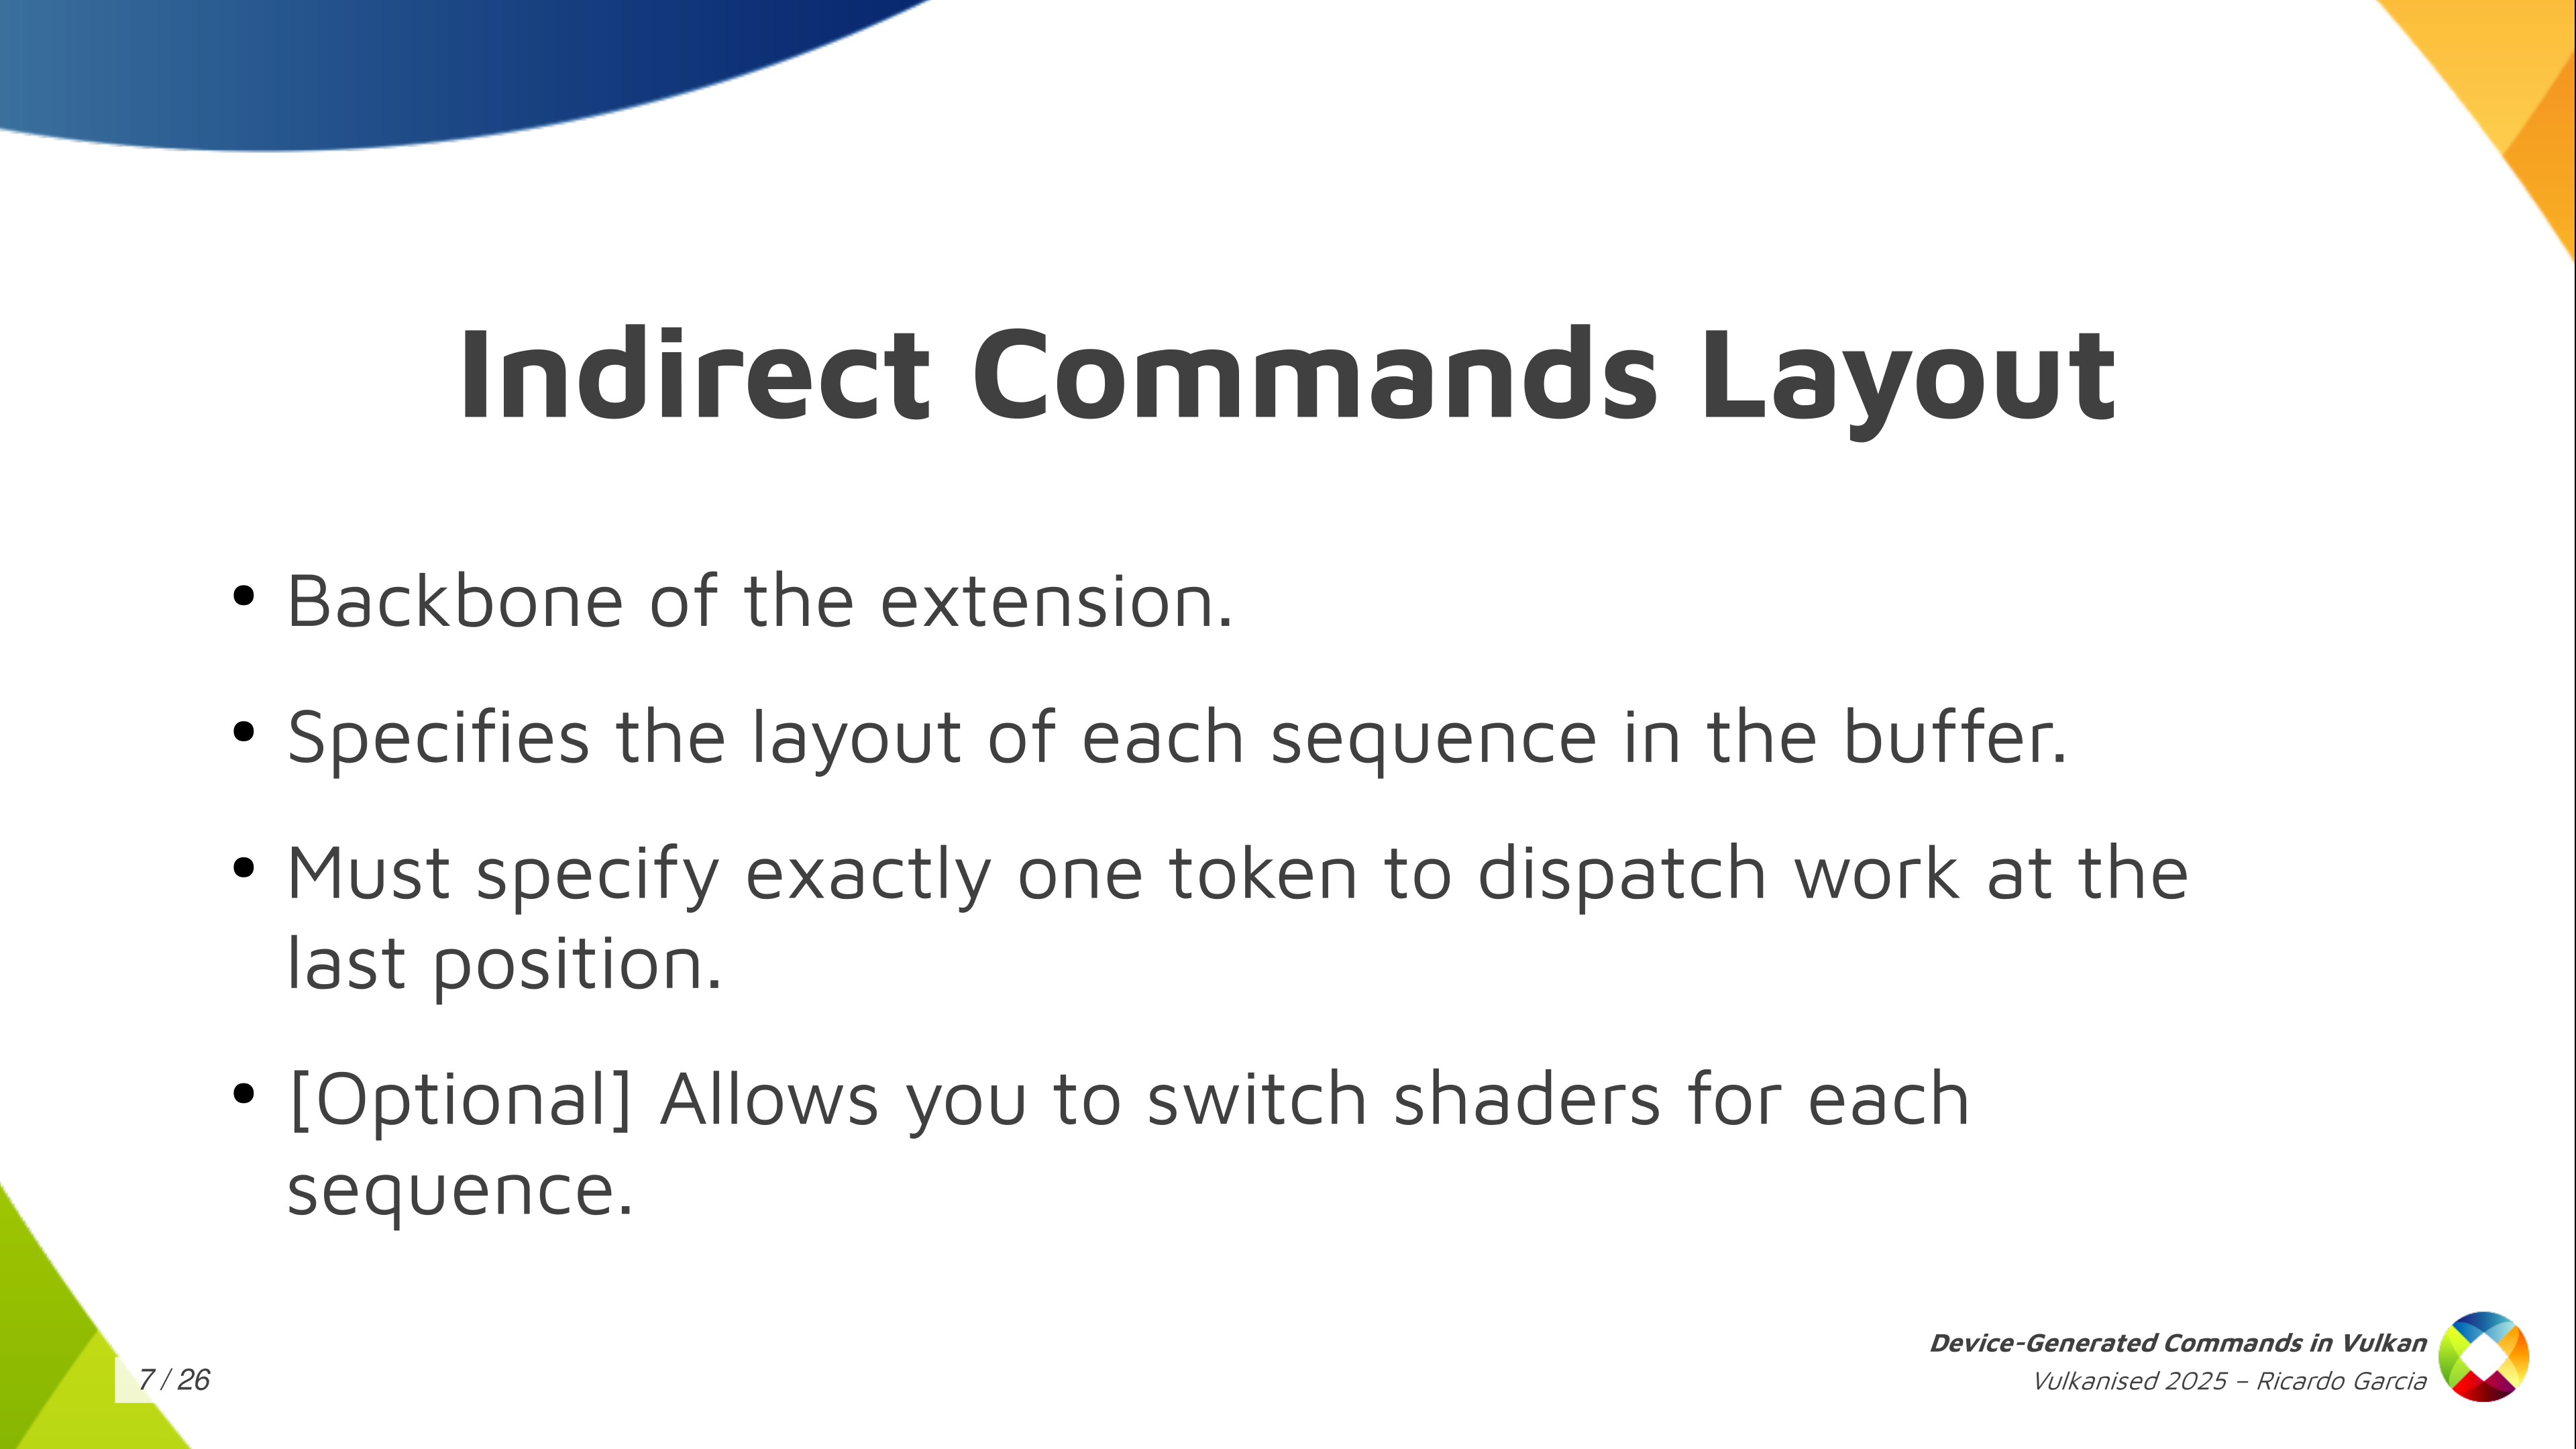
This indirect commands layout, which is the backbone of the extension, specifies, as I said, the layout for each sequence in the buffer and it has additional restrictions. The first one is that it must specify exactly one token that dispatches some kind of work and it must be the last token in the sequence. You cannot have a sequence that dispatches graphics work twice, or that dispatches computer work twice, or that dispatches compute first and then draws, or something like that. No, you can only do one thing with each DGC buffer and each commands layout and it has to be the last one in the sequence.
And one interesting thing that also Vulkan allows you to do, that DX12 doesn’t let you do, is that it allows you (on some drivers, you need to check the properties for this) to choose which shaders you want to use for each sequence. This is a restricted version of the bind pipeline command in Vulkan. You cannot choose arbitrary pipelines and you cannot change arbitrary states but you can switch shaders. For example, if you want to use a different fragment shader for each of the draws in the sequence, you can do that. This is pretty powerful.
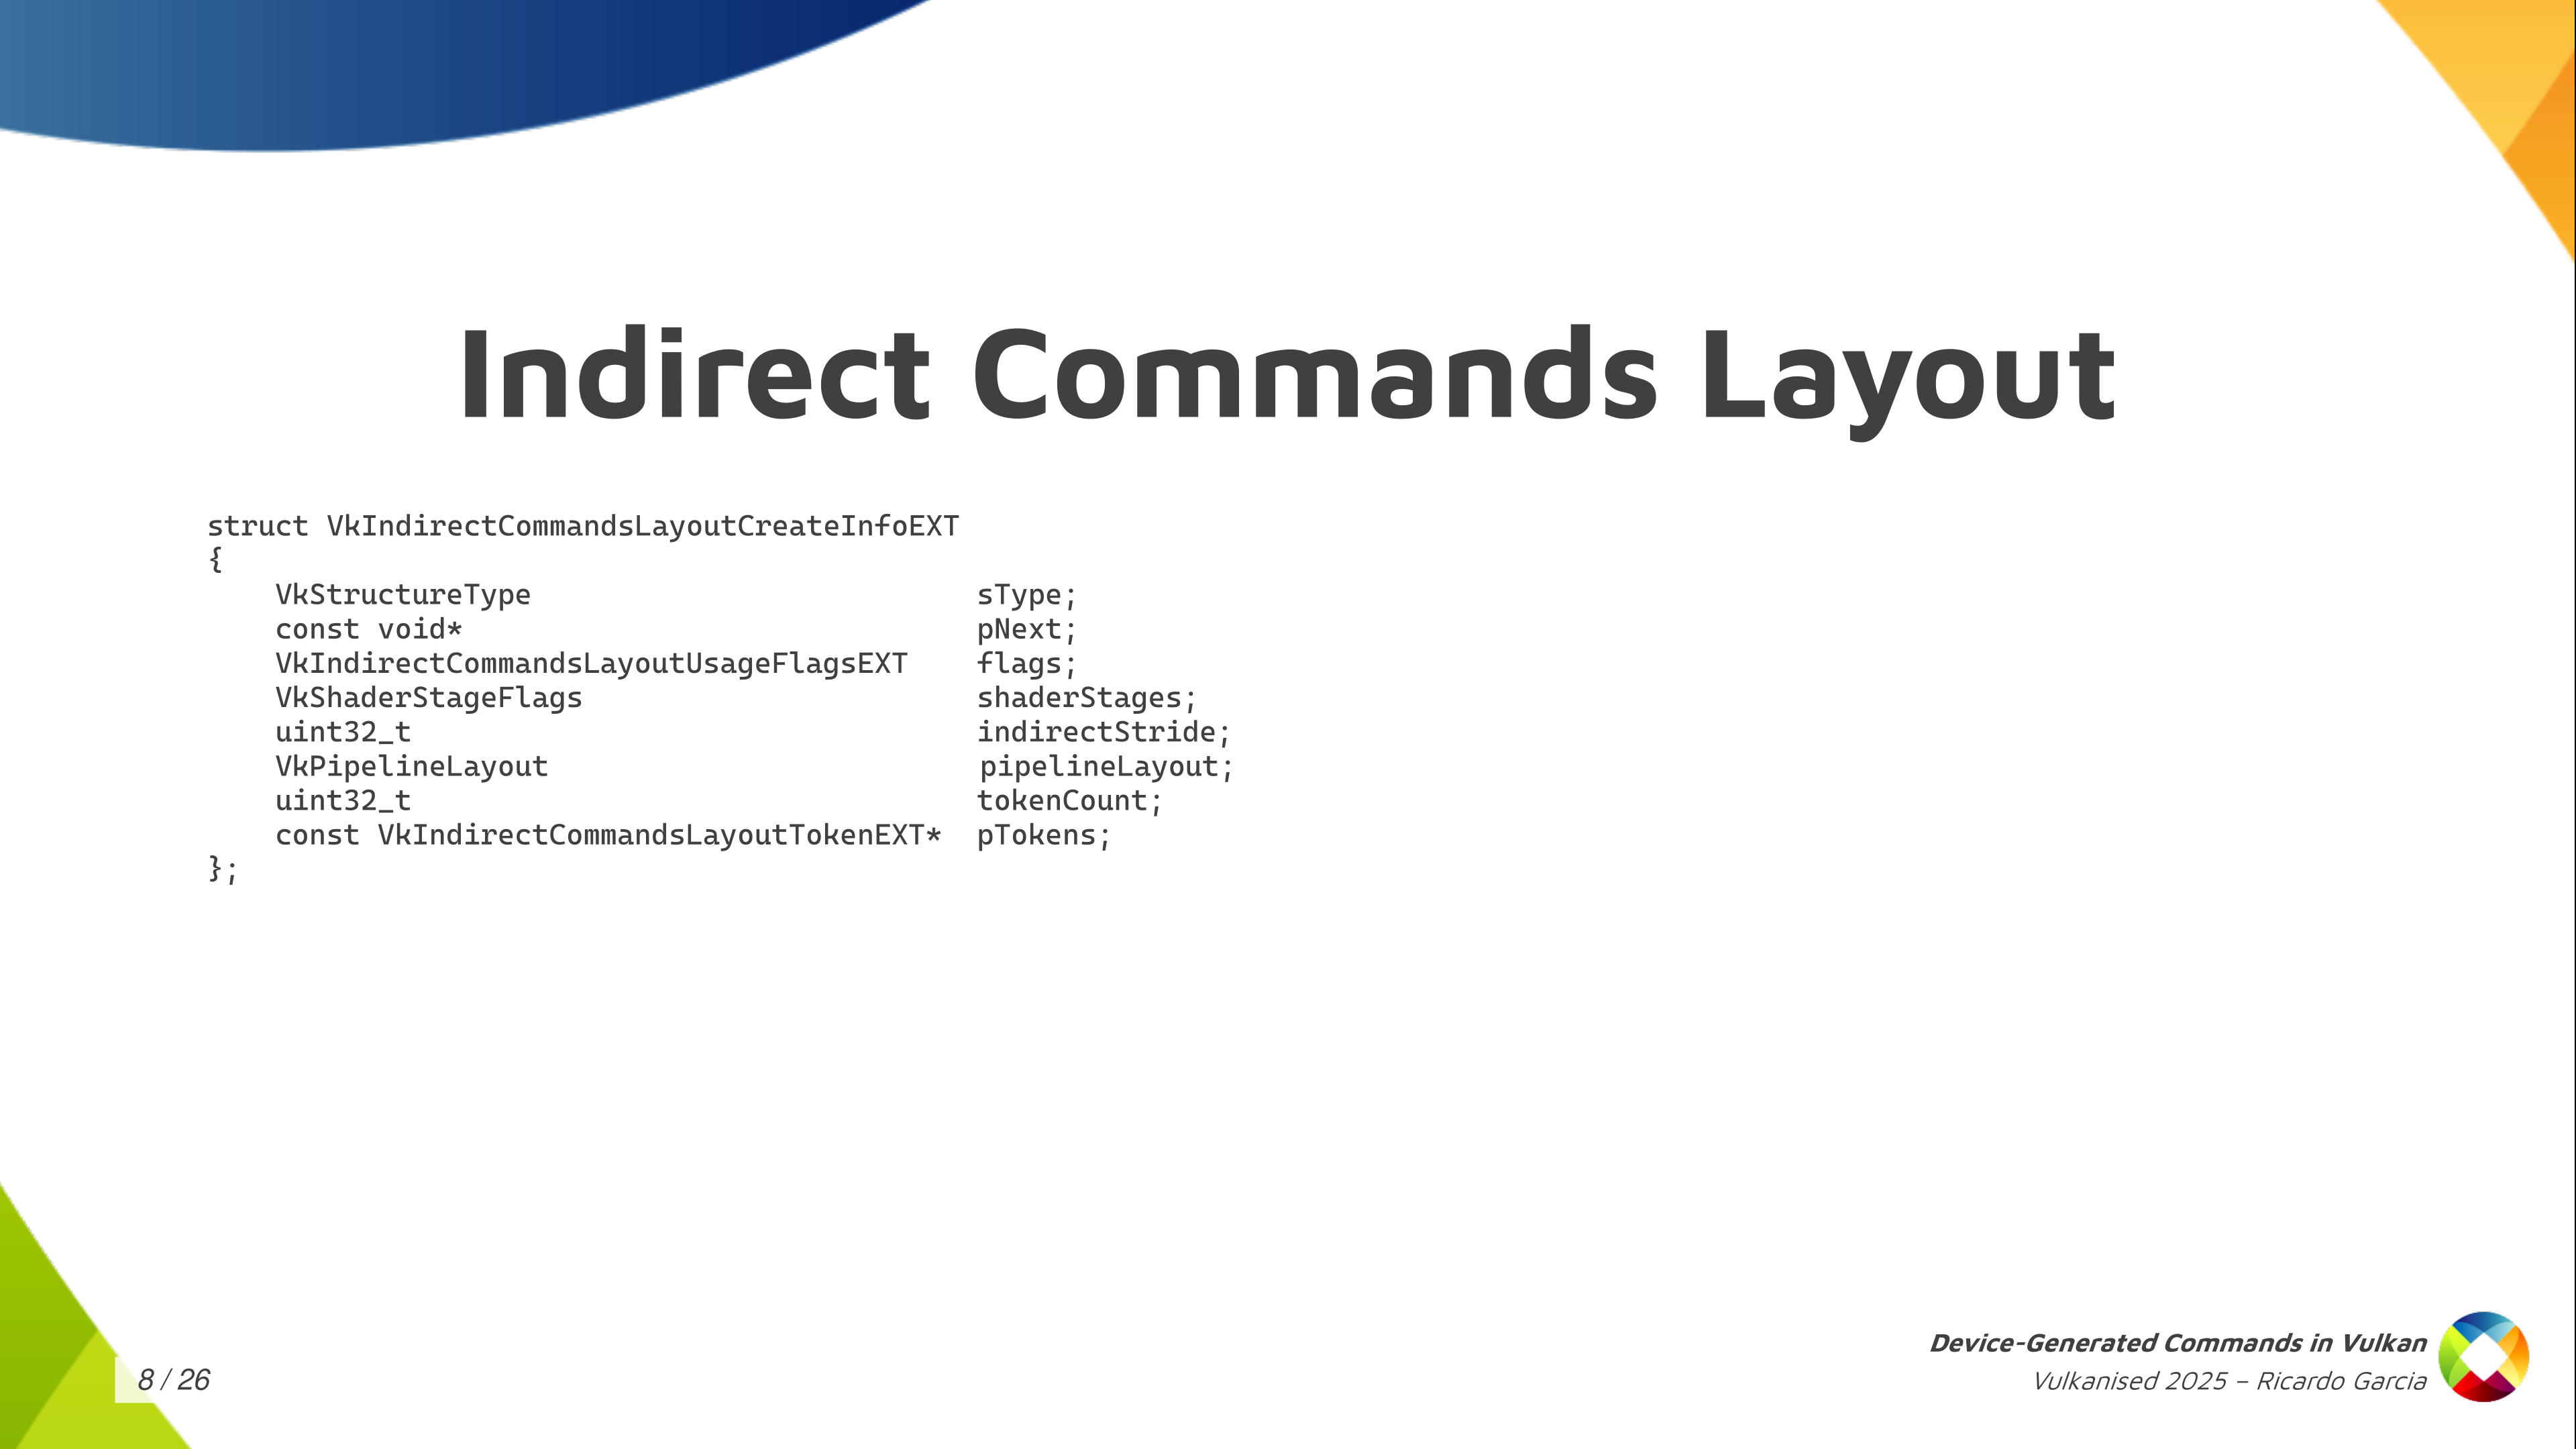
How do you create one of those indirect commands layout? Well, with one of those typical Vulkan calls, to create an object that you pass these CreateInfo structures that are always present in Vulkan.
And, as you can see, you have to pass these shader stages that will be used, will be active, while you draw or you execute those indirect commands. You have to pass the pipeline layout, and you have to pass in an indirect stride. The stride is the amount of bytes for each sequence, from the start of a sequence to the next one. And the most important information of course, is the list of tokens: an array of tokens that you pass as the token count and then the pointer to the first element.
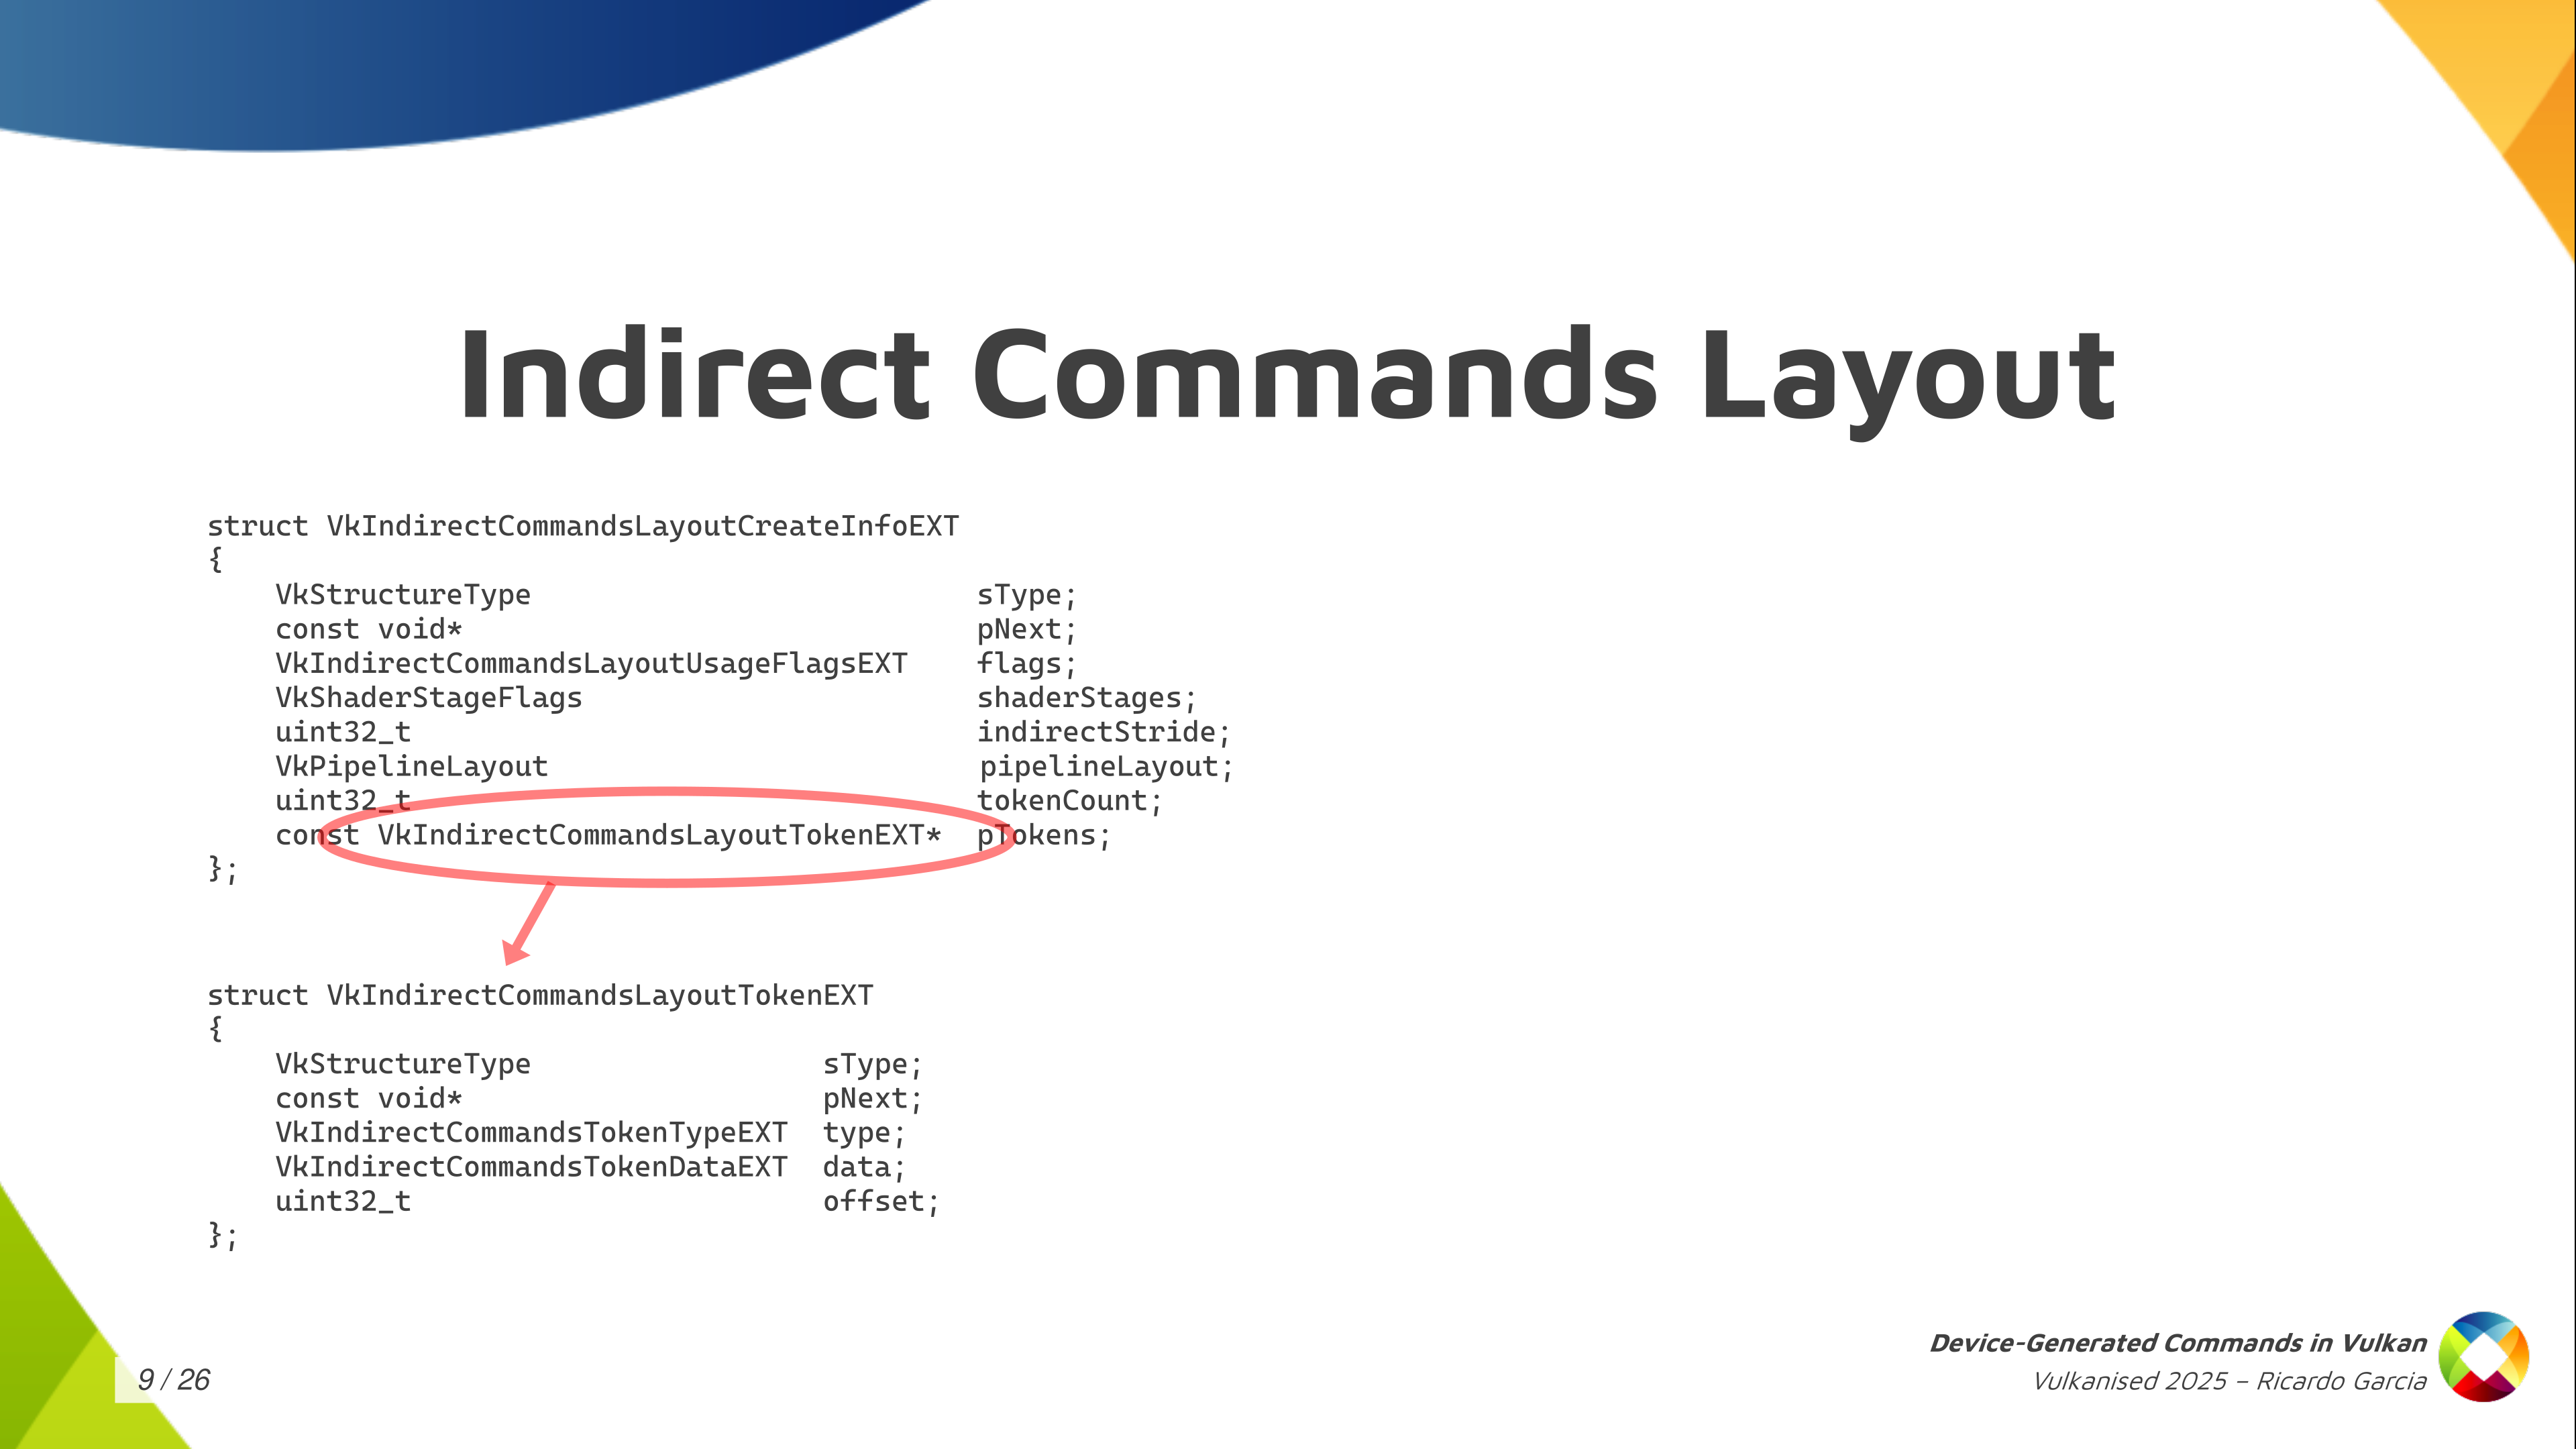
Now, each of those tokens contains a bit of information and the most important one is the type, of course. Then you can also pass an offset that tells you how many bytes into the sequence for the start of the data for that command. Together with the stride, it tells us that you don’t need to pack the data for those commands together. If you want to include some padding, because it’s convenient or something, you can do that.

And then there’s also the token data which allows you to pass the information that I was painting in green in other slides like information to be able to run the command with some extra parameters. Only a few tokens, a few commands, need that. Depending on the command it is, you have to fill one of the pointers in the union but for most commands they don’t need this kind of information. Knowing which command it is you just know you are going to find some fixed data in the buffer and you just read that and process that.
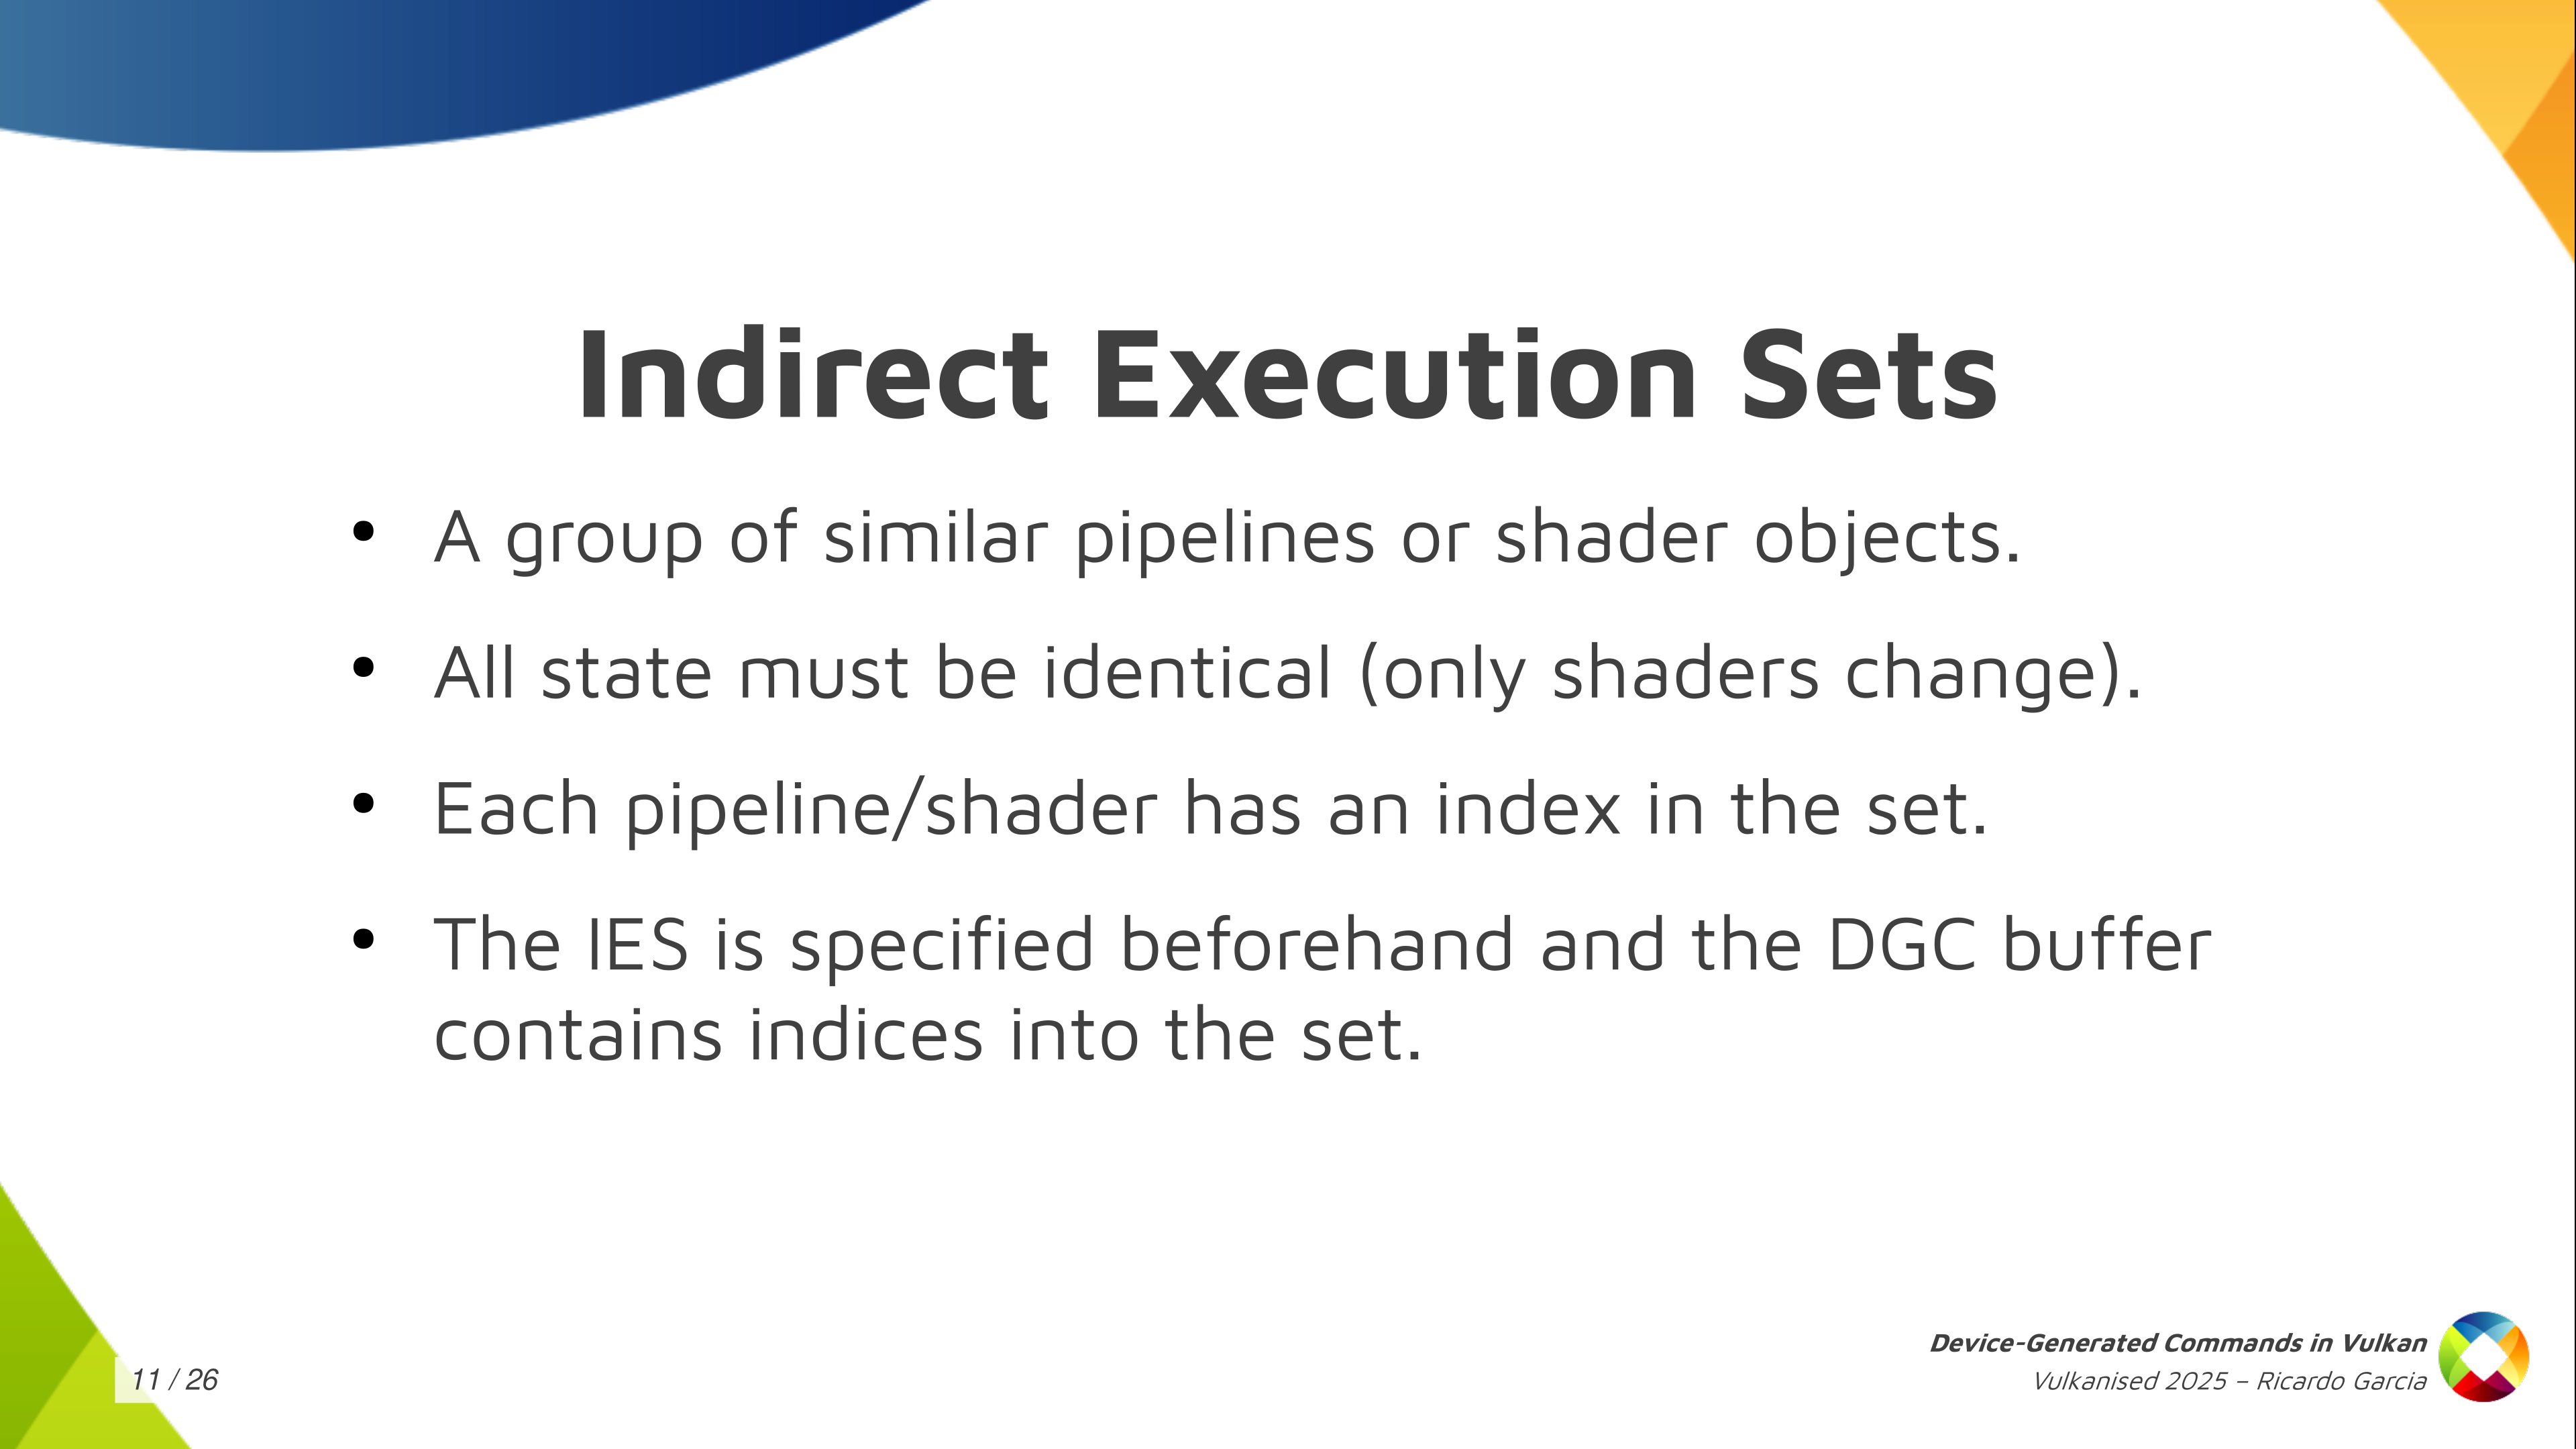
One thing that is interesting, like I said, is the ability to switch shaders and to choose which shaders are going to be used for each of those individual sequences. Some form of pipeline switching, or restricted pipeline switching. To do that you have to create something that is called Indirect Execution Sets.
Each of these execution sets is like a group or an array, if you want to think about it like that, of pipelines: similar pipelines or shader objects. They have to share something in common, which is that all of the state in the pipeline has to be identical, basically. Only the shaders can change.
When you create these execution sets and you start adding pipelines or shaders to them, you assign an index to each pipeline in the set. Then, you pass this execution set beforehand, before executing the commands, so that the driver knows which set of pipelines you are going to use. And then, in the DGC buffer, when you have this pipeline token, you only have to store the index of the pipeline that you want to use. You create the execution set with 20 pipelines and you pass an index for the pipeline that you want to use for each draw, for each dispatch, or whatever.
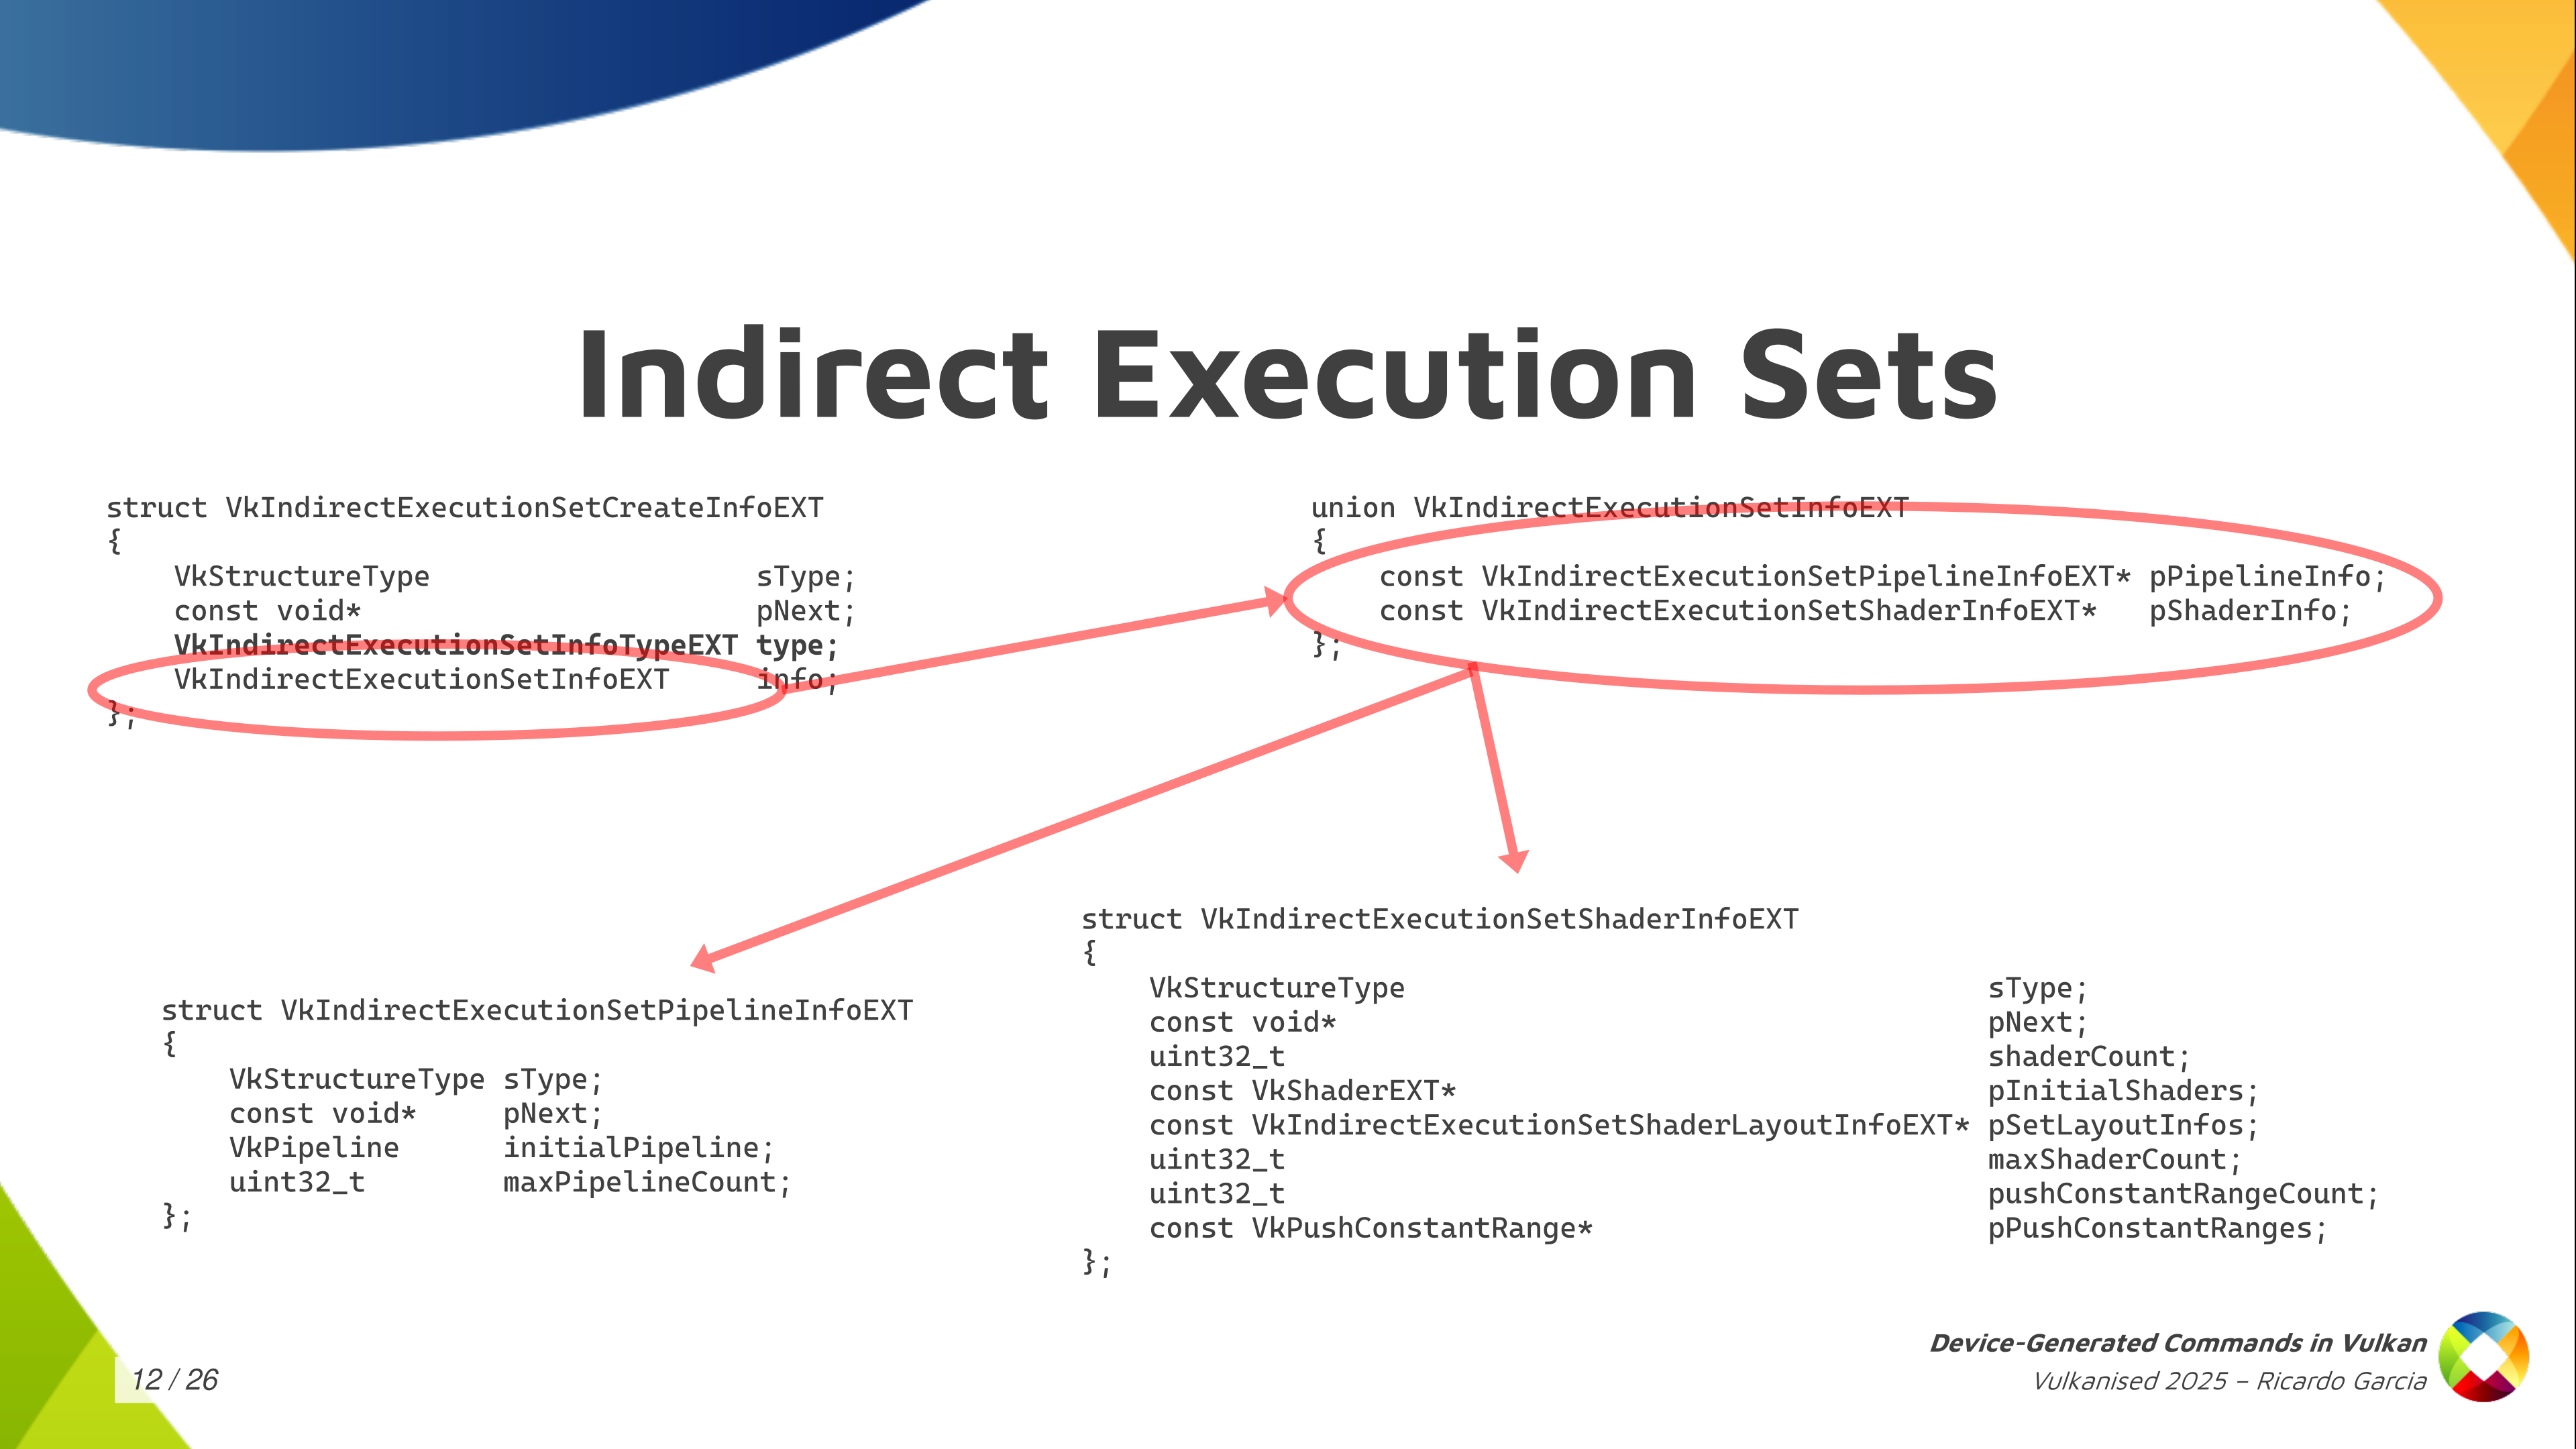
The way to create the execution sets is the one you see here, where we have, again, one of those CreateInfo structures. There, we have to indicate the type, which is pipelines or shader objects. Depending on that, you have to fill one of the pointers from the union on the top right here.
If we focus on pipelines because it’s easier on the bottom left, you have to pass the maximum pipeline count that you’re going to store in the set and an initial pipeline. The initial pipeline is what is going to set the template that all pipelines in the set are going to conform to. They all have to share essentially the same state as the initial pipeline and then you can change the shaders. With shader objects, it’s basically the same, but you have to pass more information for the shader objects, like the descriptor set layouts used by each stage, push-constant information… but it’s essentially the same.
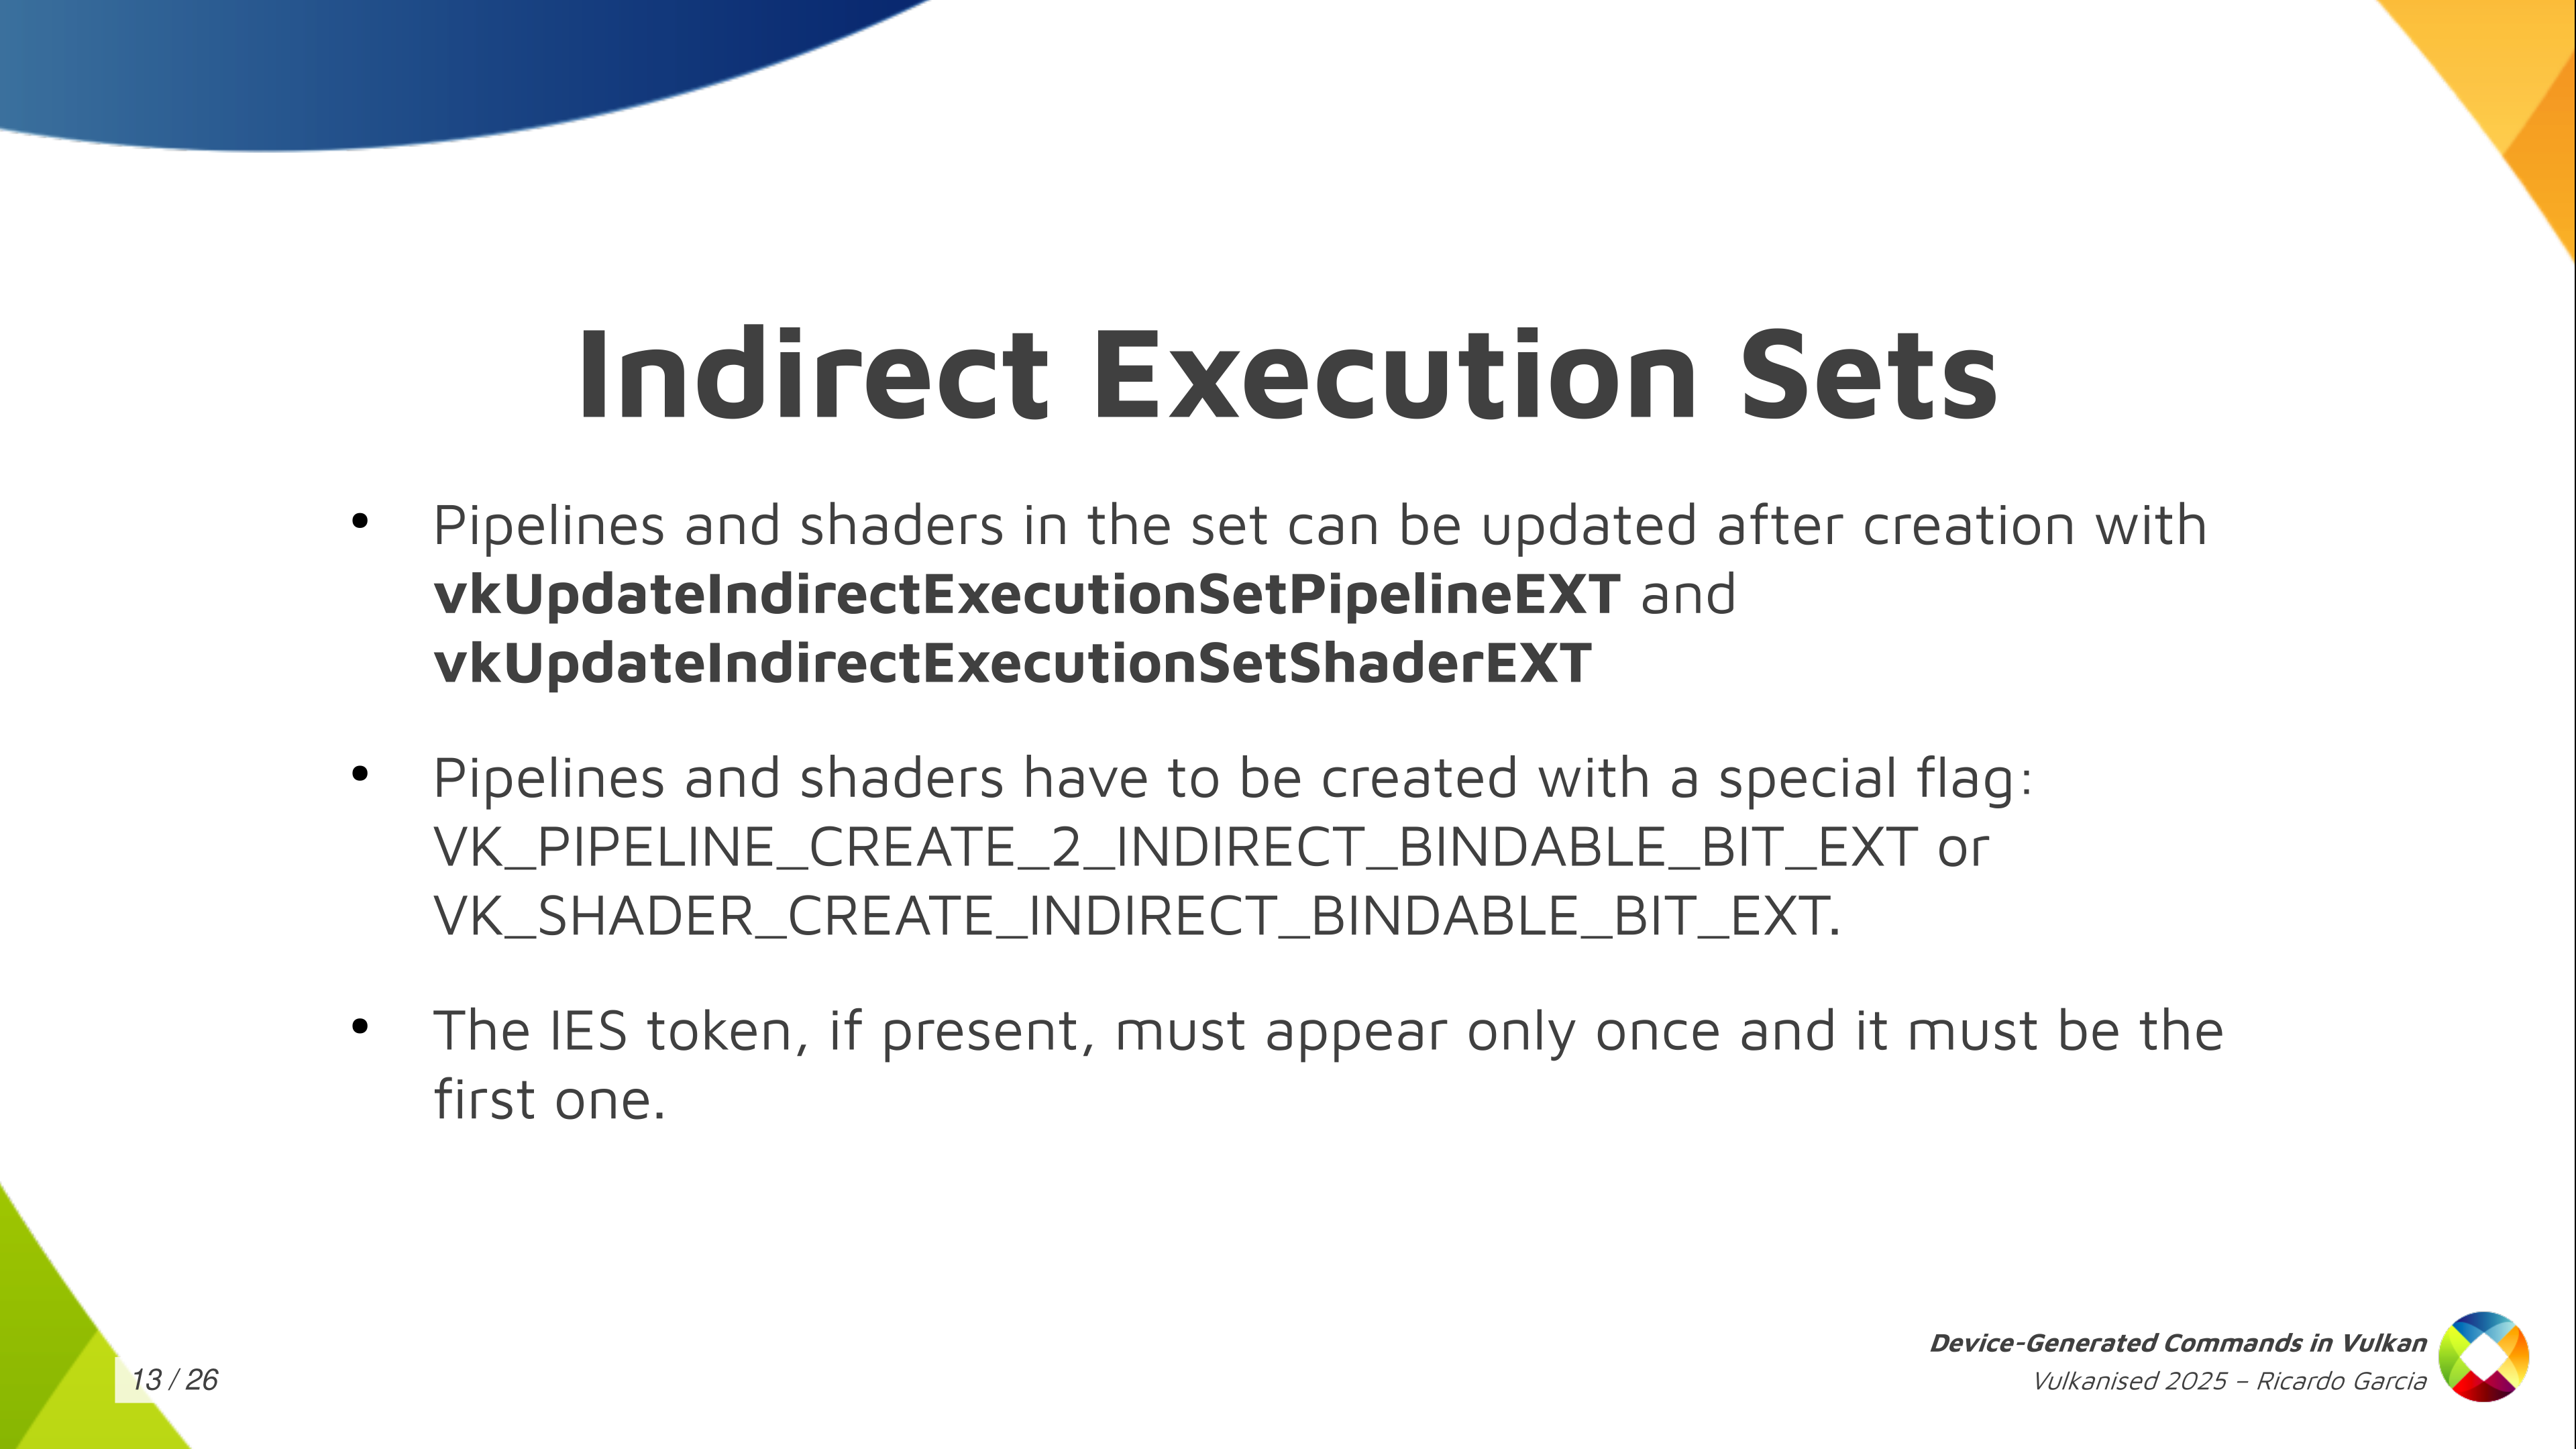
Once you have that execution set created, you can use those two functions (vkUpdateIndirectExecutionSetPipelineEXT and vkUpdateIndirectExecutionSetShaderEXT) to update and add pipelines to that execution set. You need to take into account that you have to pass a couple of special creation flags to the pipelines, or the shader objects, to tell the driver that you may use those inside an execution set because the driver may need to do something special for them. And one additional restriction that we have is that if you use an execution set token in your sequences, it must appear only once and it must be the first one in the sequence.
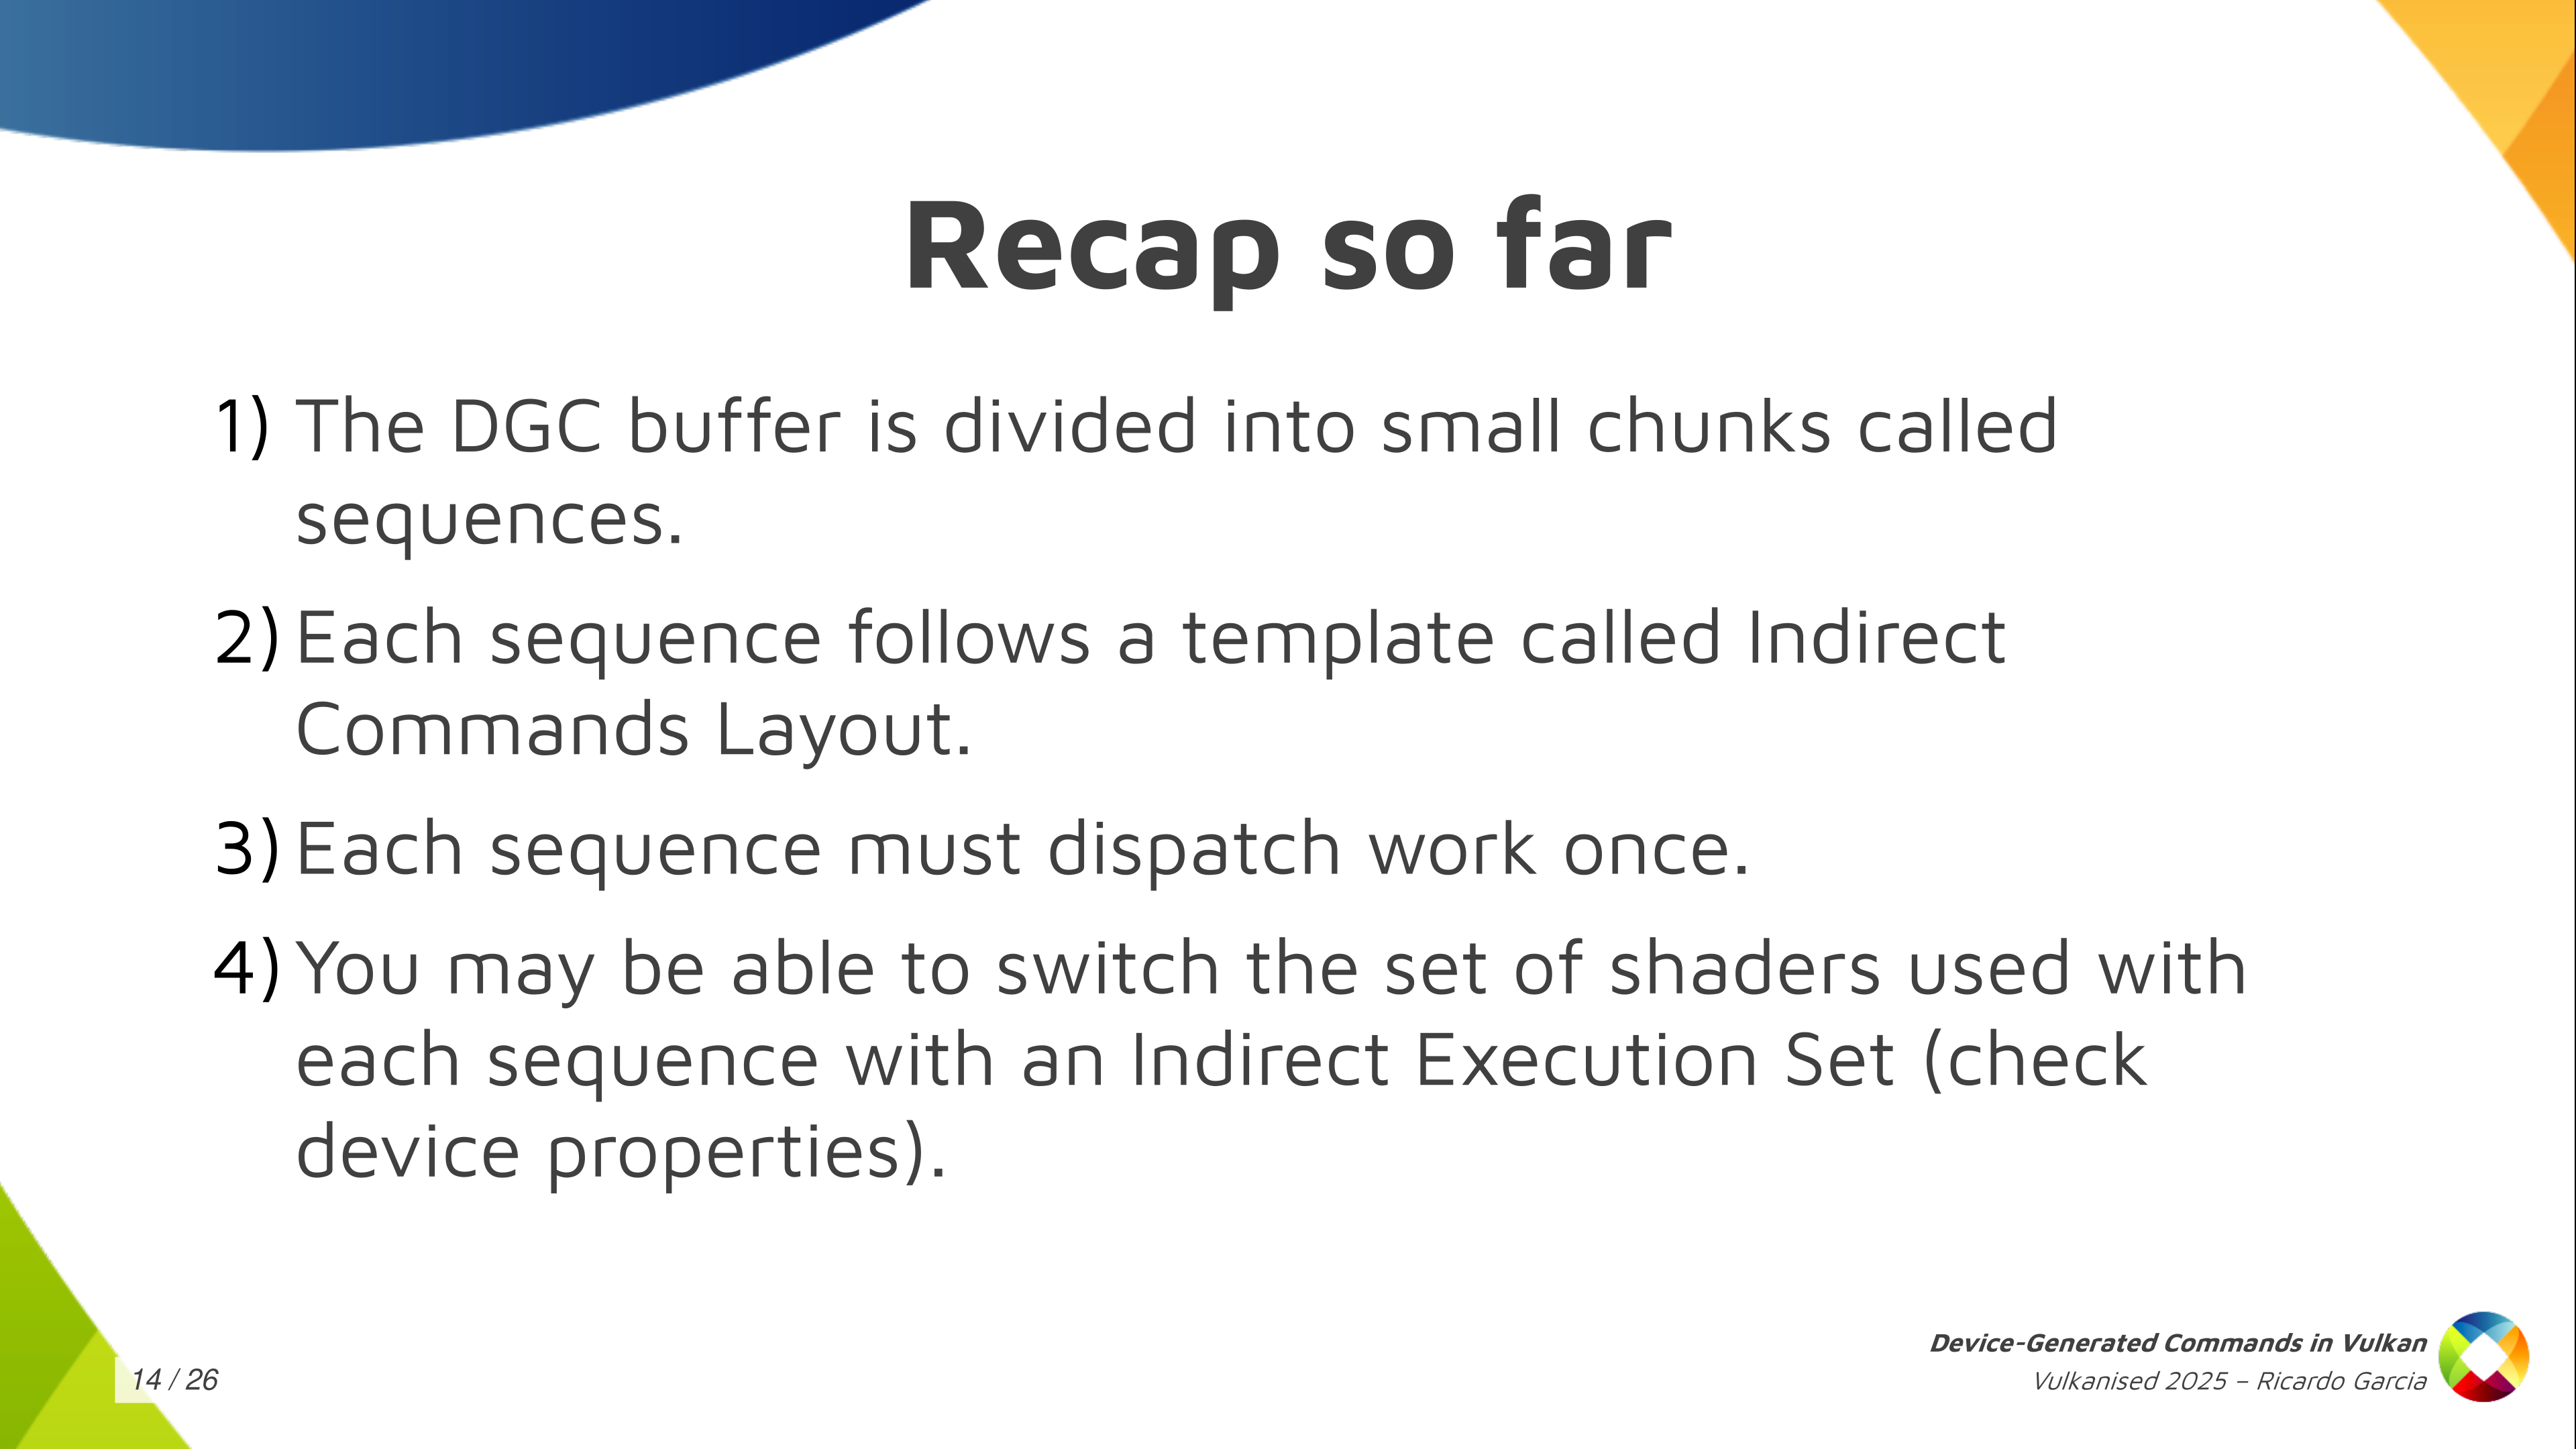
The recap, so far, is that the DGC buffer is divided into small chunks that we call sequences. Each sequence follows a template that we call the Indirect Commands Layout. Each sequence must dispatch work exactly once and you may be able to switch the set of shaders we used with with each sequence with an Indirect Execution Set.
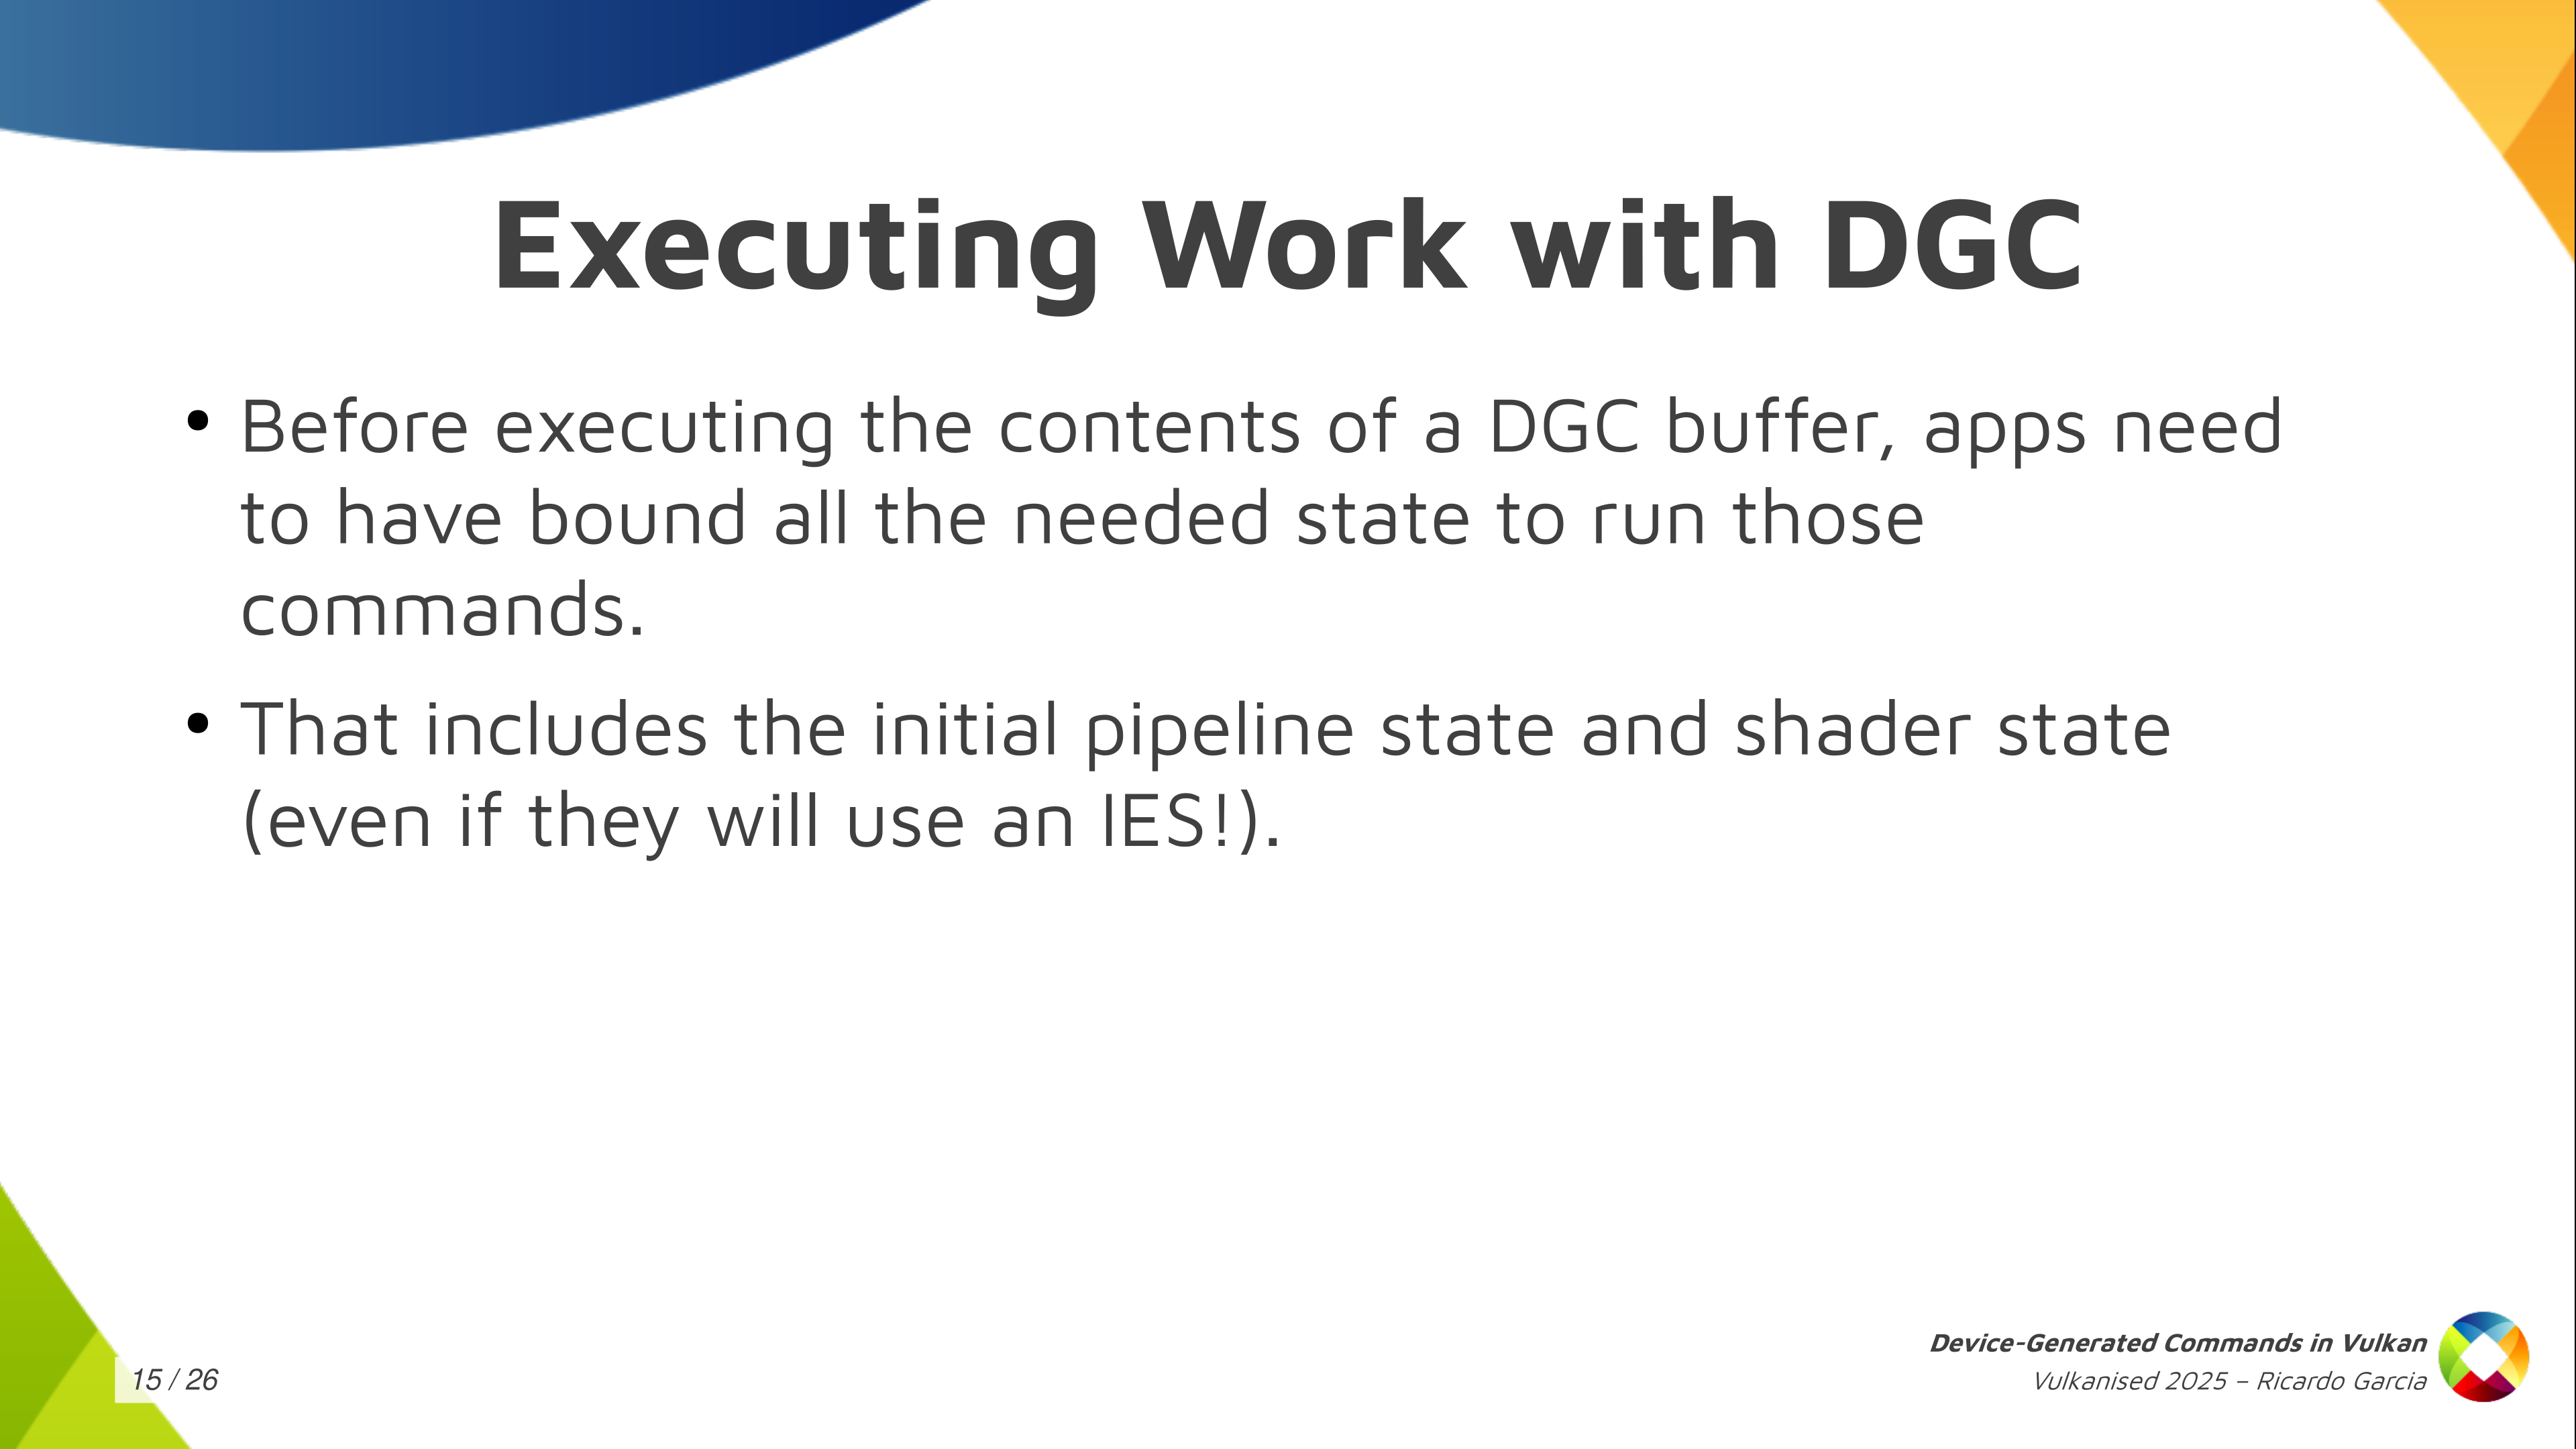
Wow do we go about actually telling Vulkan to execute the contents of a specific buffer? Well, before executing the contents of the DGC buffer the application needs to have bound all the needed states to run those commands. That includes descriptor sets, initial push constant values, initial shader state, initial pipeline state. Even if you are going to use an Execution Set to switch shaders later you have to specify some kind of initial shader state.
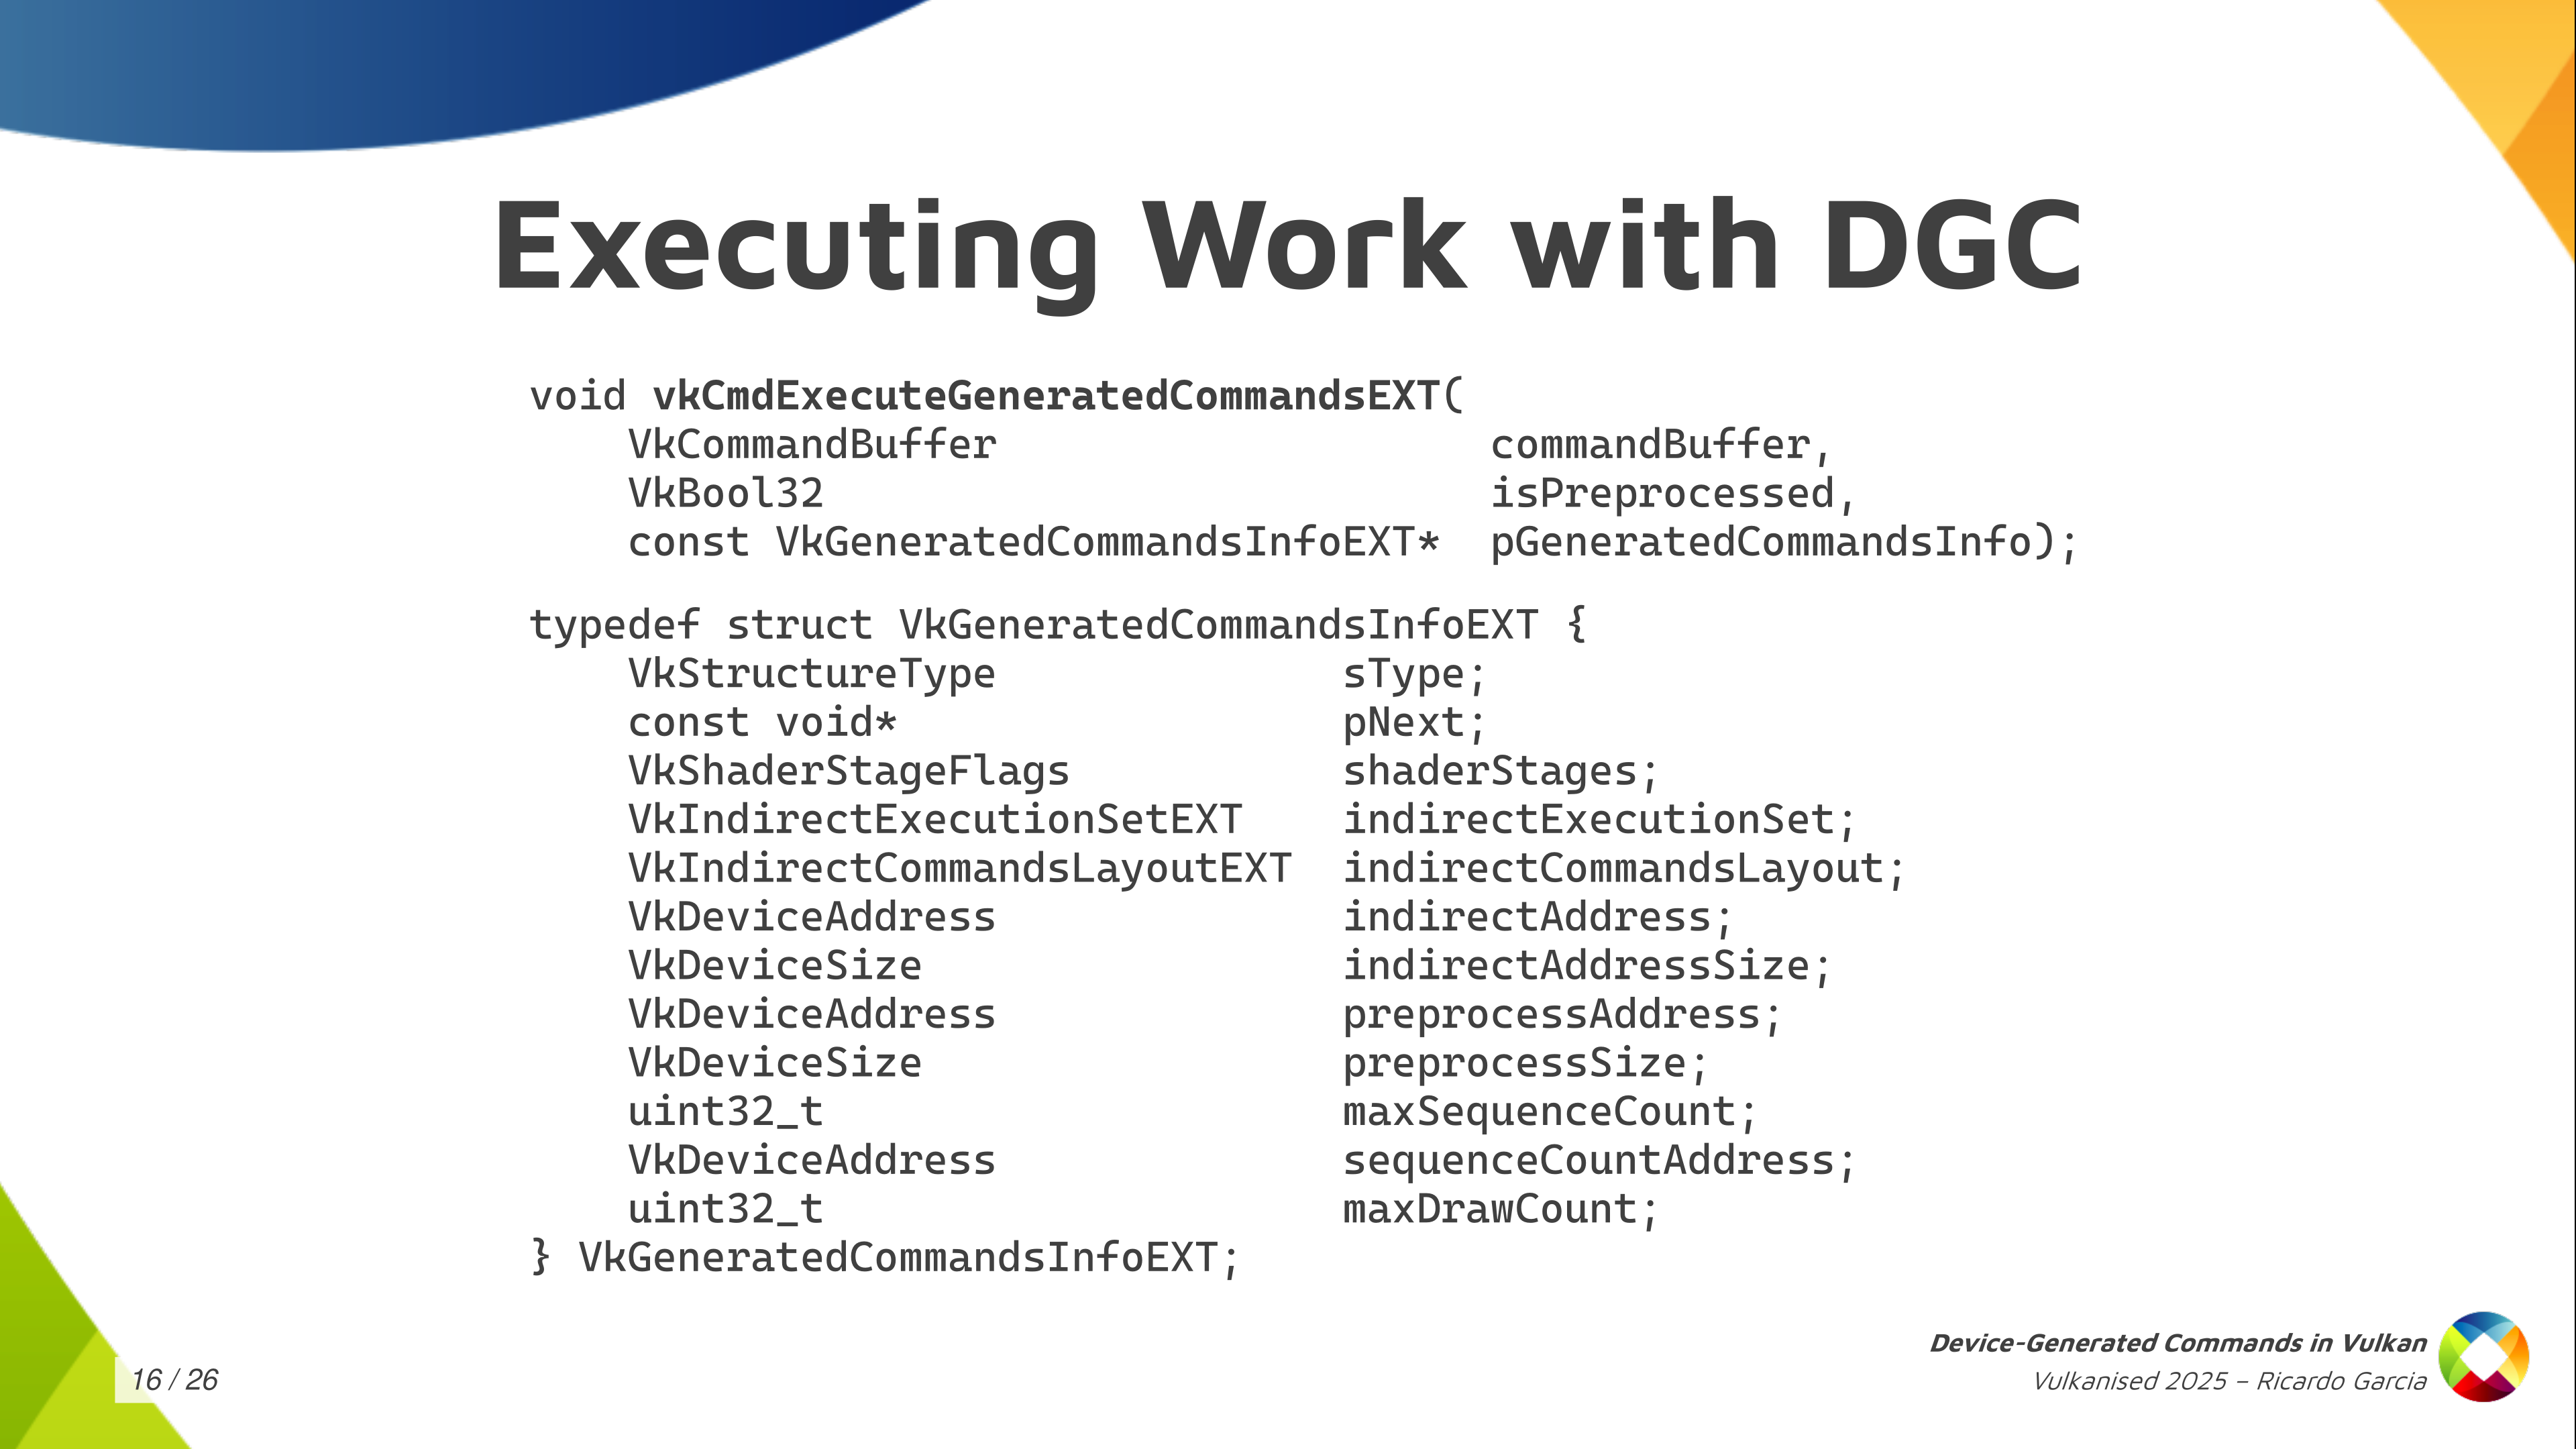
Once you have that, you can call this vkCmdExecuteGeneratedCommands. You bind all the state into your regular command buffer and then you record this command to tell the driver: at this point, execute the contents of this buffer. As you can see, you typically pass a regular command buffer as the first argument. Then there’s some kind of boolean value called isPreprocessed, which is kind of confusing because it’s the first time it appears and you don’t know what it is about, but we will talk about it in a minute. And then you pass a relatively larger structure containing information about what to execute.
In that GeneratedCommandsInfo structure, you need to pass again the shader stages that will be used. You have to pass the handle for the Execution Set, if you’re going to use one (if not you can use the null handle). Of course, the indirect commands layout, which is the central piece here. And then you pass the information about the buffer that you want to execute, which is the indirect address and the indirect address size as the buffer size. We are using buffer device address to pass information.
And then we have something again mentioning some kind of preprocessing thing, which is really weird: preprocess address and preprocess size which looks like a buffer of some kind (we will talk about it later). You have to pass the maximum number of sequences that you are going to execute. Optionally, you can also pass a buffer address for an actual counter of sequences. And the last thing that you need is the max draw count, but you can forget about that if you are not dispatching work using draw-with-count tokens as it only applies there. If not, you leave it as zero and it should work.
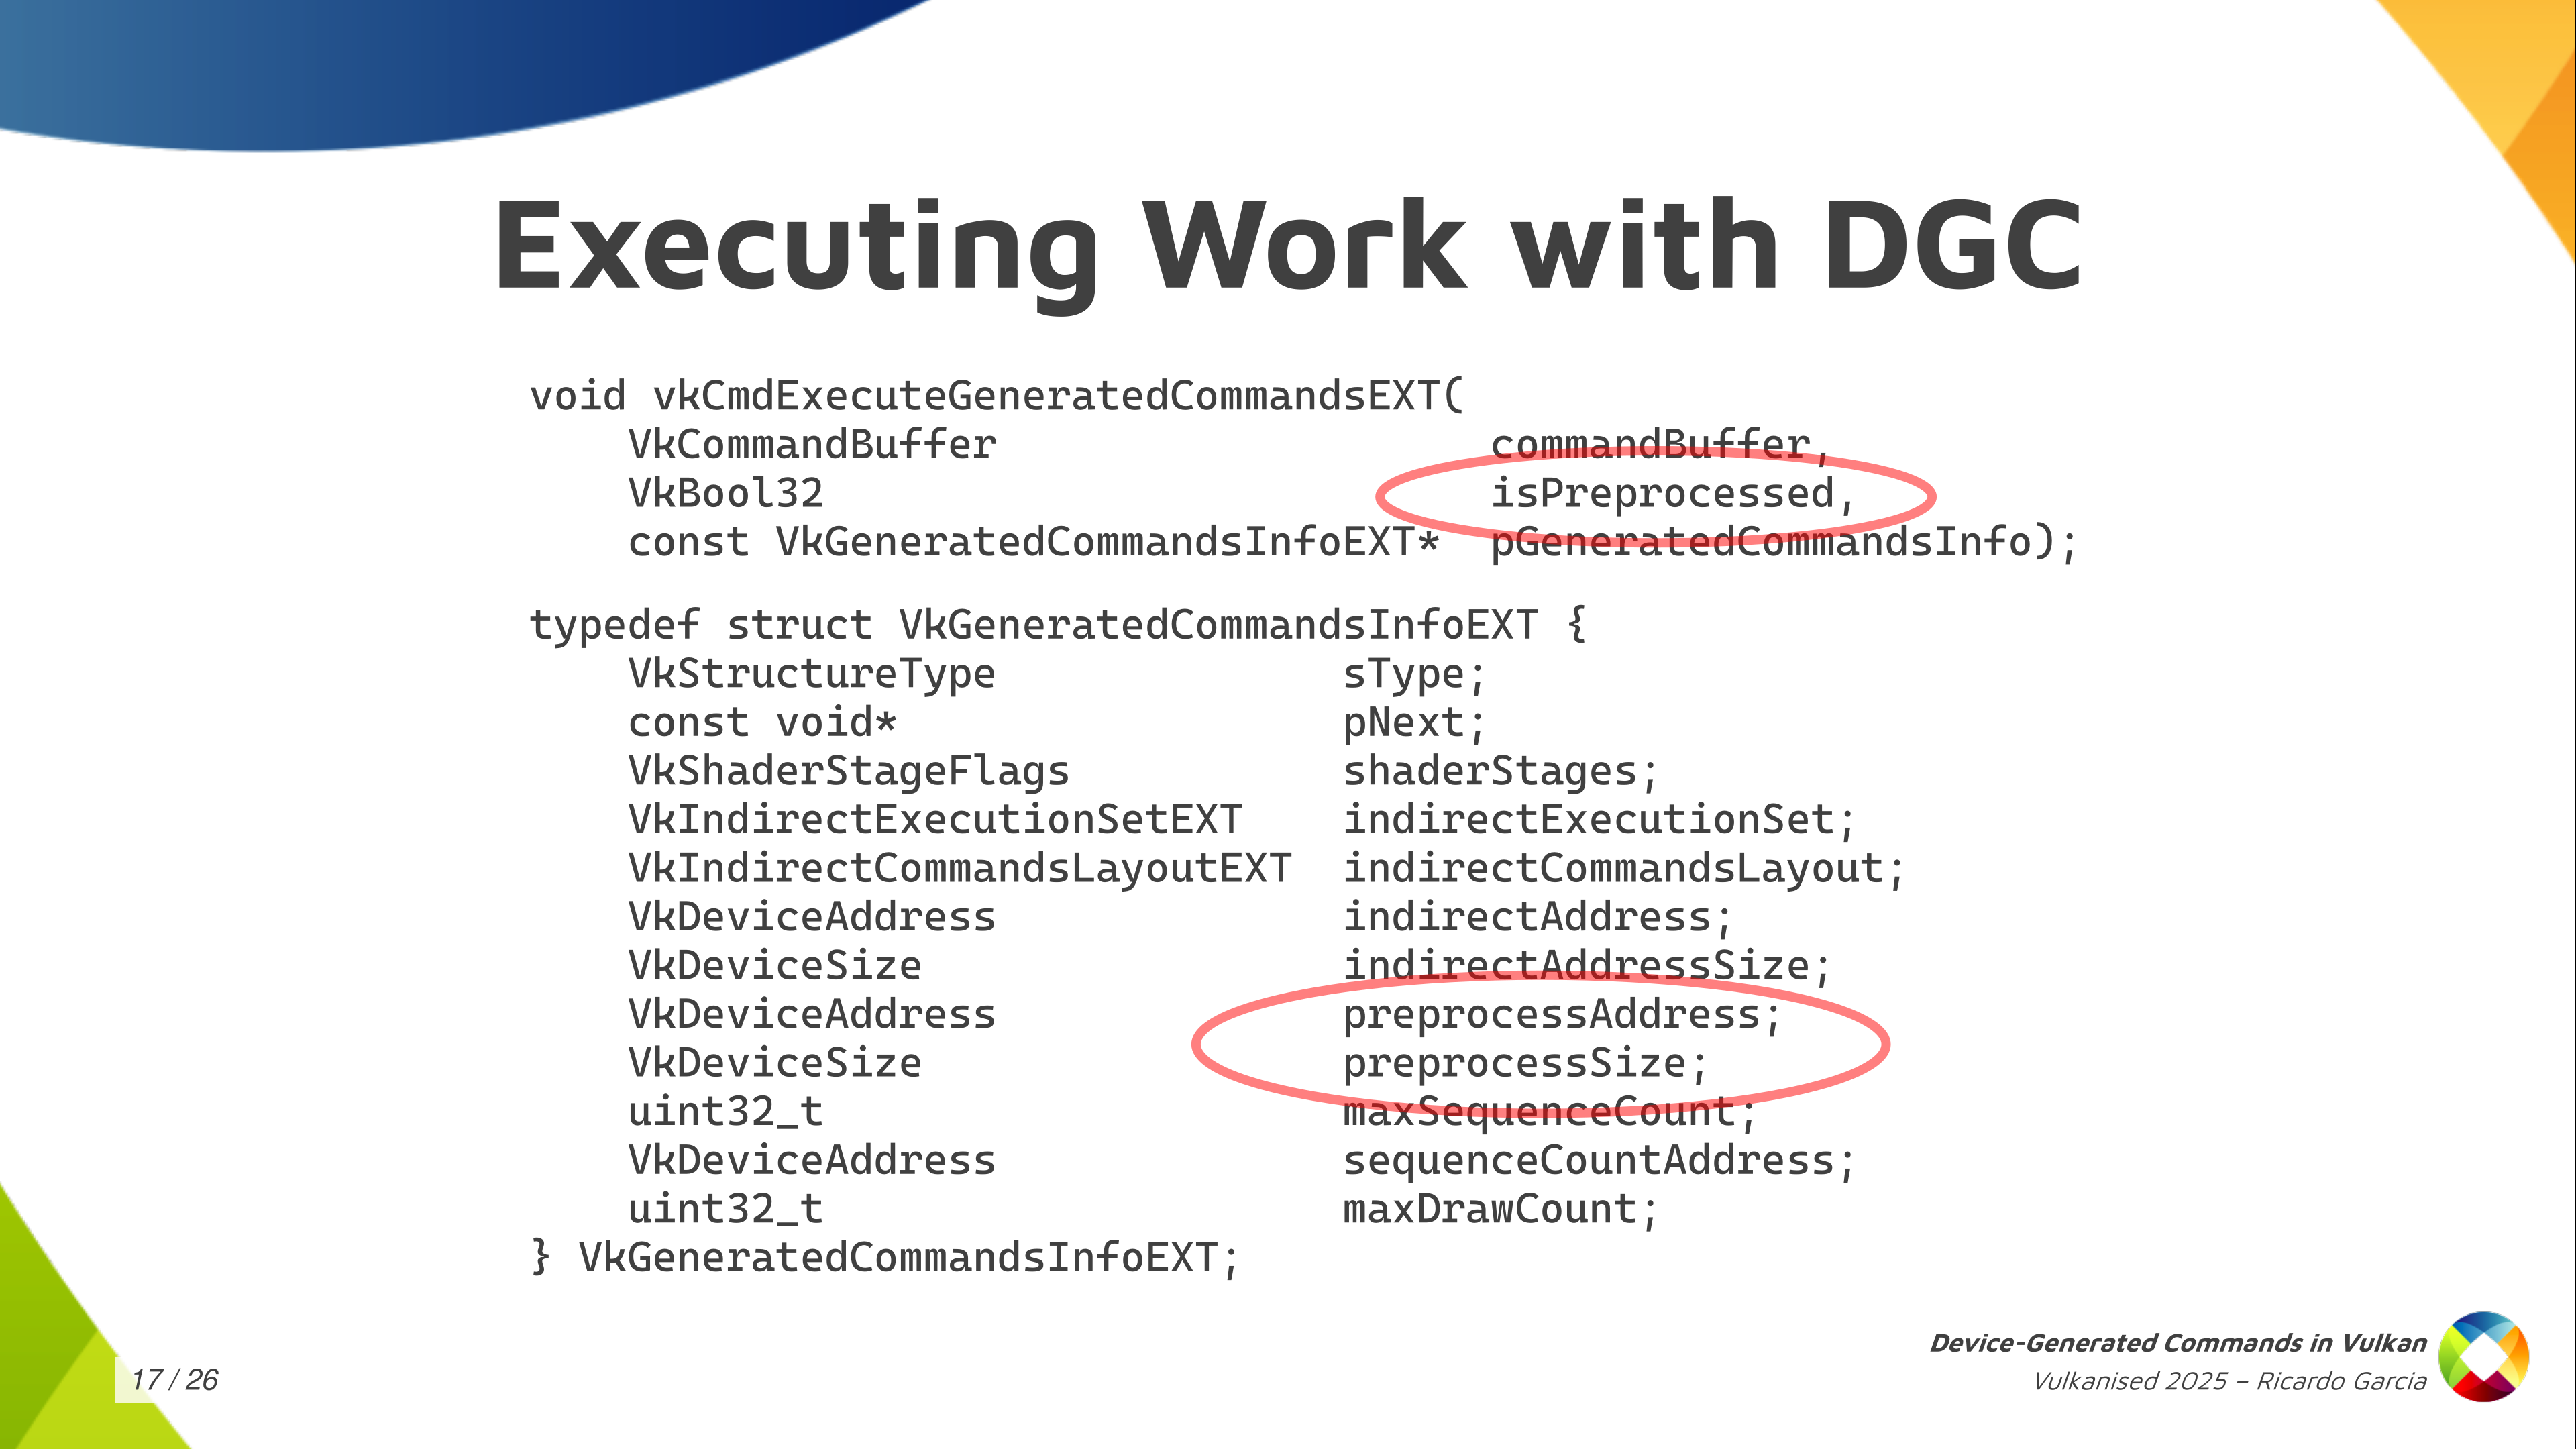
We have a couple of things here that we haven’t talked about yet, which are the preprocessing things. Starting from the bottom, that preprocess address and size give us a hint that there may be a pre-processing step going on. Some kind of thing that the driver may need to do before actually executing the commands, and we need to pass information about the buffer there.
The boolean value that we pass to the command ExecuteGeneratedCommands tells us that the pre-processing step may have happened before so it may be possible to explicitly do that pre-processing instead of letting the driver do that at execution time. Let’s take a look at that in more detail.
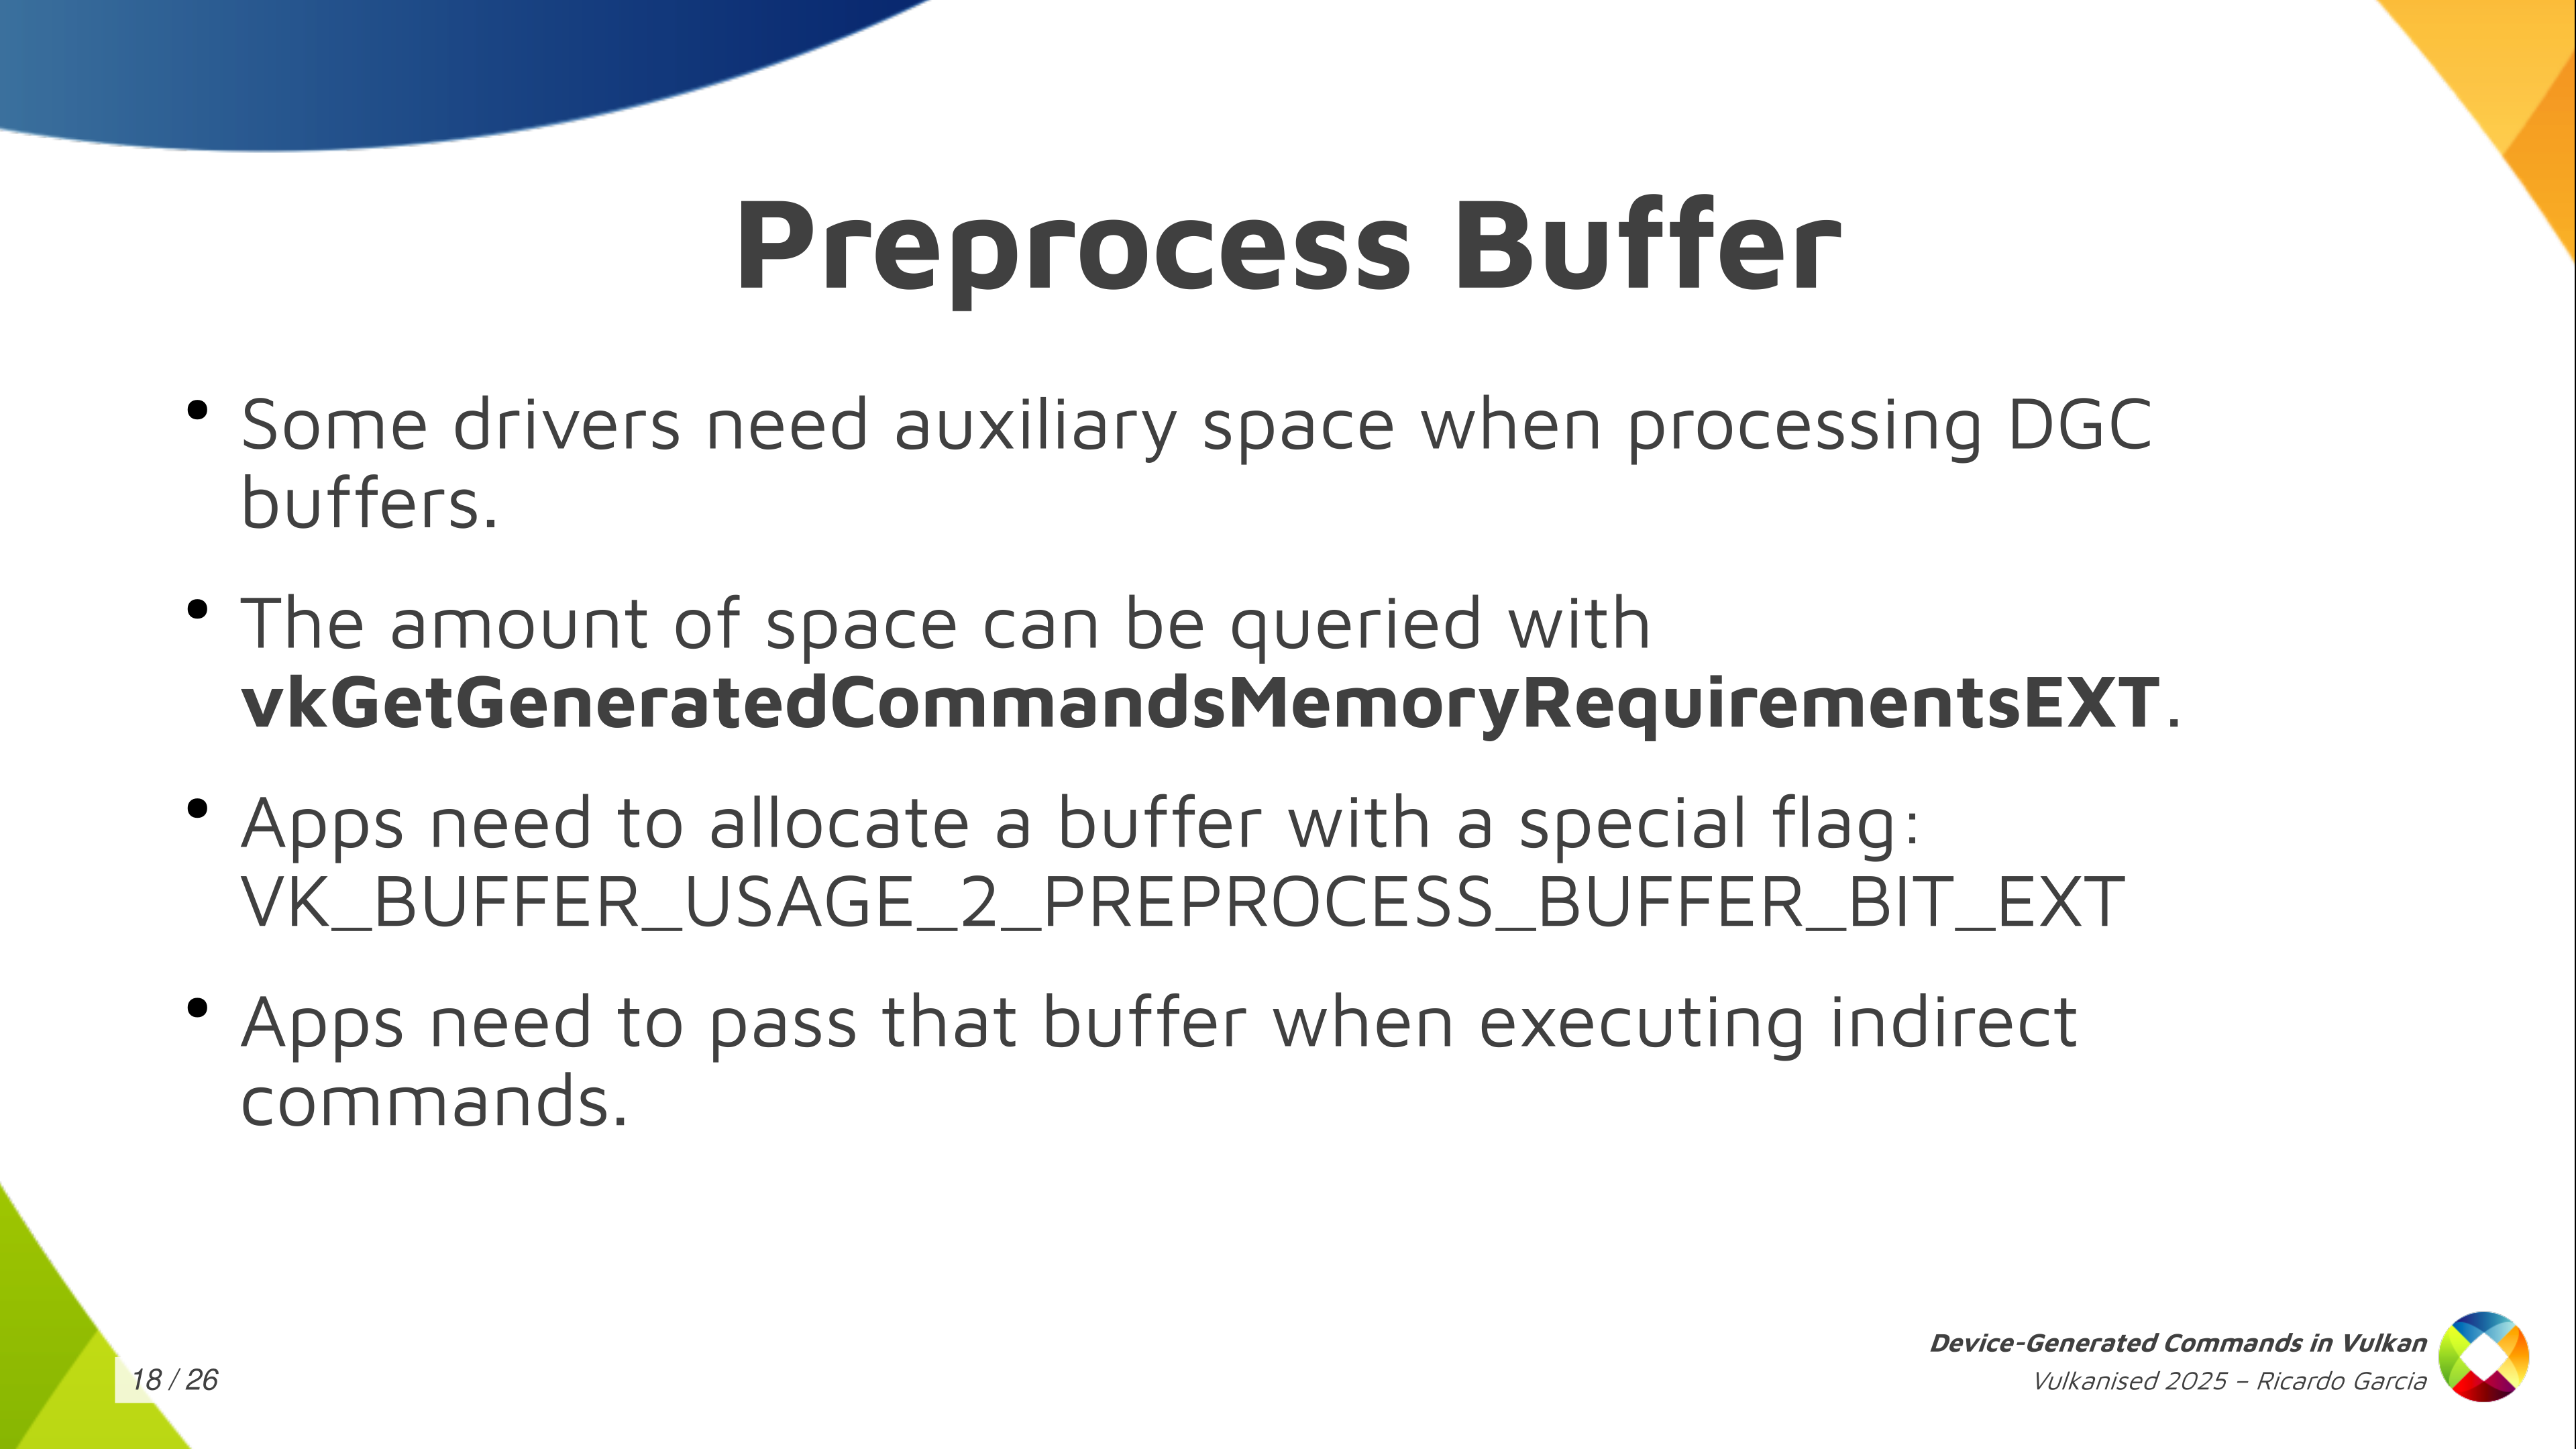
First of all, what is the pre-process buffer? The pre-process buffer is auxiliary space, a scratch buffer, because some drivers need to take a look at how the command sequence looks like before actually starting to execute things. They need to go over the sequence first and they need to write a few things down just to be able to properly do the job later to execute those commands.
Once you have the commands layout and you have the maximum number of sequences that you are going to execute, you can call this vkGetGeneratedCommandMemoryRequirementsEXT and the driver is going to tell you how much space it needs. Then, you can create a buffer, you can allocate the space for that, you need to pass a special new buffer usage flag (VK_BUFFER_USAGE_2_PREPROCESS_BUFFER_BIT_EXT) and, once you have that buffer, you pass the address and you pass a size in the previous structure.

Now the second thing is that we have the possibility of ding this preprocessing step explicitly. Explicit pre-processing is something that’s optional, but you probably want to do that if you care about performance because it’s the key to performance with some drivers.
When you use explicit pre-processing you don’t want to (1) record the state, (2) call this vkPreProcessGeneratedCommandsEXT and (3) call vkExecuteGeneratedCommandsEXT. That is what implicit pre-processing does so this doesn’t give you anything if you do it this way.
This is designed so that, if you want to do explicit pre-processing, you’re going to probably want to use a separate command buffer for pre-processing. You want to batch pre-processing calls together and submit them all together to keep the GPU busy and to give you the performance that you want. While you submit the pre-processing steps you may be still preparing the rest of the command buffers to enqueue the next batch of work. That’s the key to doing pre-processing optimally.
You need to decide beforehand if you are going to use explicit pre-processing or not because, if you’re going to use explicit preprocessing, you need to pass a flag when you create the commands layout, and then you have to call the function to preprocess generated commands. If you don’t pass that flag, you cannot call the preprocessing function, so it’s an all or nothing. You have to decide, and you do what you want.
One thing that is important to note is that preprocessing needs to know and has to have the same state, the same contents of the input buffers as when you execute so it can run properly.
The video contains a cut here because the presentation laptop ran out of battery.
If the pre-processing step needs to have the same state as the execution, you need to have bound the same pipeline state, the same shaders, the same descriptor sets, the same contents. I said that explicit pre-processing is normally used using a separate command buffer that we submit before actual execution. You have a small problem to solve, which is that you would need to record state twice: once on the pre-process command buffer, so that the pre-process step knows everything, and once on the execution, the regular command buffer, when you call execute. That would be annoying.
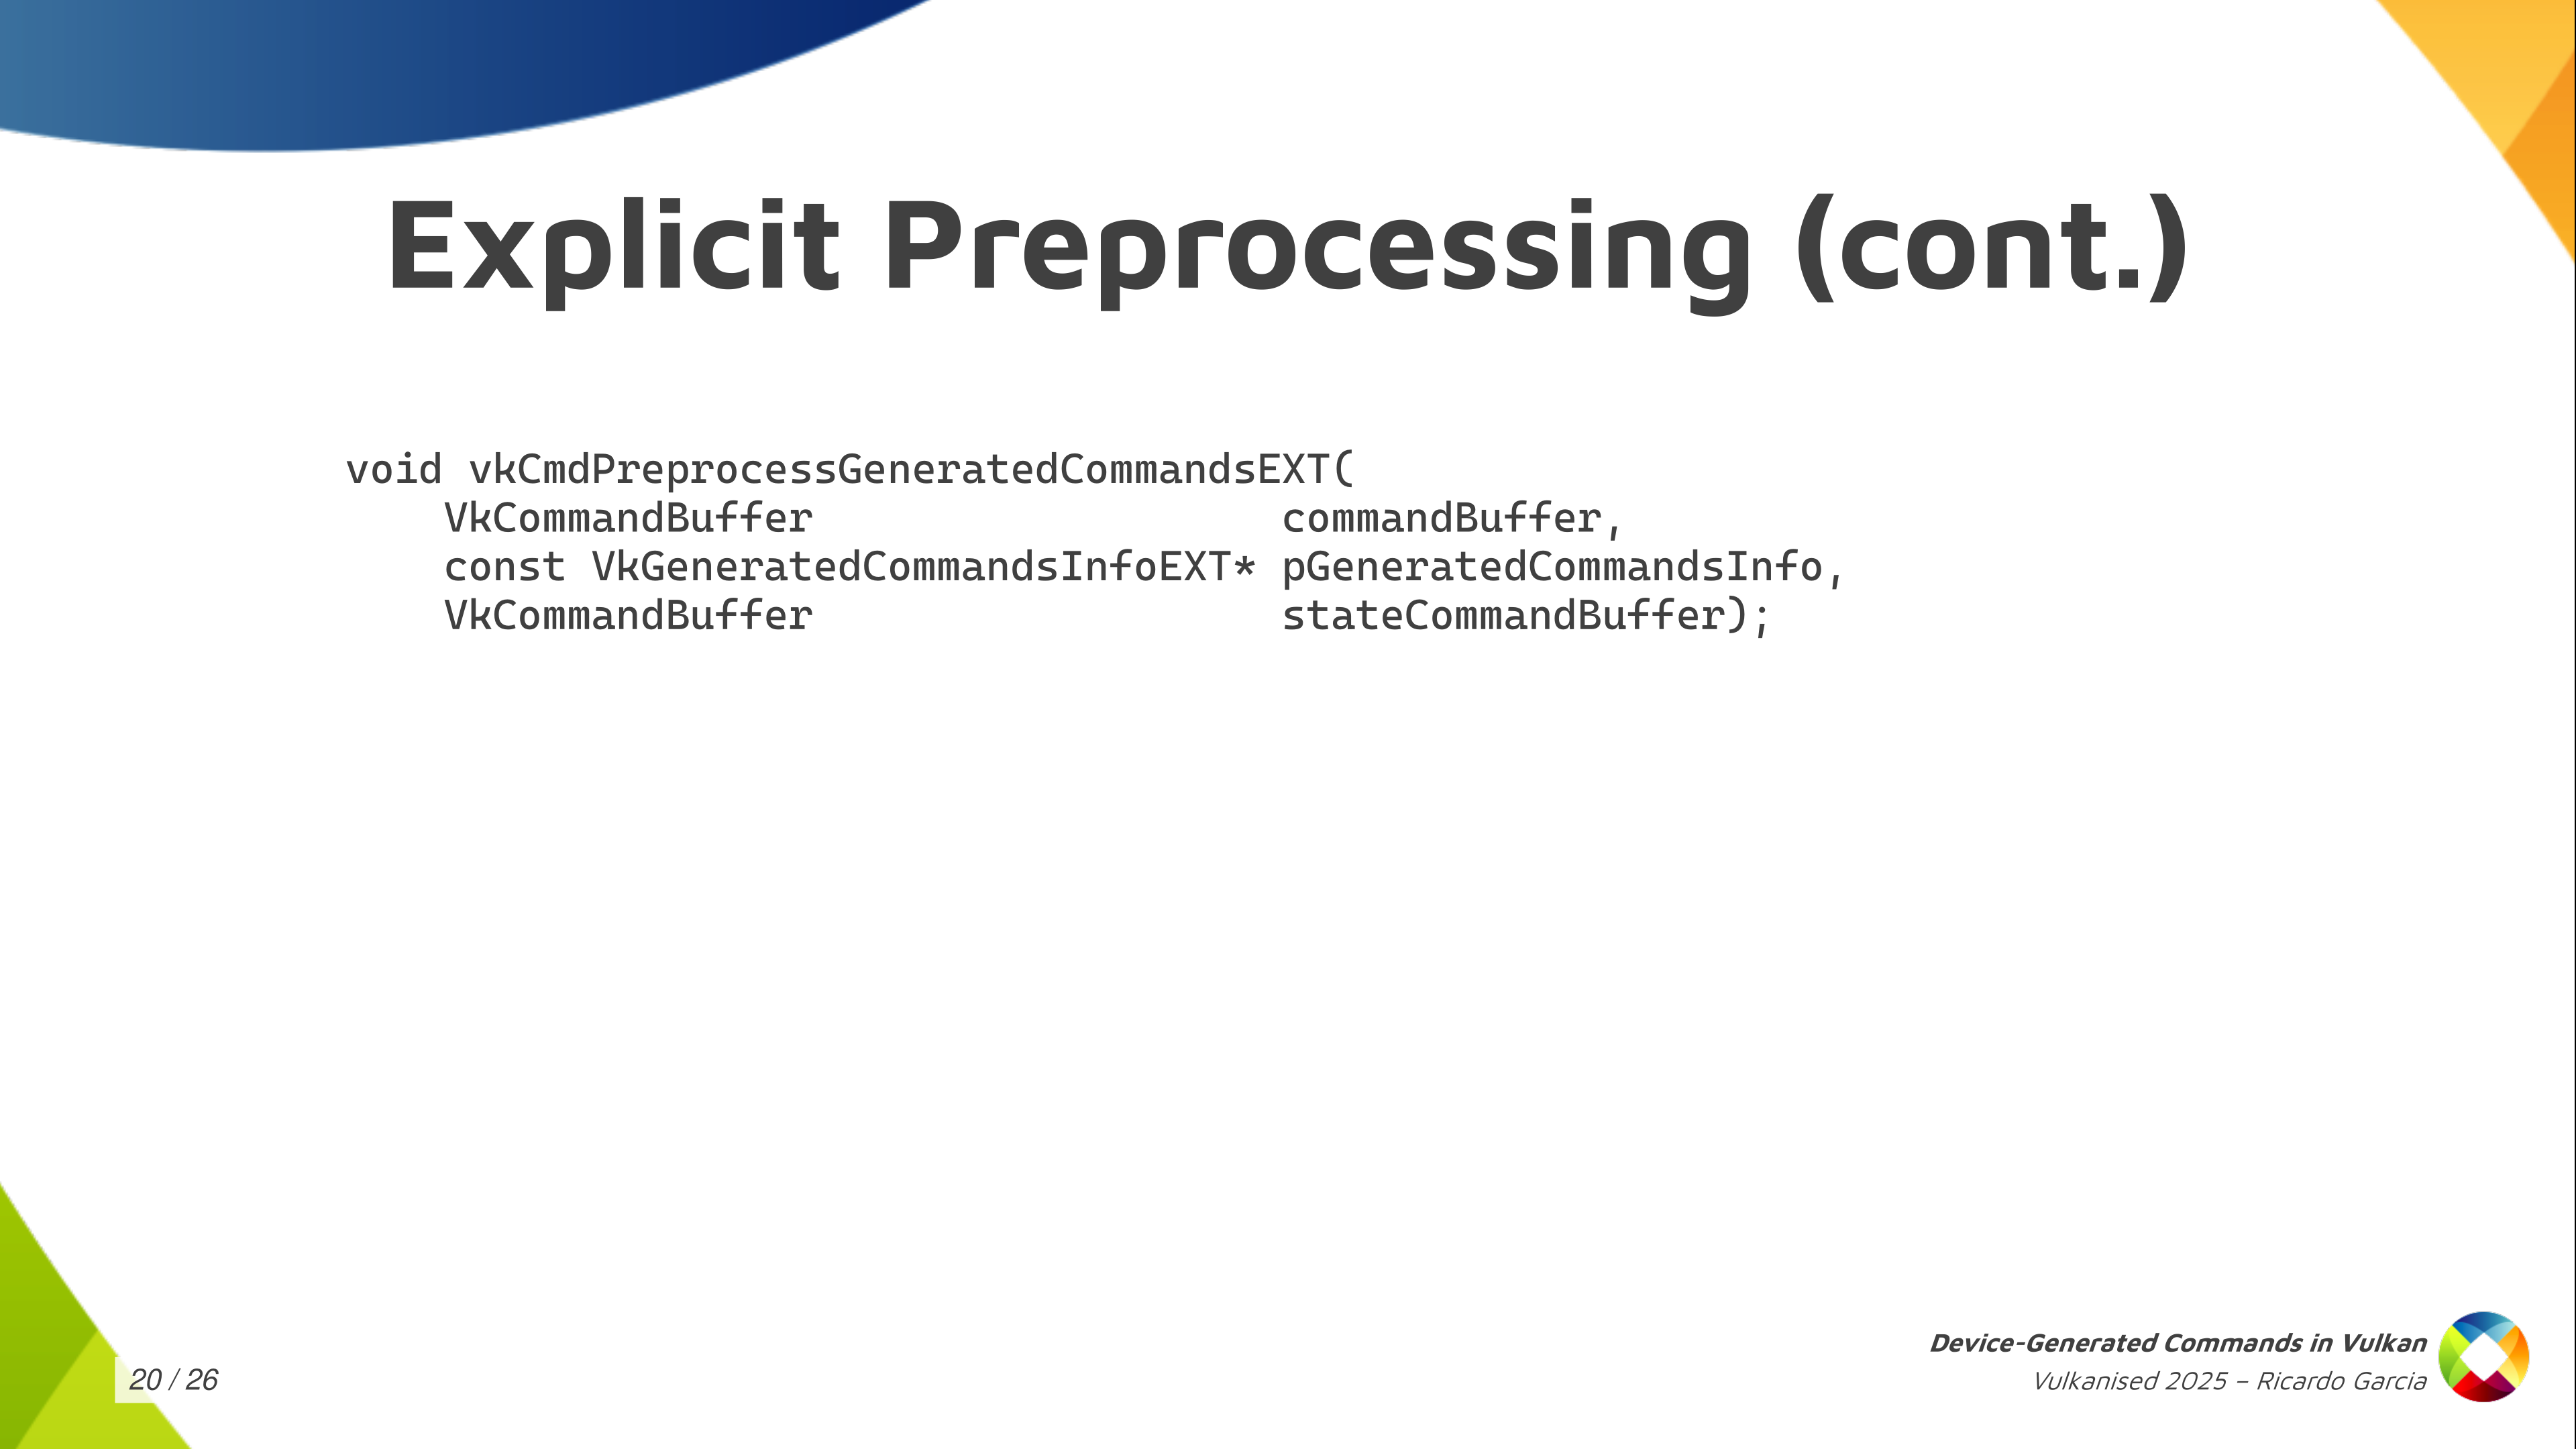
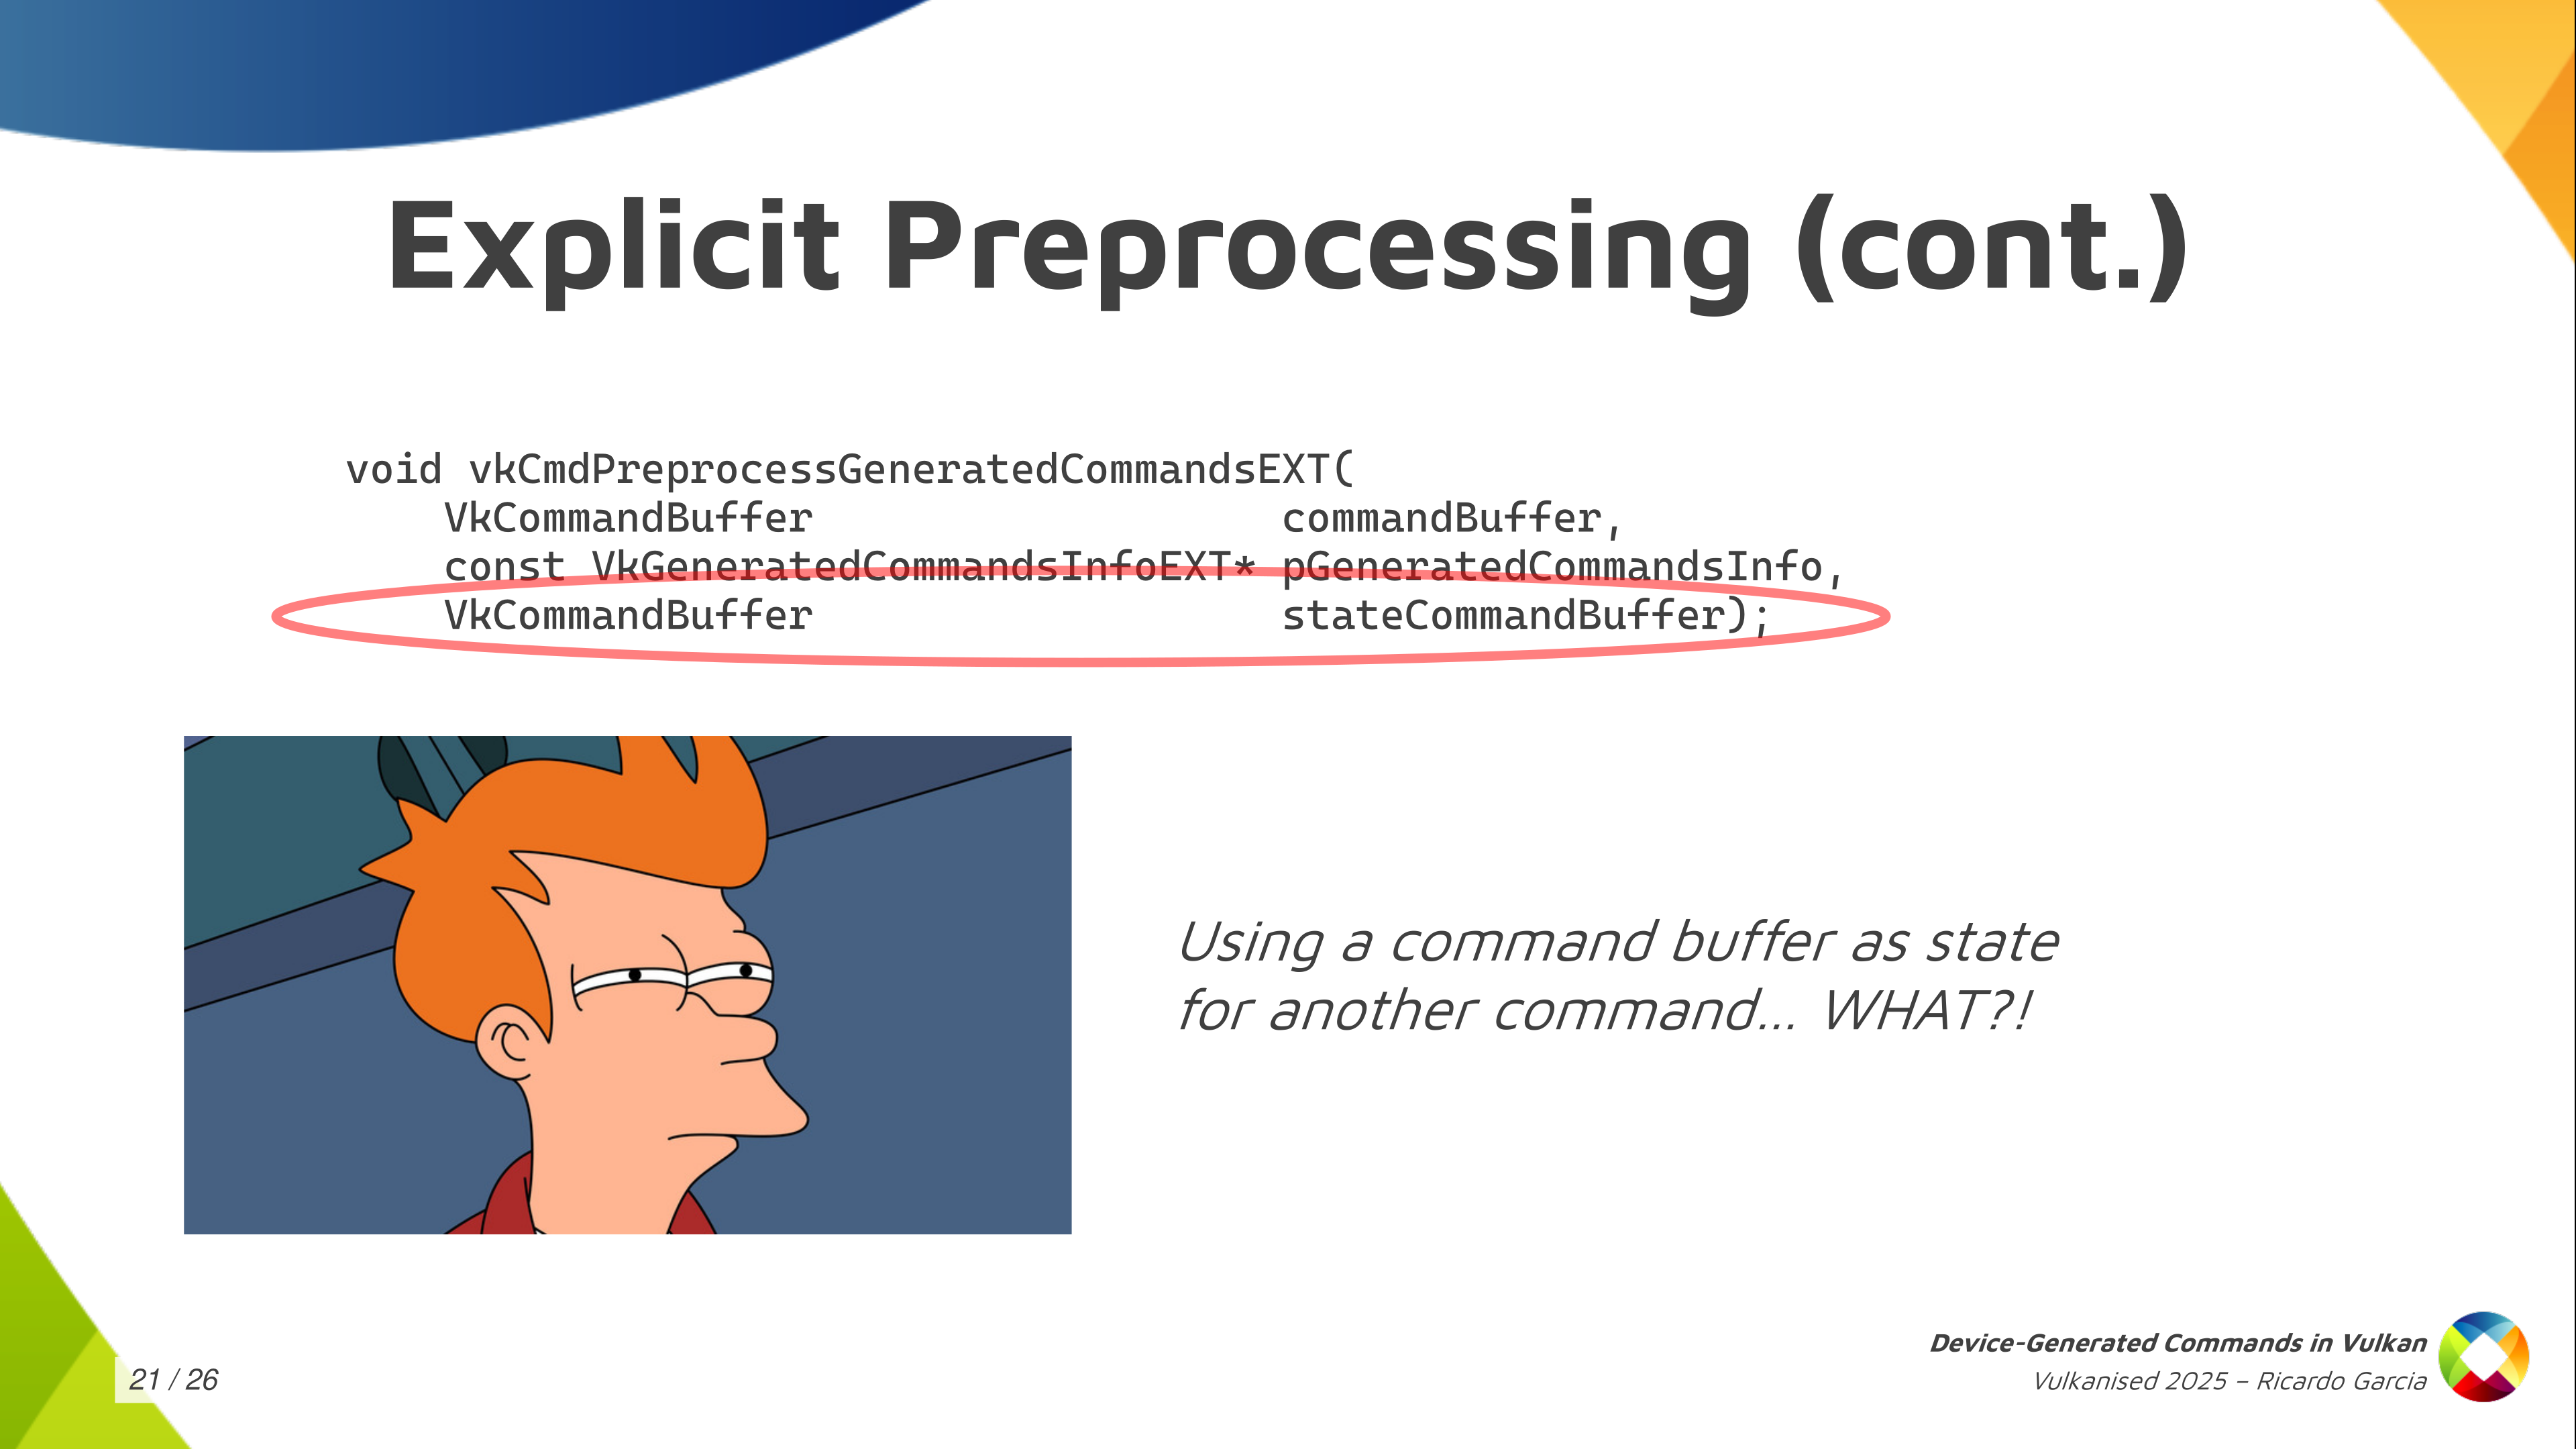
Instead of that, the pre-process generated commands function takes an argument that is a state command buffer and the specification tells you: this is a command buffer that needs to be in the recording state, and the pre-process step is going to read the state from it. This is the first time, and I think the only time in the specification, that something like this is done. You may be puzzled about what this is exactly: how do you use this and how do we pass this?
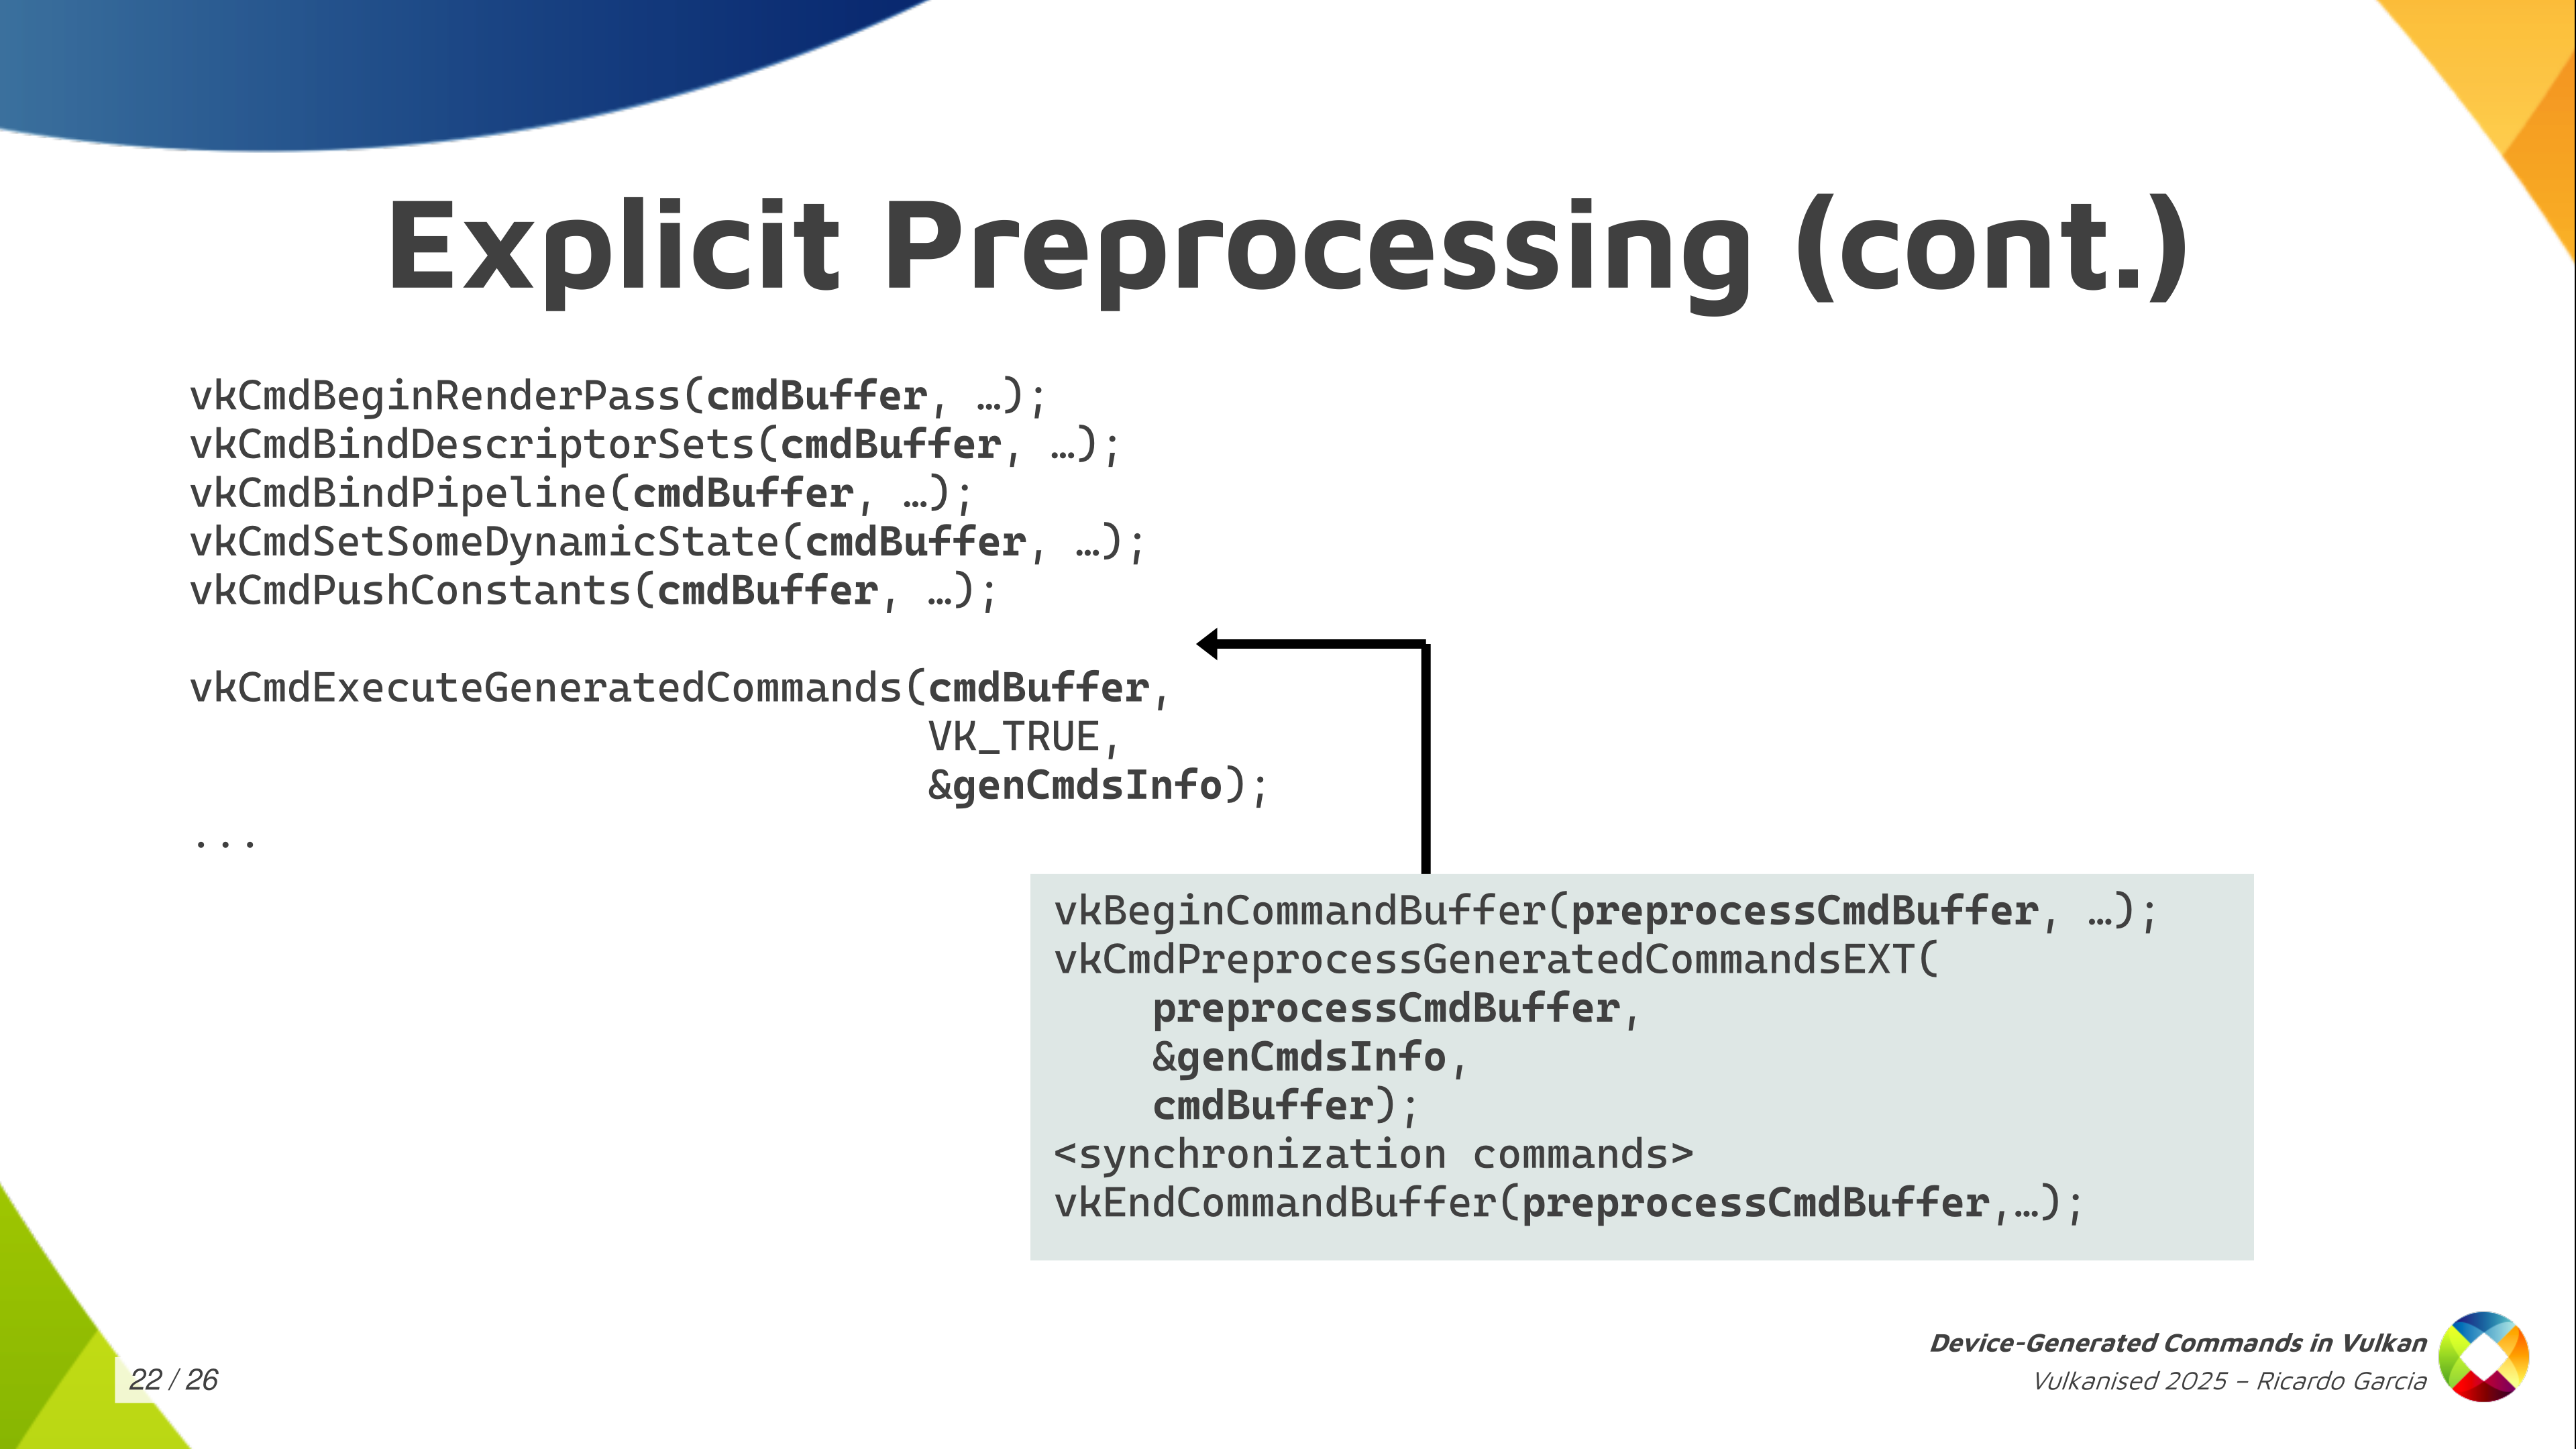
I just wanted to get this slide out to tell you: if you’re going to use explicit pre-processing, the ergonomic way of using it and how we thought about using the processing step is like you see in this slide. You take your main command buffer and you record all the state first and, just before calling execute-generated-commands, the regular command buffer contains all the state that you want and that preprocess needs. You stop there for a moment and then you prepare your separate preprocessing command buffer passing the main one as an argument to the preprocess call, and then you continue recording commands in your regular command buffer. That’s the ergonomic way of using it.

You do need some synchronization at some steps. The main one is that, if you generate the contents of the DGC buffer from the GPU itself, you’re going to need some synchronization: writes to that buffer need to be synchronized with something else that comes later which is executing or reading those commands from from the buffer.
Depending on if you use explicit preprocessing you can use the pipeline stage command-pre-process which is new and pre-process-read or you synchronize that with the regular device-generated-commands-execution which was considered part of the regular draw-indirect-stage using indirect-command-read access.
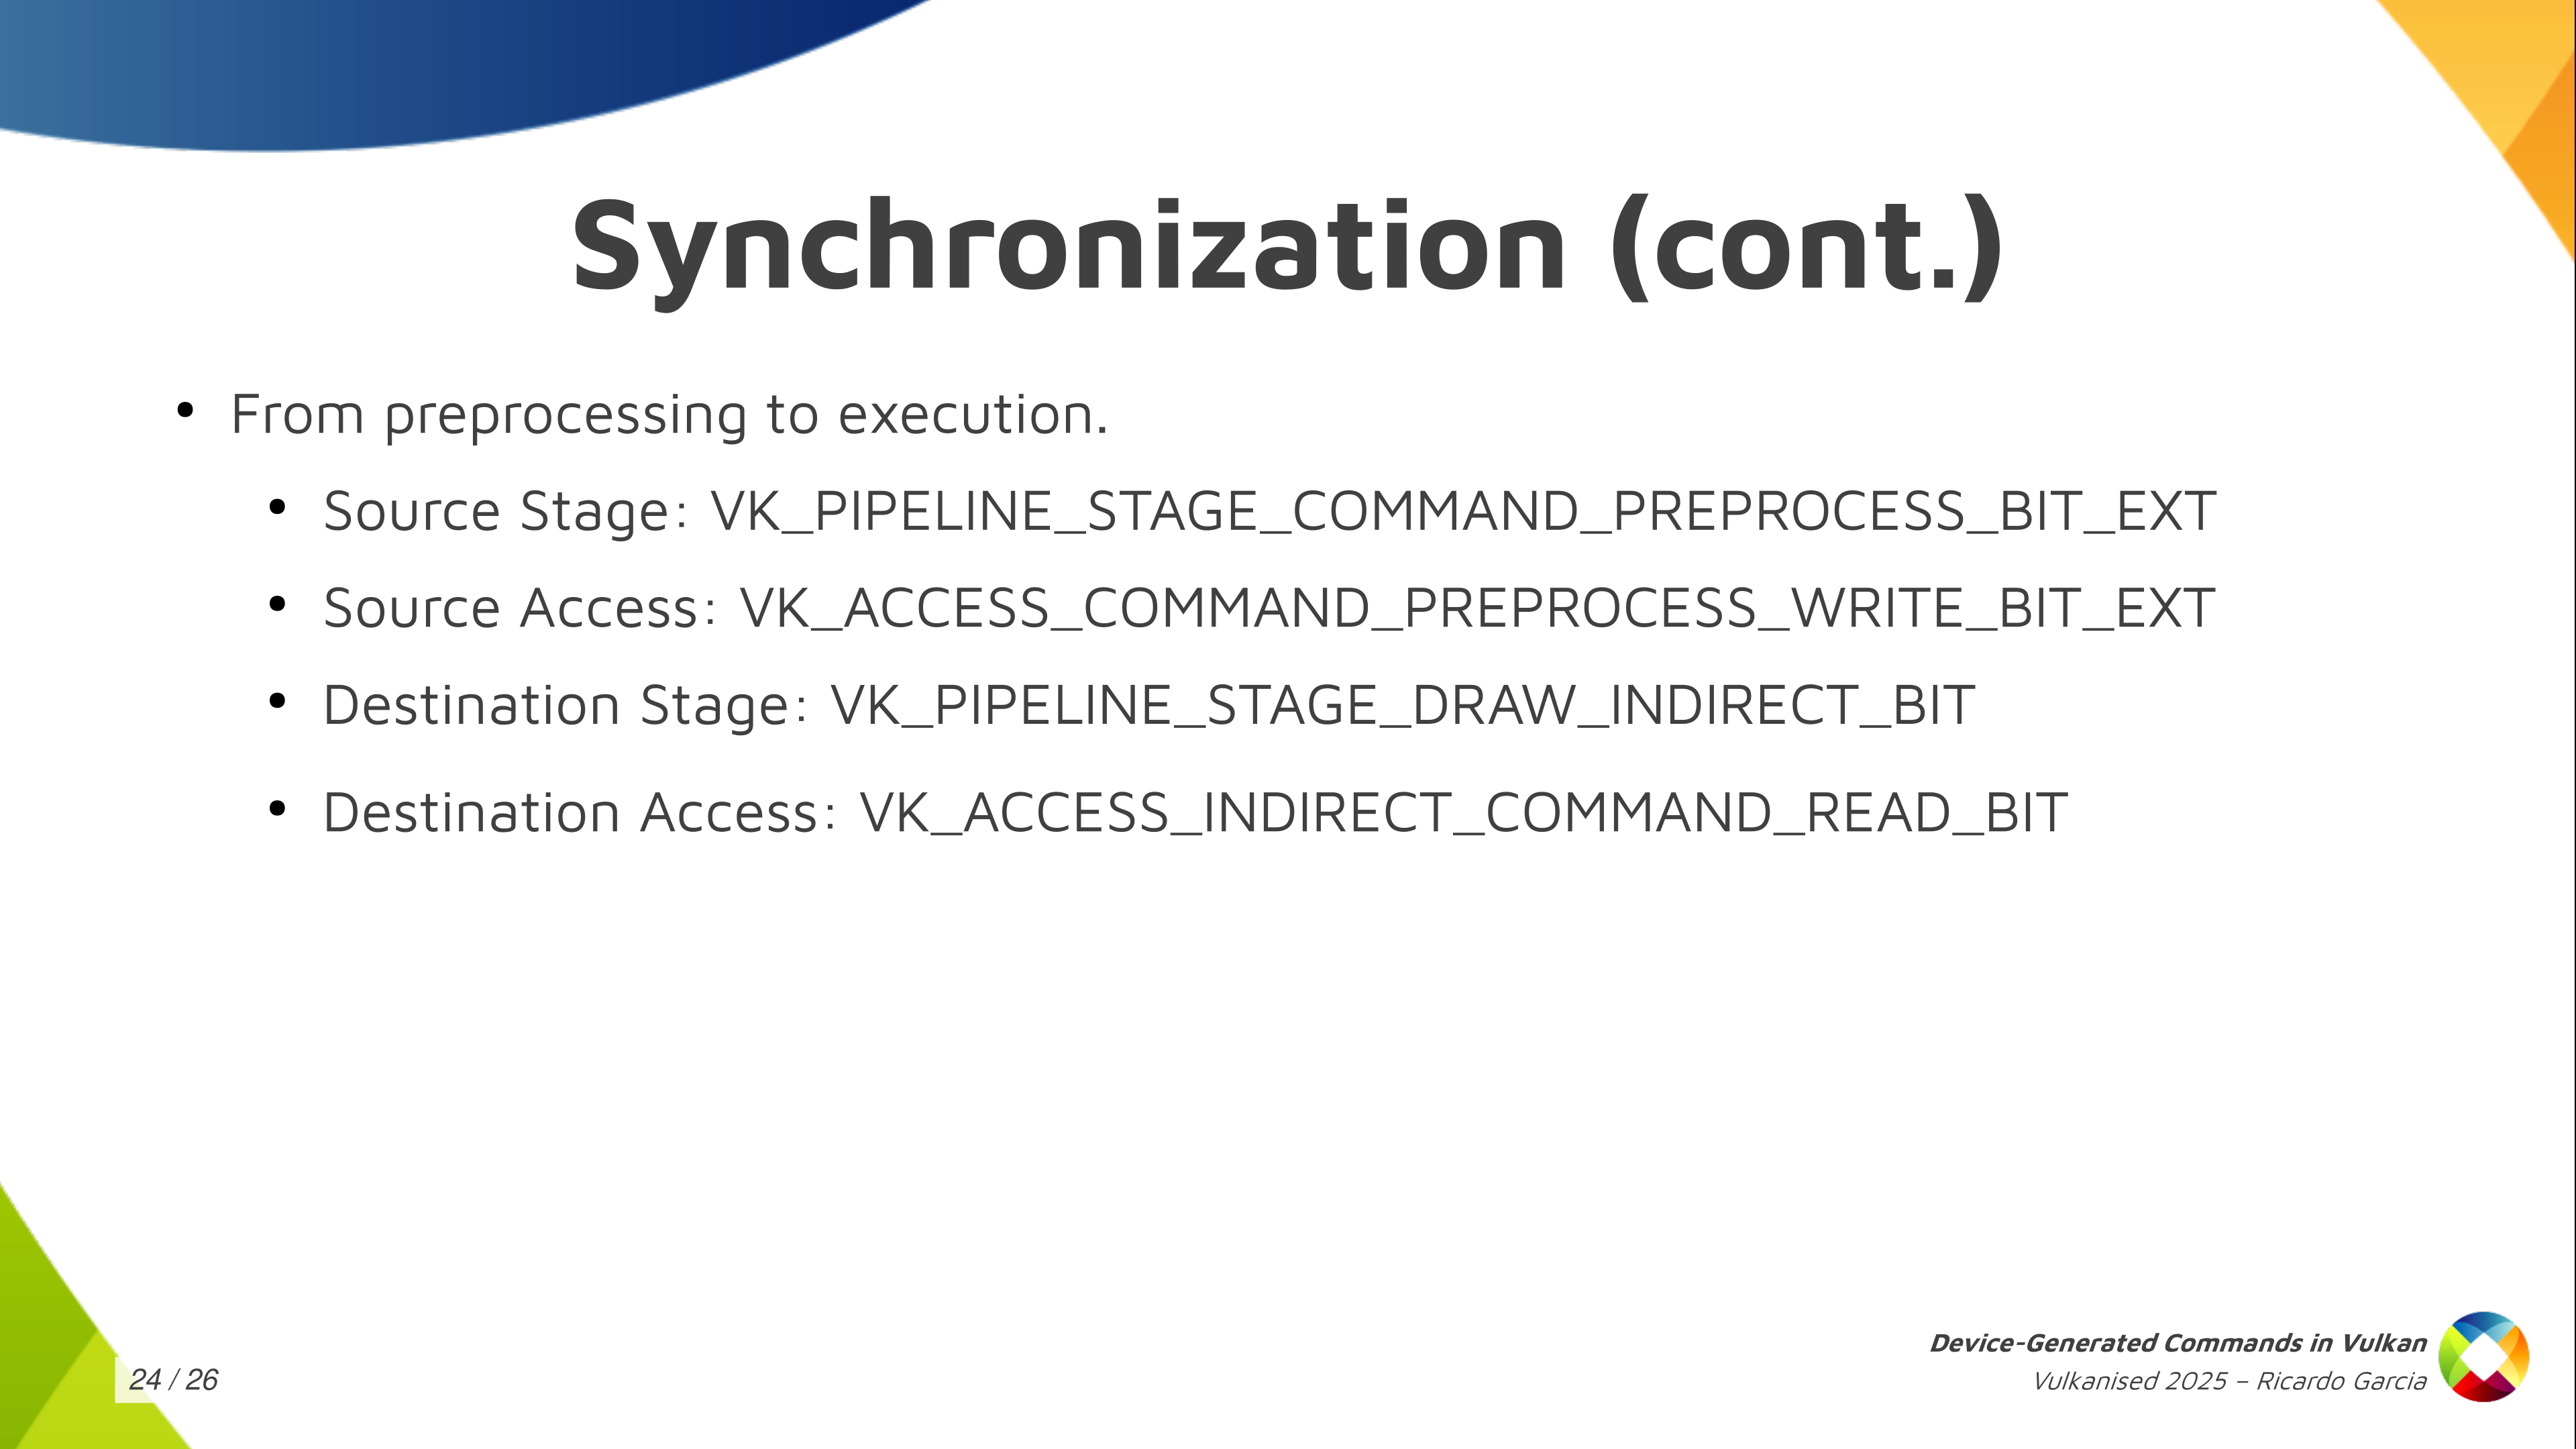
If you use explicit pre-processing you need to make sure that writes to the pre-process buffer happen before you start reading from that. So you use these just here (VK_PIPELINE_STAGE_COMMAND_PREPROCESS_BIT_EXT, VK_ACCESS_COMMAND_PREPROCESS_WRITE_BIT_EXT) to synchronize processing with execution (VK_PIPELINE_STAGE_DRAW_INDIRECT_BIT, VK_ACCESS_INDIRECT_COMMAND_READ_BIT) if you use explicit preprocessing.
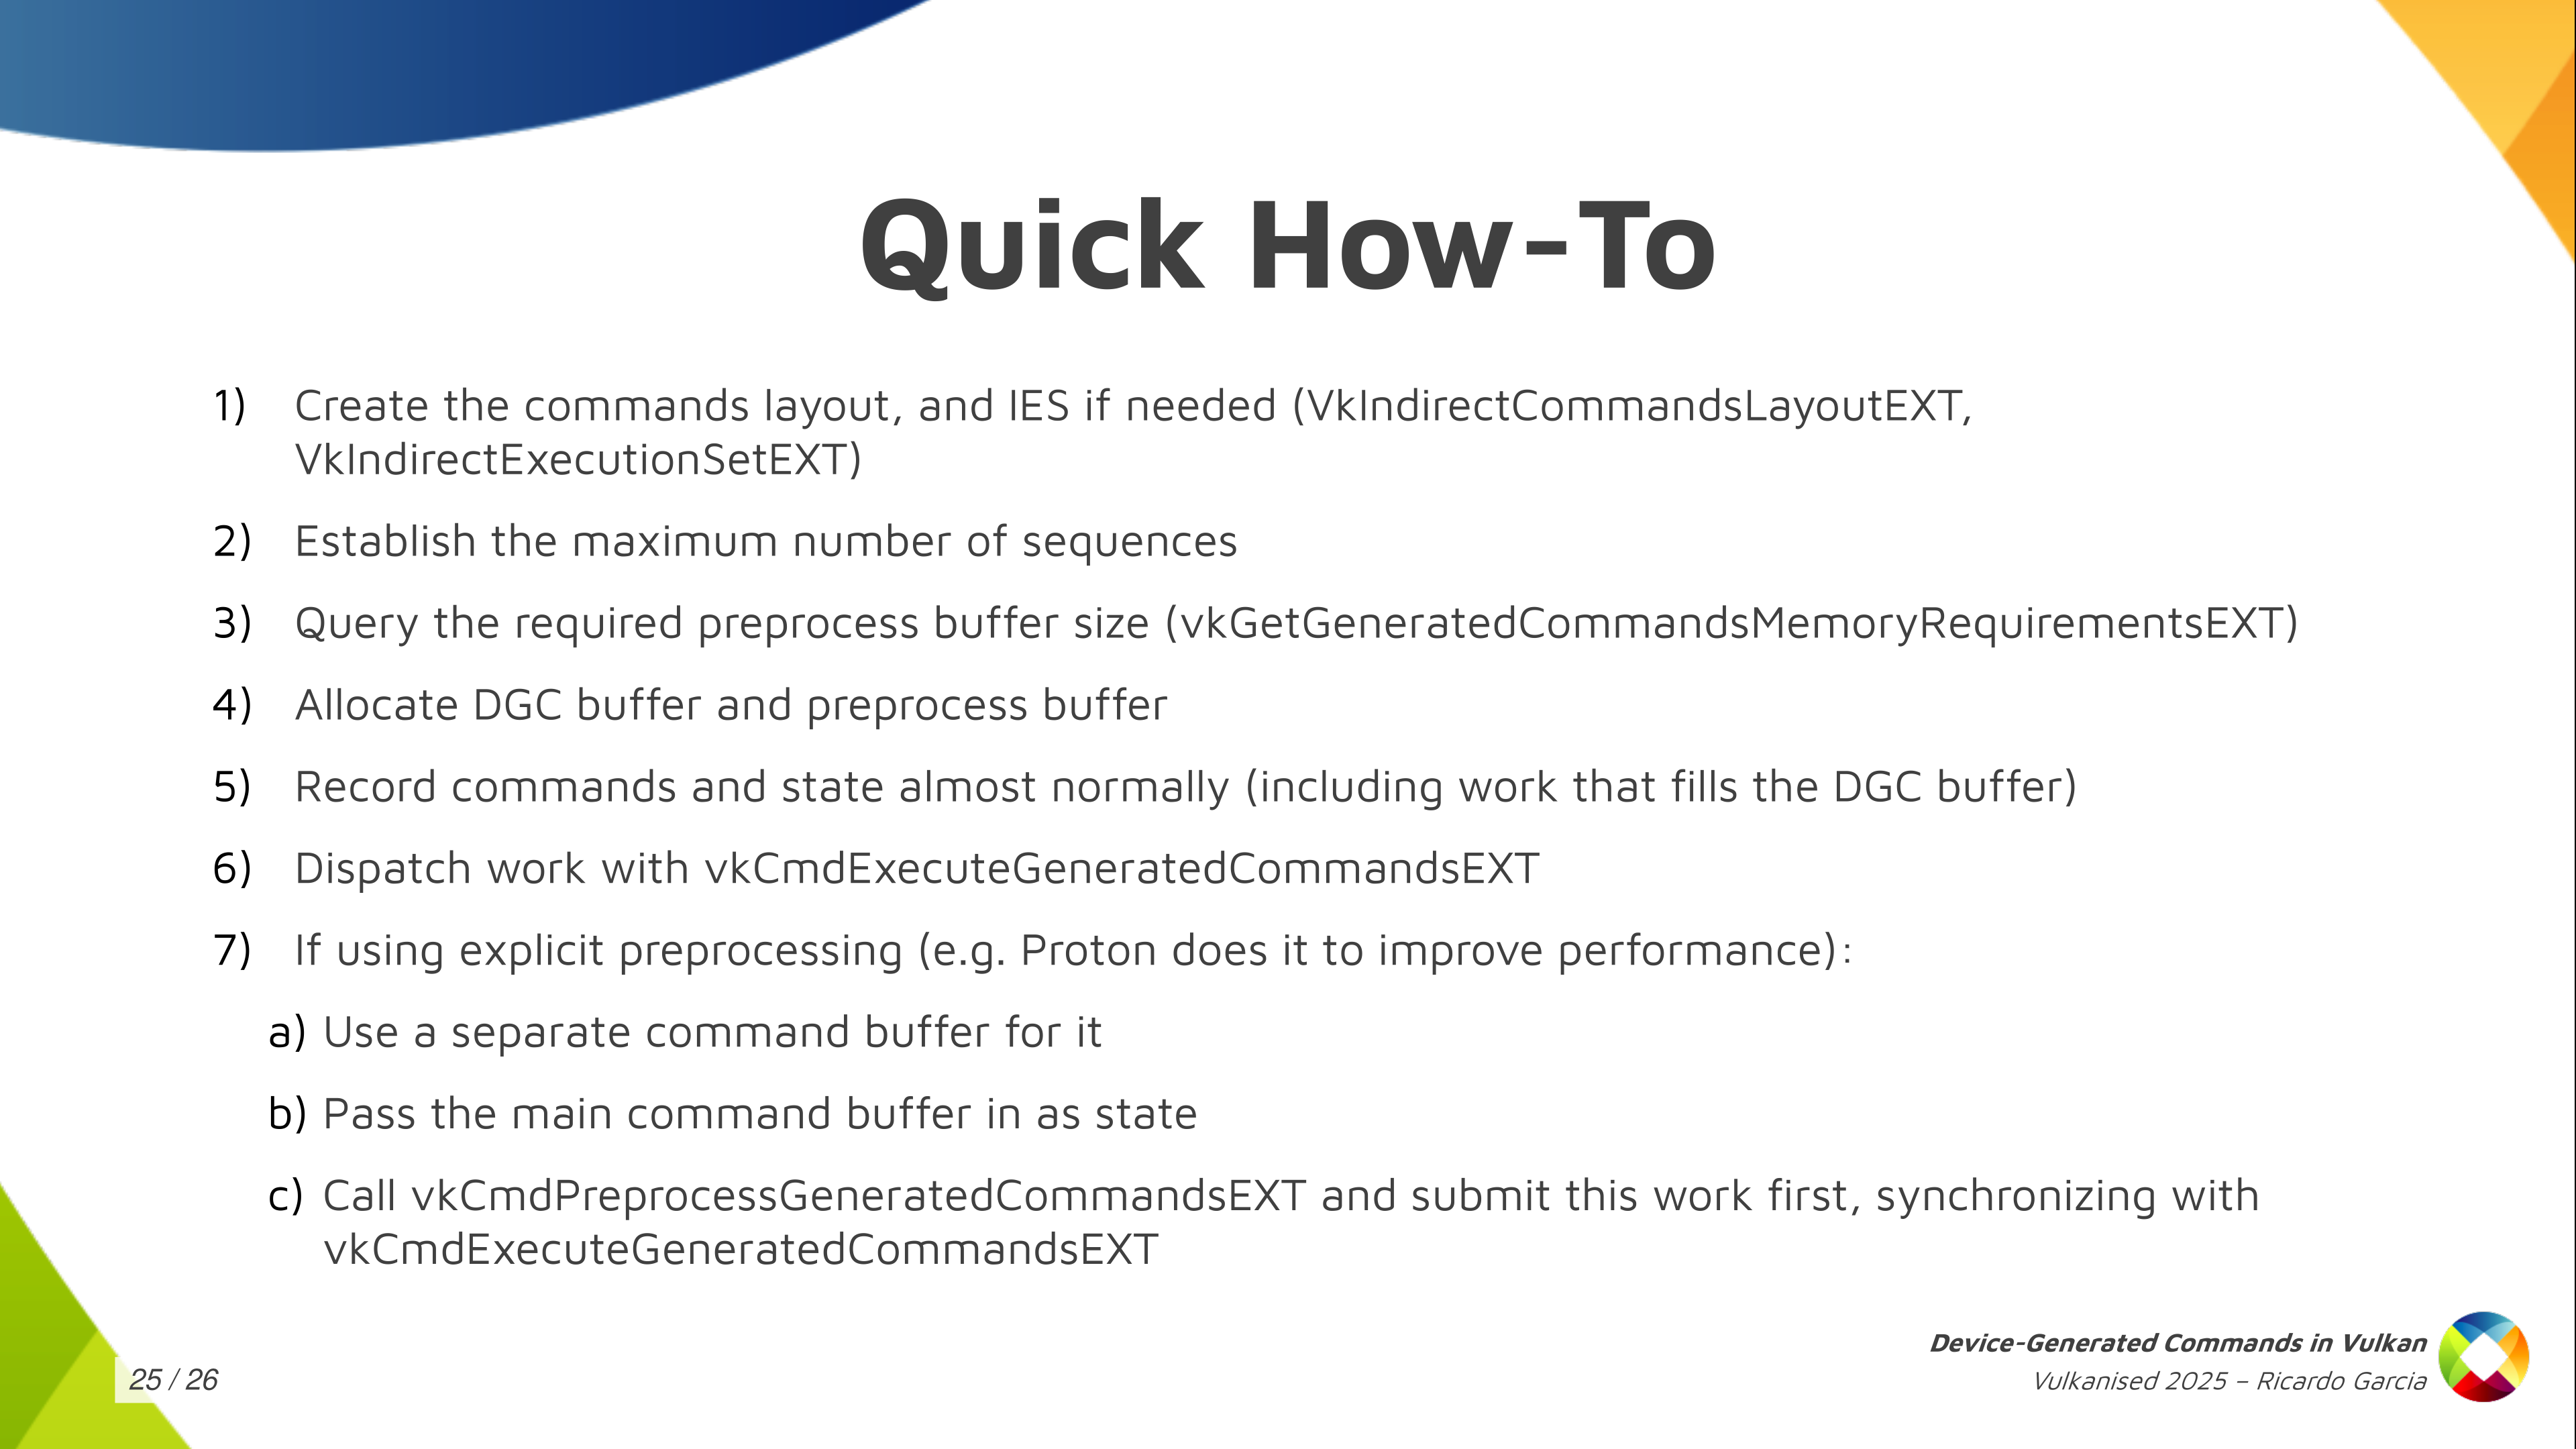
The quick how-to: I just wanted to get this slide out for those wanting a reference that says exactly what you need to do. All the steps that I mentioned here about creating the commands layout, the execution set, allocating the preprocess buffer, etc. This is the basic how-to.

And that’s it. Thanks for watching! Questions?
Year-end donations round, 2024 edition
Just in time before the year ends, I’ve gone ahead with my round of personal donations for 2024. I highly encourage you to do something similar and support the free and open source software and organizations that make a difference to you.
This year, my personal list consisted of:
-
Signal as every year, because I use it daily.
-
Calibre eBook Management, which my wife uses a lot.
-
The Gnome Project, which is my desktop environment these days.
-
LibreOffice because I use it very frequently and I think it’s a critical piece of software for the desktop.
-
Pi-Hole because I have one set up in my home network to block ads via DNS, so in practice it’s used every day.
-
Internet Archive, which is critical in preserving content and culture around the globe.
-
Software Freedom Conservancy because it has several important projects under its umbrella and they hit close to home now that the X.Org Foundation has chosen them as the fiscal sponsors.