#!/usr/bin/env bash
set -e

function usage {
cat <<EOF 1>&2
Usage: `basename $0` [-h] [-a AUDIO_STREAM] [-o OUTPUT_FILE] VIDEO_FILE [SUBTITLES_FILE]

Create MKV file containing the video and audio streams from the given VIDEO_FILE
without re-encoding.

If -a is not used, the program will use stream 1 from VIDEO_FILE. If -o is not
used, the default output file will be /tmp/watch.mkv. If passed as an additional
argument, SUBTITLES_FILE will be included as an additional stream in the output
MKV file and made active by default.

Option -h prints this help message.

EOF
}

function usage_and_abort {
    usage
    exit 1
}

while getopts "a:o:h" OPTNAME; do
    case "$OPTNAME" in
        a) OPTARG_AUDIO_STREAM="$OPTARG" ;;
        o) OPTARG_OUTPUT_FILE="$OPTARG" ;;
        h) usage; exit 0 ;;
        *) usage_and_abort ;;
    esac
done

shift $((OPTIND-1))

if [ $# -lt 1 ] || [ $# -gt 2 ]; then
    usage_and_abort
fi

VIDEO_FILE="$1"
SUBTITLES_FILE="$2" # May be empty.
AUDIO_STREAM="${OPTARG_AUDIO_STREAM:-1}"
OUTPUT_FILE="${OPTARG_OUTPUT_FILE:-/tmp/watch.mkv}"
START_WEBSERVER=""
WEBSERVER_PORT=64004
WEBSERVER_ROOT="$HOME/Public"

declare -a FFMPEG_INPUTS
declare -a FFMPEG_MAPS

# Video file as input.
FFMPEG_INPUTS+=("-i")
FFMPEG_INPUTS+=("$VIDEO_FILE")

# Pick first stream from it (video), and the selected audio stream (number 1 by default).
FFMPEG_MAPS+=("-map")
FFMPEG_MAPS+=("0:v:0")
FFMPEG_MAPS+=("-map")
FFMPEG_MAPS+=("0:$AUDIO_STREAM")

if [ -n "$SUBTITLES_FILE" ]; then
    # Add subtitles file as second input.
    FFMPEG_INPUTS+=("-i")
    FFMPEG_INPUTS+=("$SUBTITLES_FILE")

    # Pick first subtitles stream from it and make them active by default.
    FFMPEG_MAPS+=("-map")
    FFMPEG_MAPS+=("1:s:0")
    FFMPEG_MAPS+=("-disposition:s:0")
    FFMPEG_MAPS+=("default")
fi

rm -f "$OUTPUT_FILE"
ffmpeg "${FFMPEG_INPUTS[@]}" "${FFMPEG_MAPS[@]}" -c copy "$OUTPUT_FILE"
read -n 1 -p "Start web server? [y/N] " REPLY
echo
case "$REPLY" in
    [yY]) START_WEBSERVER=1 ;;
    *) ;;
esac
if [ -n "$START_WEBSERVER" ]; then
    echo "Starting web server..."
    cd "$WEBSERVER_ROOT"
    busybox httpd -f -vv -p $WEBSERVER_PORT || true # || true helps because the web server is shut down with Ctrl+C and does not return 0.
fi
exit 0
Device-Generated Commands at Vulkanised 2025
A month ago I attended Vulkanised 2025 in Cambridge, UK, to present a talk about Device-Generated Commands in Vulkan. The event was organized by Khronos and took place in the Arm Cambridge office. The talk I presented was similar to the one from XDC 2024, but instead of being a lightning 5-minutes talk, I had 25-30 minutes to present and I could expand the contents to contain proper explanations of almost all major DGC concepts that appear in the spec.
I attended the event together with my Igalia colleagues Lucas Fryzek and Stéphane Cerveau, who presented about lavapipe and Vulkan Video, respectively. We had a fun time in Cambridge and I can sincerely recommend attending the event to any Vulkan enthusiasts out there. It allows you to meet Khronos members and people working on both the specification and drivers, as well as many other Vulkan users from a wide variety of backgrounds.
The recordings for all sessions are now publicly available, and the one for my talk can be found embedded below. For those of you preferring slides and text, I’m also providing a transcription of my presentation together with slide screenshots further down.
In addition, at the end of the video there’s a small Q&A section but I’ve always found it challenging to answer questions properly on the fly and with limited time. For this reason, instead of transcribing the Q&A section literally, I’ve taken the liberty of writing down the questions and providing better answers in written form, and I’ve also included an extra question that I got in the hallways as bonus content. You can find the Q&A section right after the embedded video.
Vulkanised 2025 recording
Questions and answers with longer explanations
Question: can you give an example of when it’s beneficial to use Device-Generated Commands?
There are two main use cases where DGC would improve performance: on the one hand, many times game engines use compute pre-passes to analyze the scene they want to draw and prepare some data for that scene. This includes maybe deciding LOD levels, discarding content, etc. After that compute pre-pass, results would need to be analyzed from the CPU in some way. This implies a stall: the output from that compute pre-pass needs to be transferred to the CPU so the CPU can use it to record the right drawing commands, or maybe you do this compute pre-pass during the previous frame and it contains data that is slightly out of date. With DGC, this compute dispatch (or set of compute dispatches) could generate the drawing commands directly, so you don’t stall or you can use more precise data. You also save some memory bandwidth because you don’t need to copy the compute results to host-visible memory.
On the other hand, sometimes scenes contain so much detail and geometry that recording all the draw calls from the CPU takes a nontrivial amount of time, even if you distribute this draw call recording among different threads. With DGC, the GPU itself can generate these draw calls, so potentially it saves you a lot of CPU time.
Question: as the extension makes heavy use of buffer device addresses, what are the challenges for tools like GFXReconstruct when used to record and replay traces that use DGC?
The extension makes use of buffer device addresses for two separate things. First, it uses them to pass some buffer information to different API functions, instead of passing buffer handles, offsets and sizes. This is not different from other APIs that existed before. The VK_KHR_buffer_device_address extension contains APIs like vkGetBufferOpaqueCaptureAddressKHR, vkGetDeviceMemoryOpaqueCaptureAddressKHR that are designed to take care of those cases and make it possible to record and reply those traces. Contrary to VK_KHR_ray_tracing_pipeline, which has a feature to indicate if you can capture and replay shader group handles (fundamental for capture and replay when using ray tracing), DGC does not have any specific feature for capture-replay. DGC does not add any new problem from that point of view.
Second, the data for some commands that is stored in the DGC buffer sometimes includes device addresses. This is the case for the index buffer bind command, the vertex buffer bind command, indirect draws with count (double indirection here) and ray tracing command. But, again, the addresses in those commands are buffer device addresses. That does not add new challenges for capture and replay compared to what we already had.
Question: what is the deal with the last token being the one that dispatches work?
One minor detail from DGC, that’s important to remember, is that, by default, DGC respects the order in which sequences appear in the DGC buffer and the state used for those sequences. If you have a DGC buffer that dispatches multiple draws, you know the state that is used precisely for each draw: it’s the state that was recorded before the execute-generated-commands call, plus the small changes that a particular sequence modifies like push constant values or vertex and index buffer binds, for example. In addition, you know precisely the order of those draws: executing the DGC buffer is equivalent, by default, to recording those commands in a regular command buffer from the CPU, in the same order they appear in the DGC buffer.
However, when you create an indirect commands layout you can indicate that the sequences in the buffer may run in an undefined order (this is VK_INDIRECT_COMMANDS_LAYOUT_USAGE_UNORDERED_SEQUENCES_BIT_EXT). If the sequences could dispatch work and then change state, we would have a logical problem: what do those state changes affect? The sequence that is executed right after the current one? Which one is that? We would not know the state used for each draw. Forcing the work-dispatching command to be the last one is much easier to reason about and is also logically tight.
Naturally, if you have a series of draws on the CPU where, for some of them, you change some small bits of state (e.g. like disabling the depth or stencil tests) you cannot do that in a single DGC sequence. For those cases, you need to batch your sequences in groups with the same state (and use multiple DGC buffers) or you could use regular draws for parts of the scene and DGC for the rest.
Question from the hallway: do you know what drivers do exactly at preprocessing time that is so important for performance?
Most GPU drivers these days have a kernel side and a userspace side. The kernel driver does a lot of things like talking to the hardware, managing different types of memory and buffers, talking to the display controller, etc. The kernel driver normally also has facilities to receive a command list from userspace and send it to the GPU.
These command lists are particular for each GPU vendor and model. The packets that form it control different aspects of the GPU. For example (this is completely made-up), maybe one GPU has a particular packet to modify depth buffer and test parameters, and another packet for the stencil test and its parameters, while another GPU from another vendor has a single packet that controls both. There may be another packet that dispatches draw work of all kinds and is flexible to accomodate the different draw commands that are available on Vulkan.
The Vulkan userspace driver translates Vulkan command buffer contents to these GPU-specific command lists. In many drivers, the preprocessing step in DGC takes the command buffer state, combines it with the DGC buffer contents and generates a final command list for the GPU, storing that final command list in the preprocess buffer. Once the preprocess buffer is ready, executing the DGC commands is only a matter of sending that command list to the GPU.
Talk slides and transcription

Hello, everyone! I’m Ricardo from Igalia and I’m going to talk about device-generated commands in Vulkan.
First, some bits about me. I have been part of the graphics team at Igalia since 2019. For those that don’t know us, Igalia is a small consultancy company specialized in open source and my colleagues in the graphics team work on things such as Mesa drivers, Linux kernel drivers, compositors… that kind of things. In my particular case the focus of my work is contributing to the Vulkan Conformance Test Suite and I do that as part of a collaboration between Igalia and Valve that has been going on for a number of years now. Just to highlight a couple of things, I’m the main author of the tests for the mesh shading extension and device-generated commands that we are talking about today.
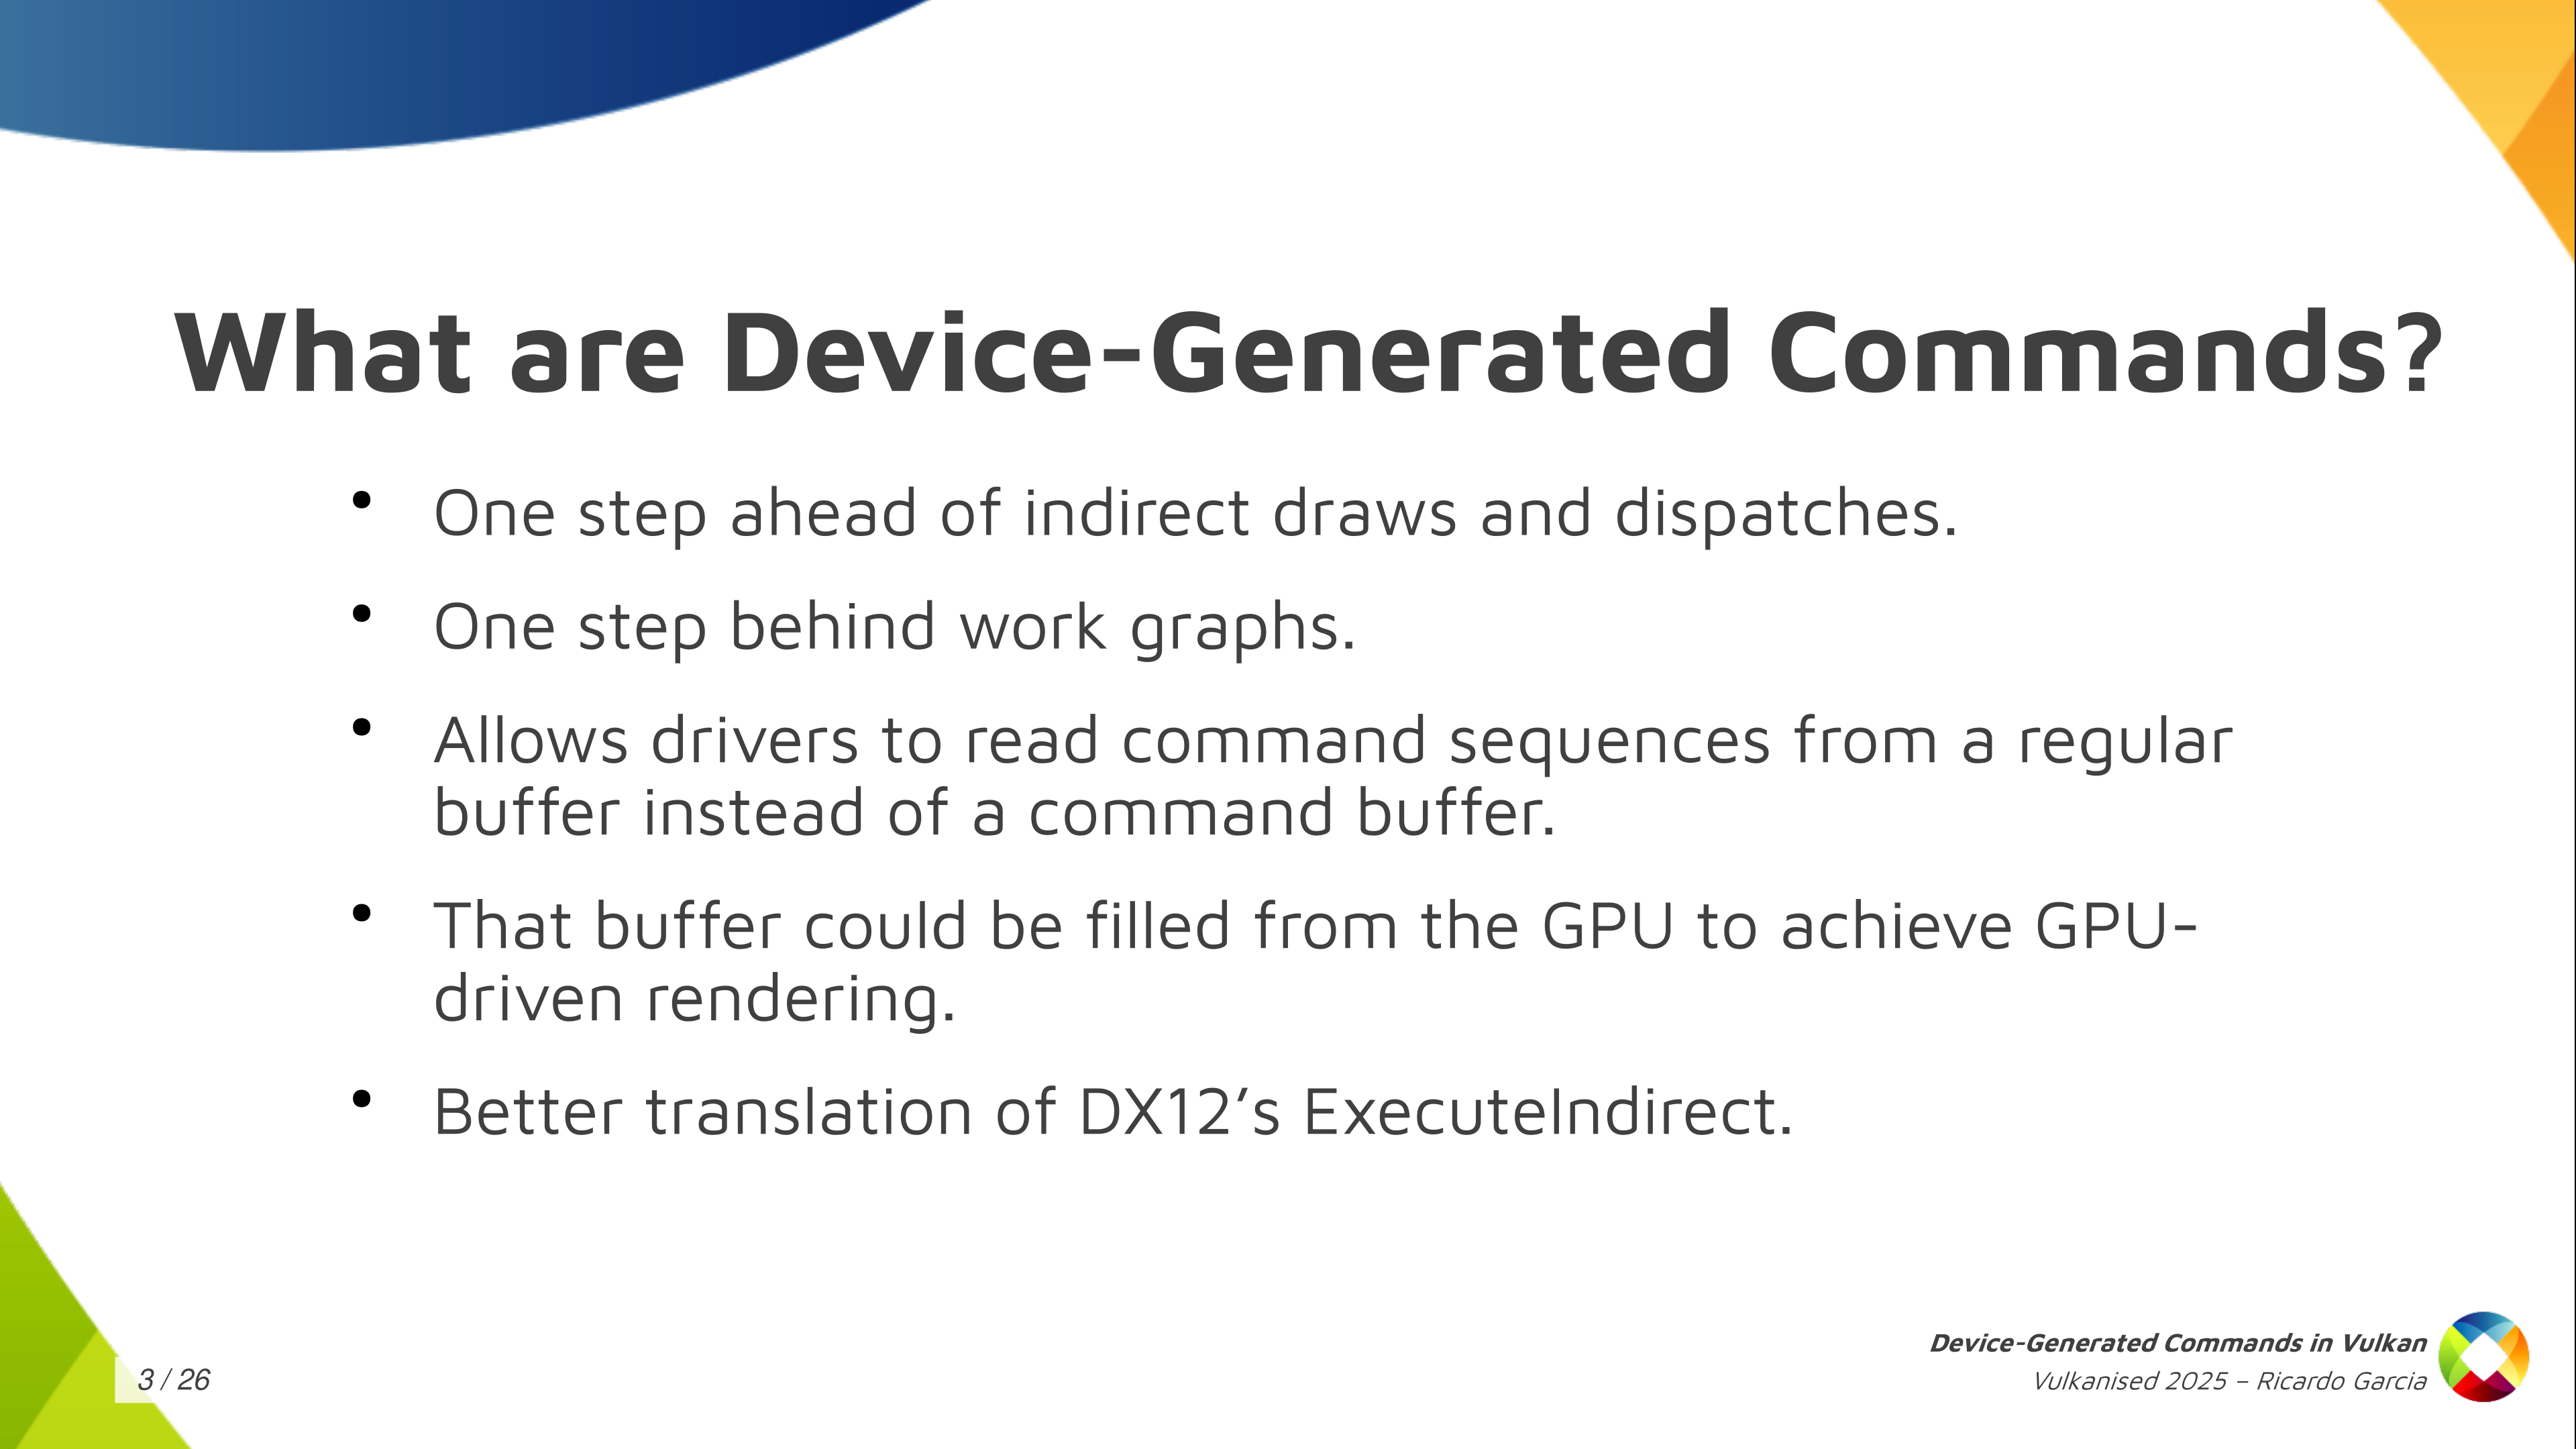
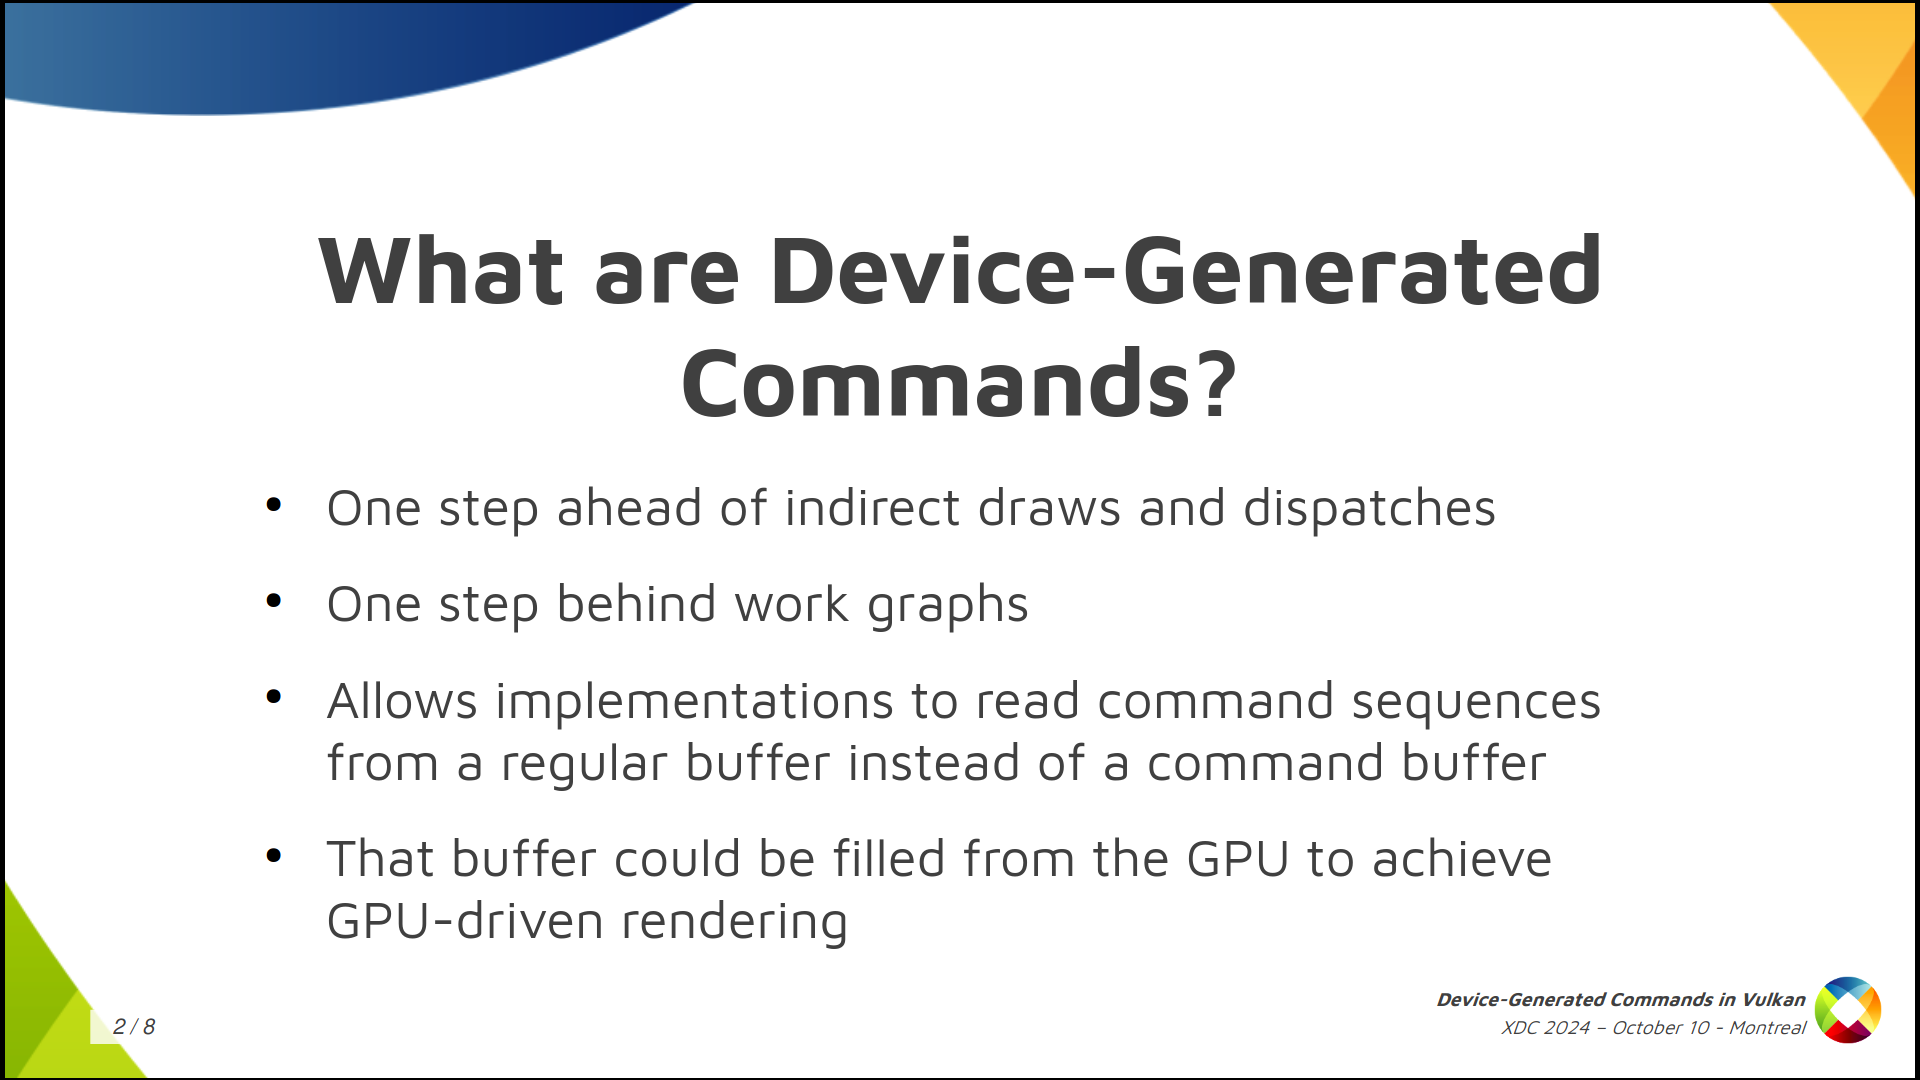
So what are device-generated commands? So basically it’s a new extension, a new functionality, that allows a driver to read command sequences from a regular buffer: something like, for example, a storage buffer, instead of the usual regular command buffers that you use. The contents of the DGC buffer could be filled from the GPU itself. This is what saves you the round trip to the CPU and, that way, you can improve the GPU-driven rendering process in your application. It’s like one step ahead of indirect draws and dispatches, and one step behind work graphs. And it’s also interesting because device-generated commands provide a better foundation for translating DX12. If you have a translation layer that implements DX12 on top of Vulkan like, for example, Proton, and you want to implement ExecuteIndirect, you can do that much more easily with device generated commands. This is important for Proton, which Valve uses to run games on the Steam Deck, i.e. Windows games on top of Linux.
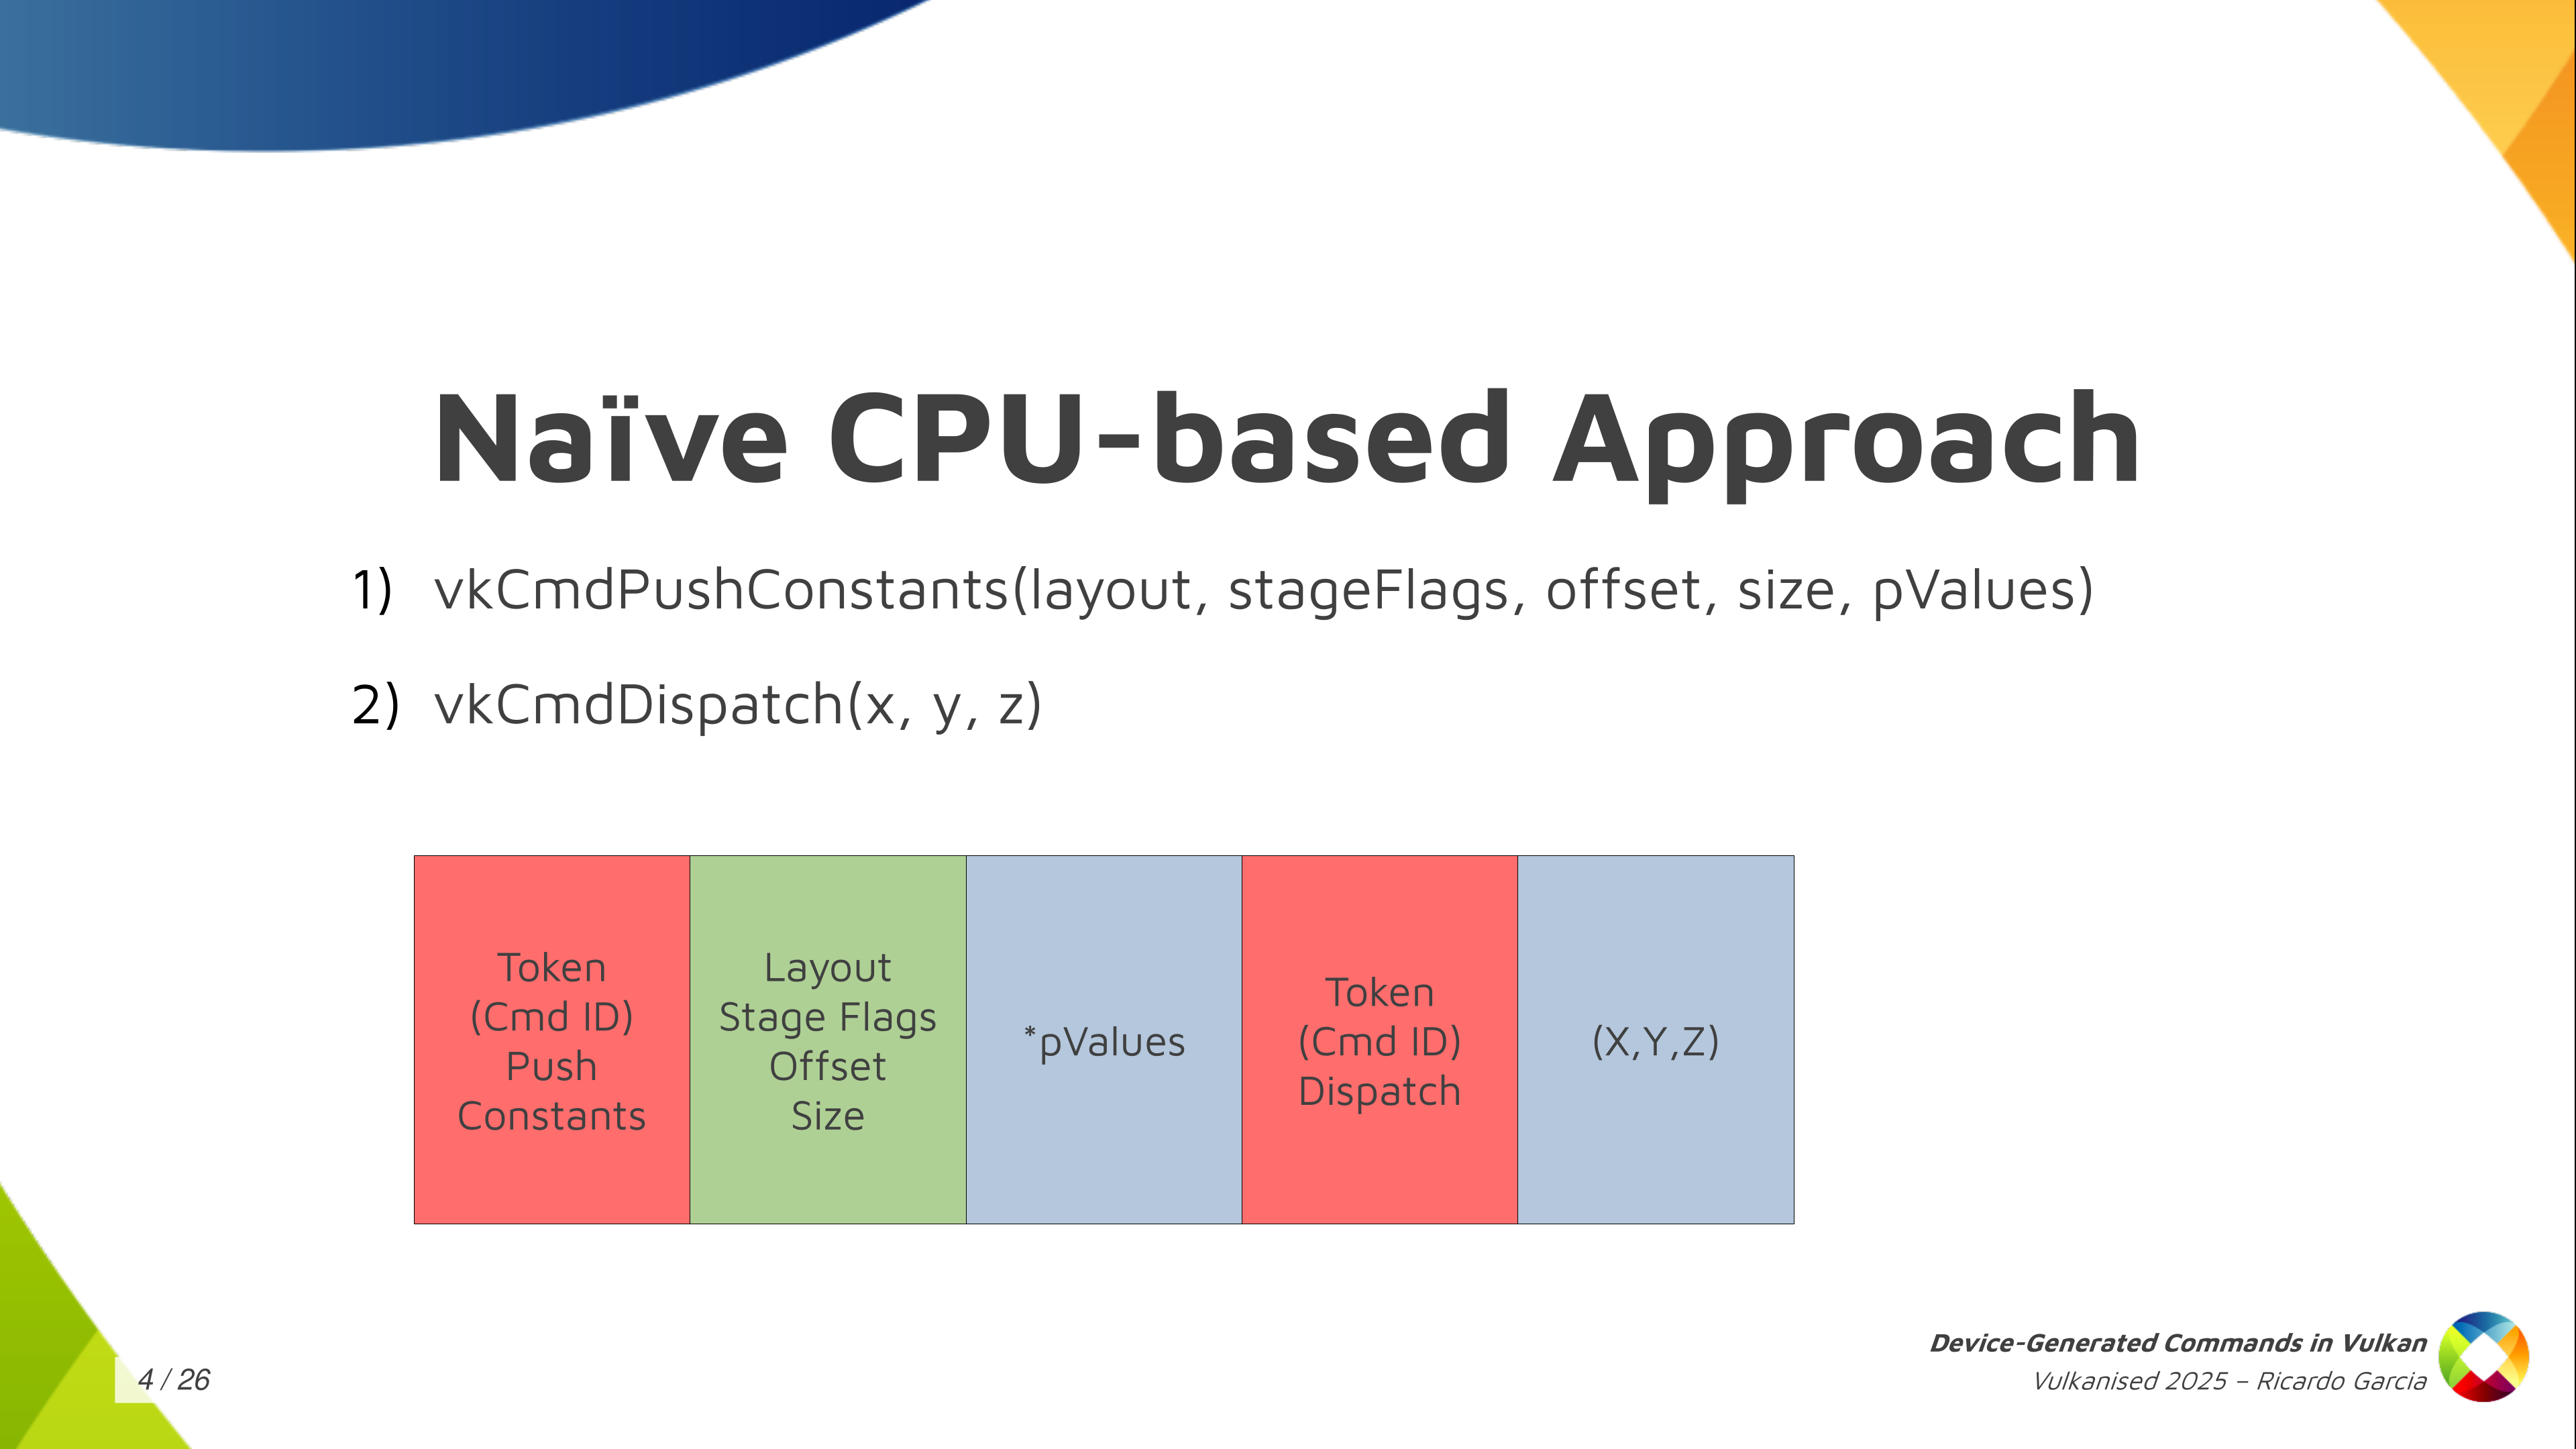
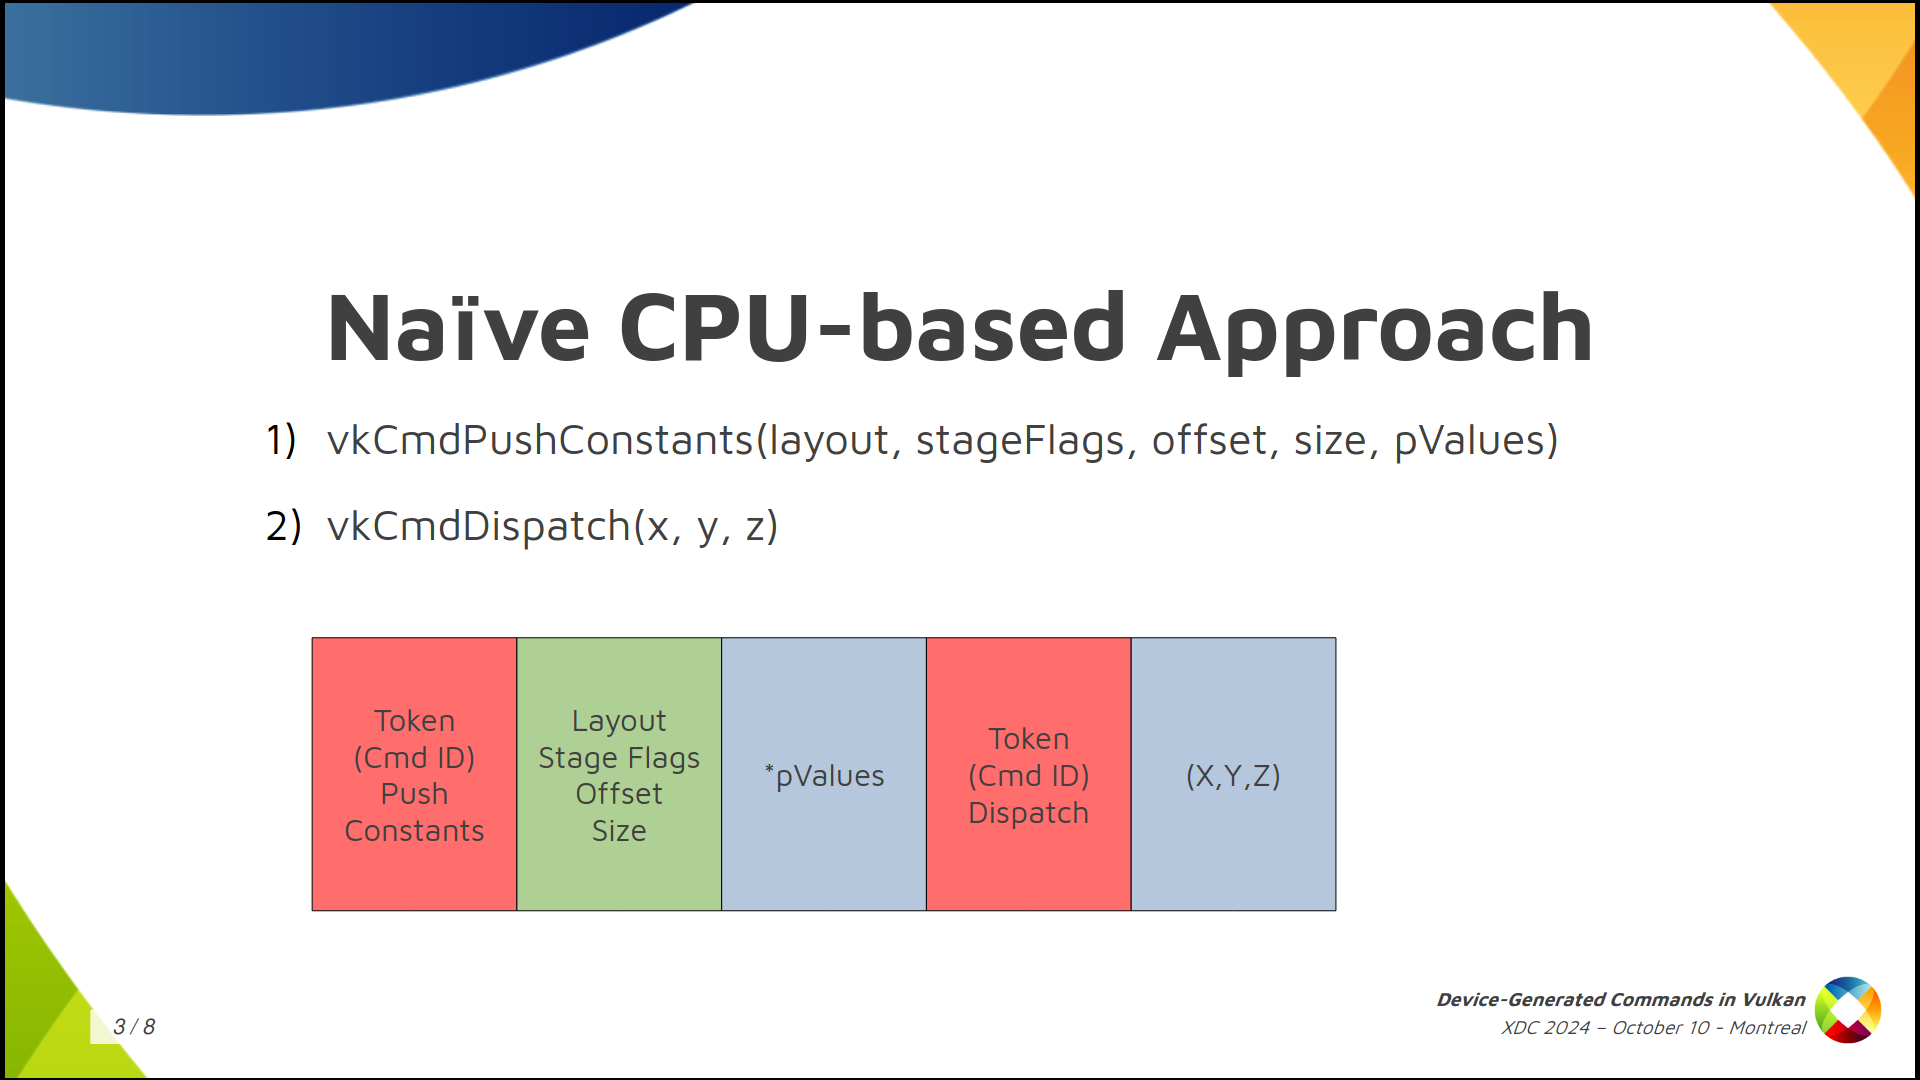
If we set aside Vulkan for a moment, and we stop thinking about GPUs and such, and you want to come up with a naive CPU-based way of running commands from a storage buffer, how do you do that? Well, one immediate solution we can think of is: first of all, I’m going to assign a token, an identifier, to each of the commands I want to run, and I’m going to store that token in the buffer first. Then, depending on what the command is, I want to store more information.
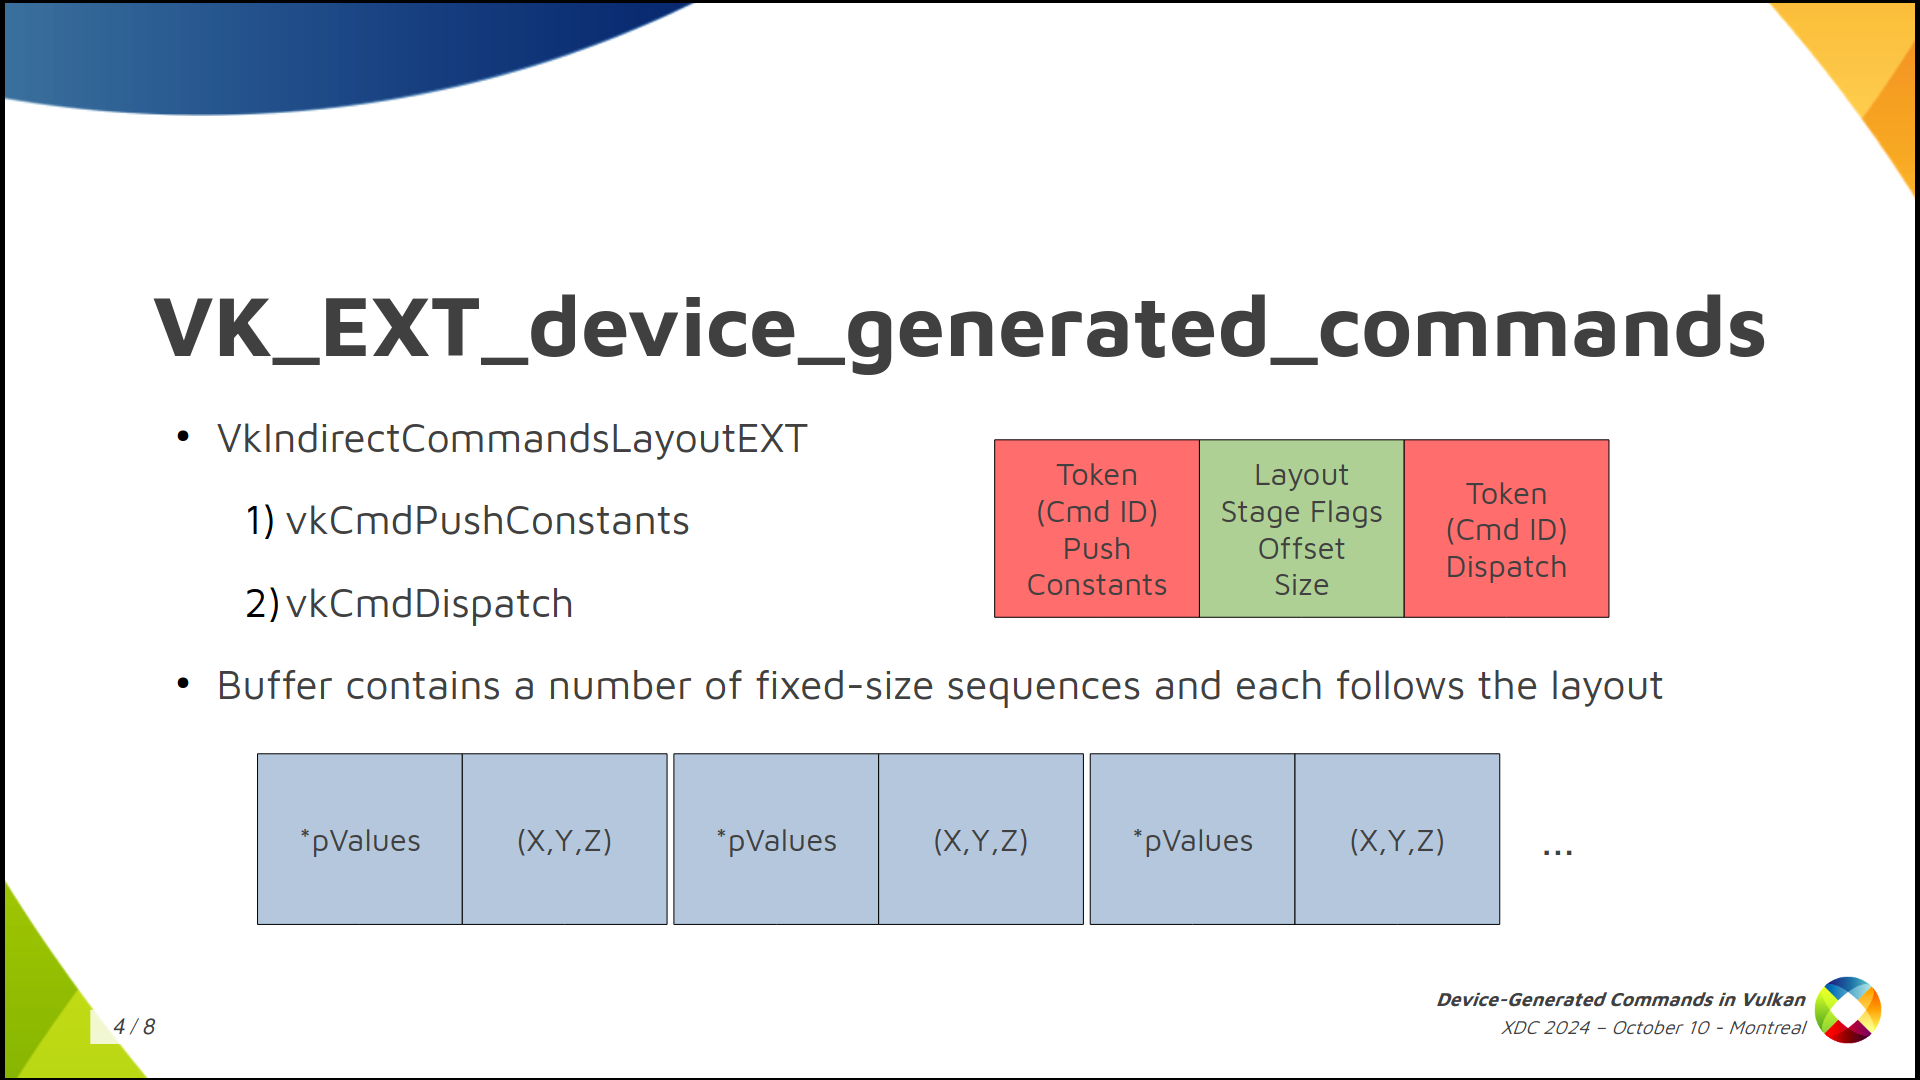
For example, if we have a sequence like we see here in the slide where we have a push constant command followed by dispatch, I’m going to store the token for the push constants command first, then I’m going to store some information that I need for the push constants command, like the pipeline layout, the stage flags, the offset and the size. Then, after that, depending on the size that I said I need, I am going to store the data for the command, which is the push constant values themselves. And then, after that, I’m done with it, and I store the token for the dispatch, and then the dispatch size, and that’s it.
But this doesn’t really work: this is not how GPUs work. A GPU would have a hard time running commands from a buffer if we store them this way. And this is not how Vulkan works because in Vulkan you want to provide as much information as possible in advance and you want to make things run in parallel as much as possible, and take advantage of the GPU.
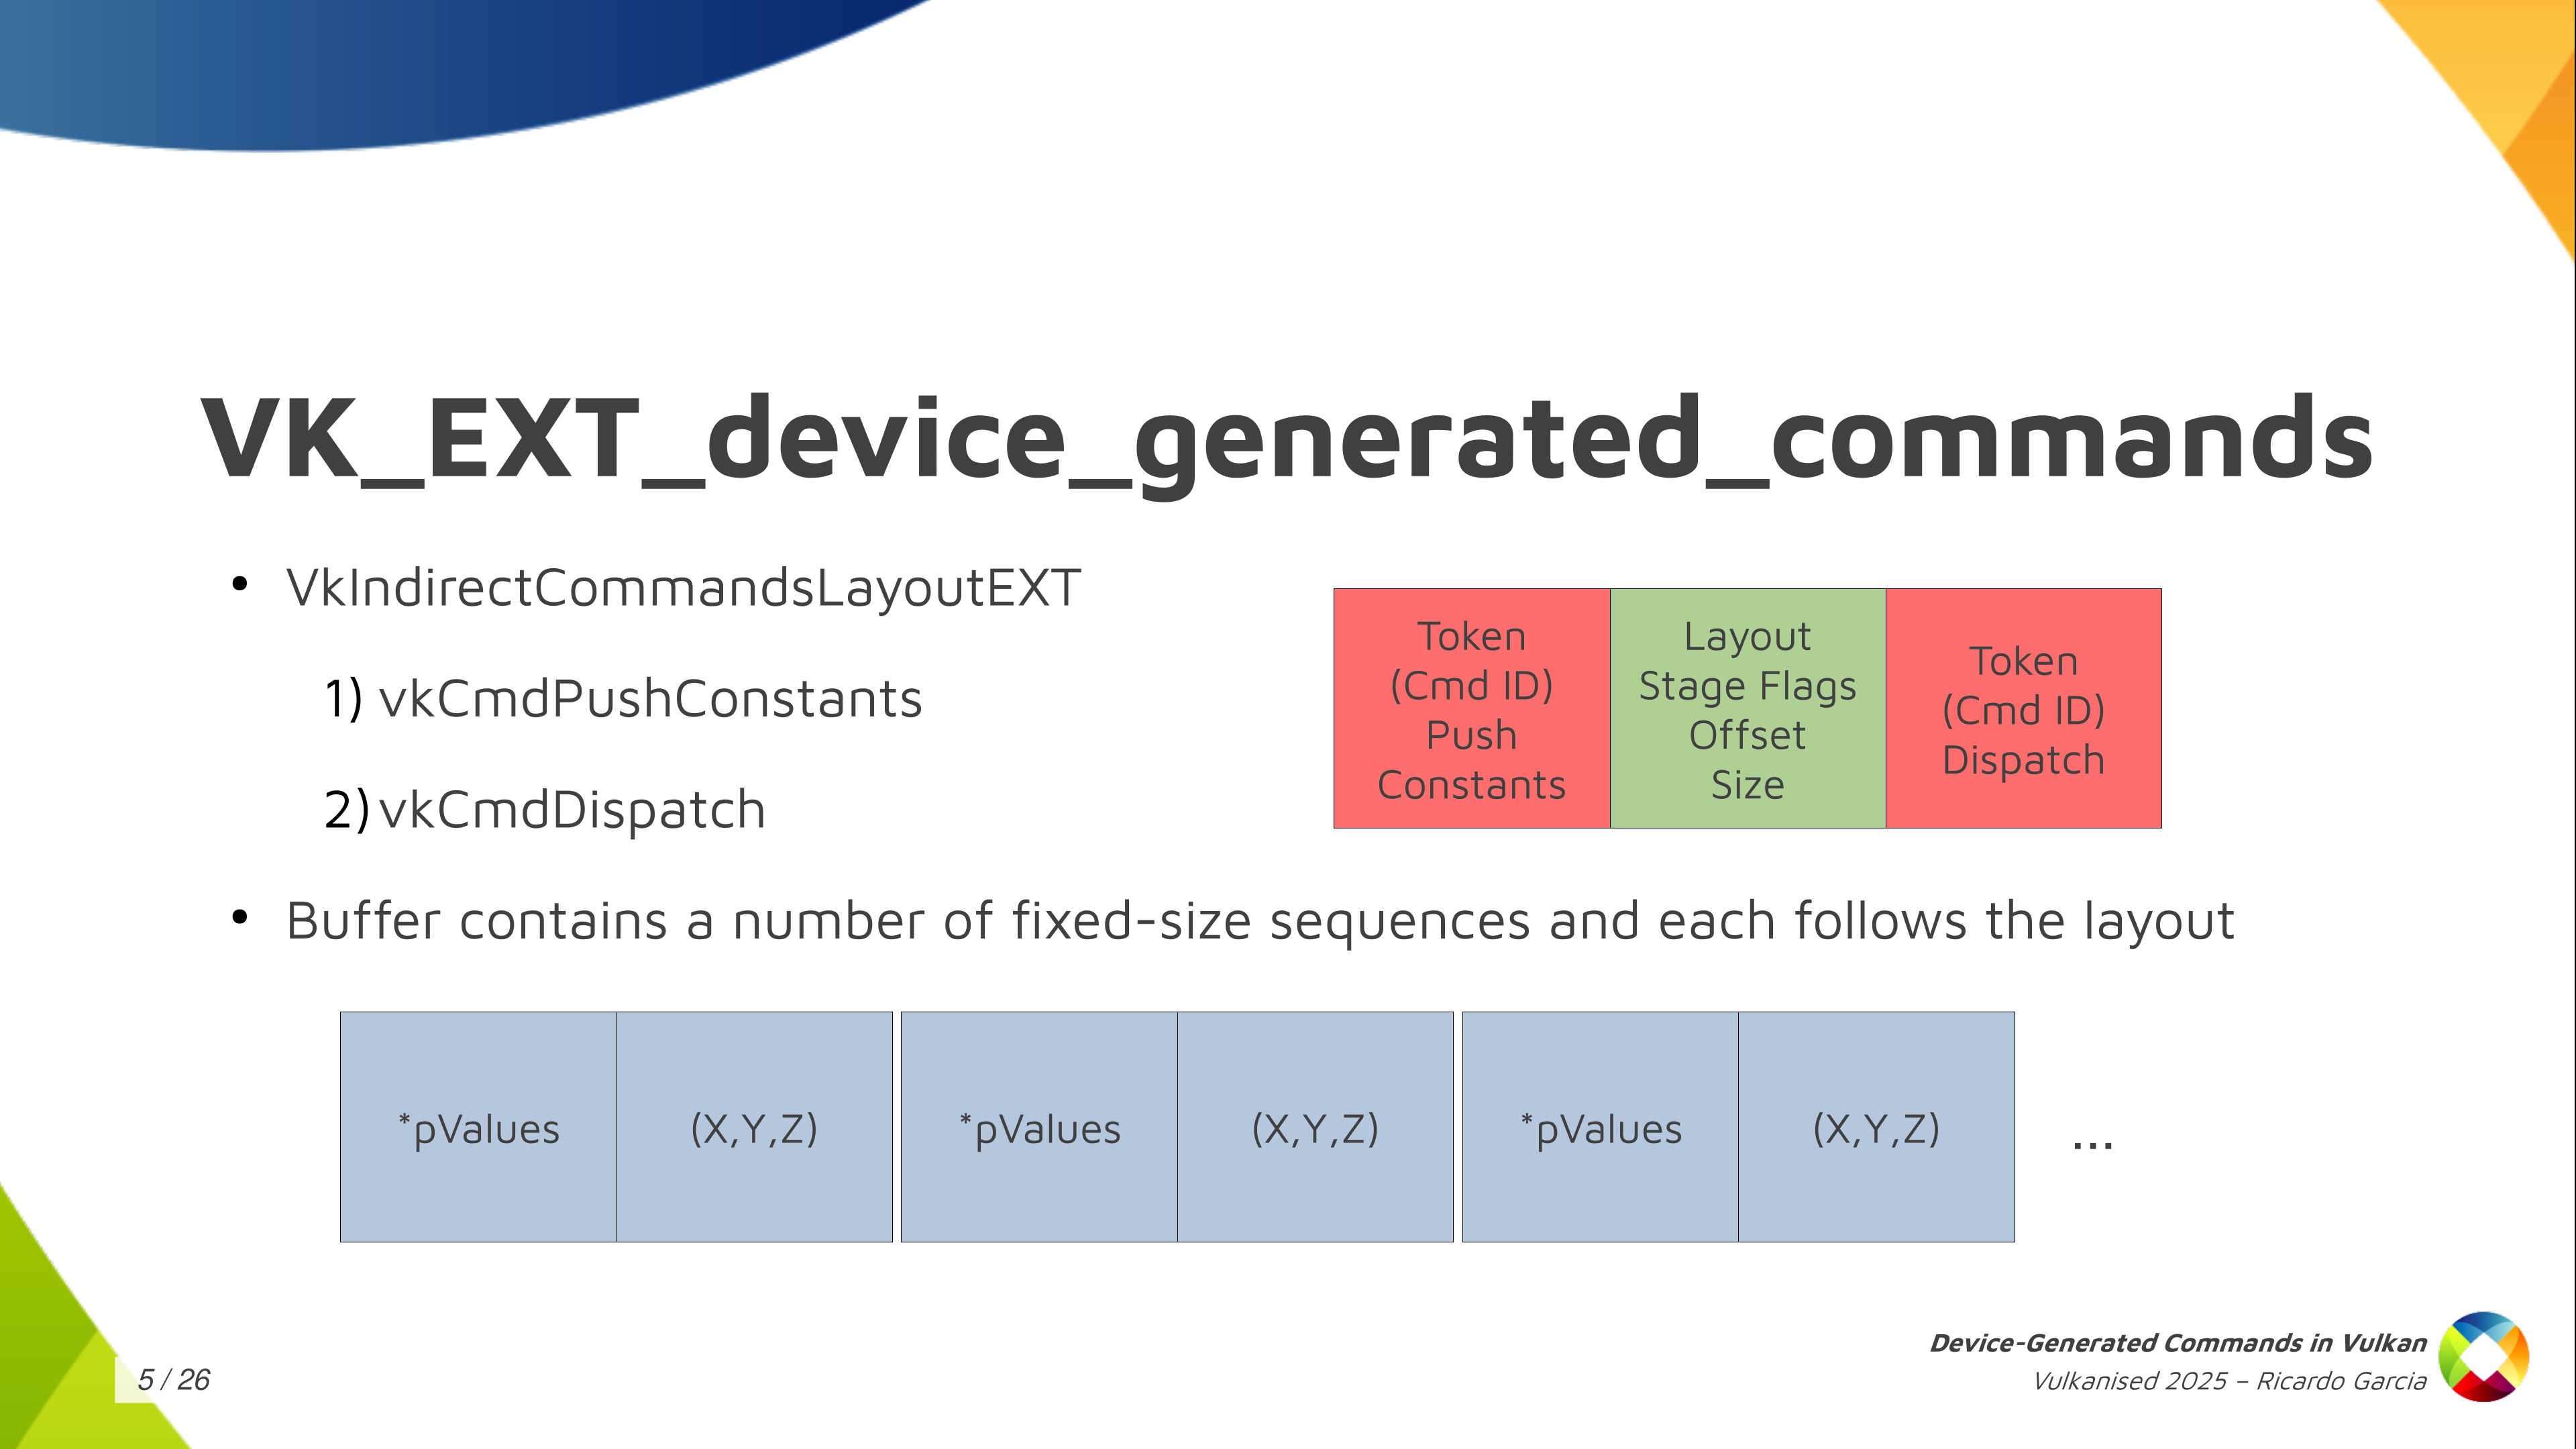
So what do we do in Vulkan? In Vulkan, and in the Vulkan VK_EXT_device_generated_commands extension, we have this central concept, which is called the Indirect Commands Layout. This is the main thing, and if you want to remember just one thing about device generated commands, you can remember this one.
The indirect commands layout is basically like a template for a short sequence of commands. The way you build this template is using the tokens and the command information that we saw colored red and green in the previous slide, and you build that in advance and pass that in advance so that, in the end, in the command buffer itself, in the buffer that you’re filling with commands, you don’t need to store that information. You just store the data for each command. That’s how you make it work.
And the result of this is that with the commands layout, that I said is a template for a short sequence of commands (and by short I mean a handful of them like just three, four or five commands, maybe 10), the DGC buffer can be pretty large, but it does not contain a random sequence of commands where you don’t know what comes next. You can think about it as divided into small chunks that the specification calls sequences, and you get a large number of sequences stored in the buffer but all of them follow this template, this commands layout. In the example we had, push constant followed by dispatch, the contents of the buffer would be push constant values, dispatch size, push content values, dispatch size, many times repeated.
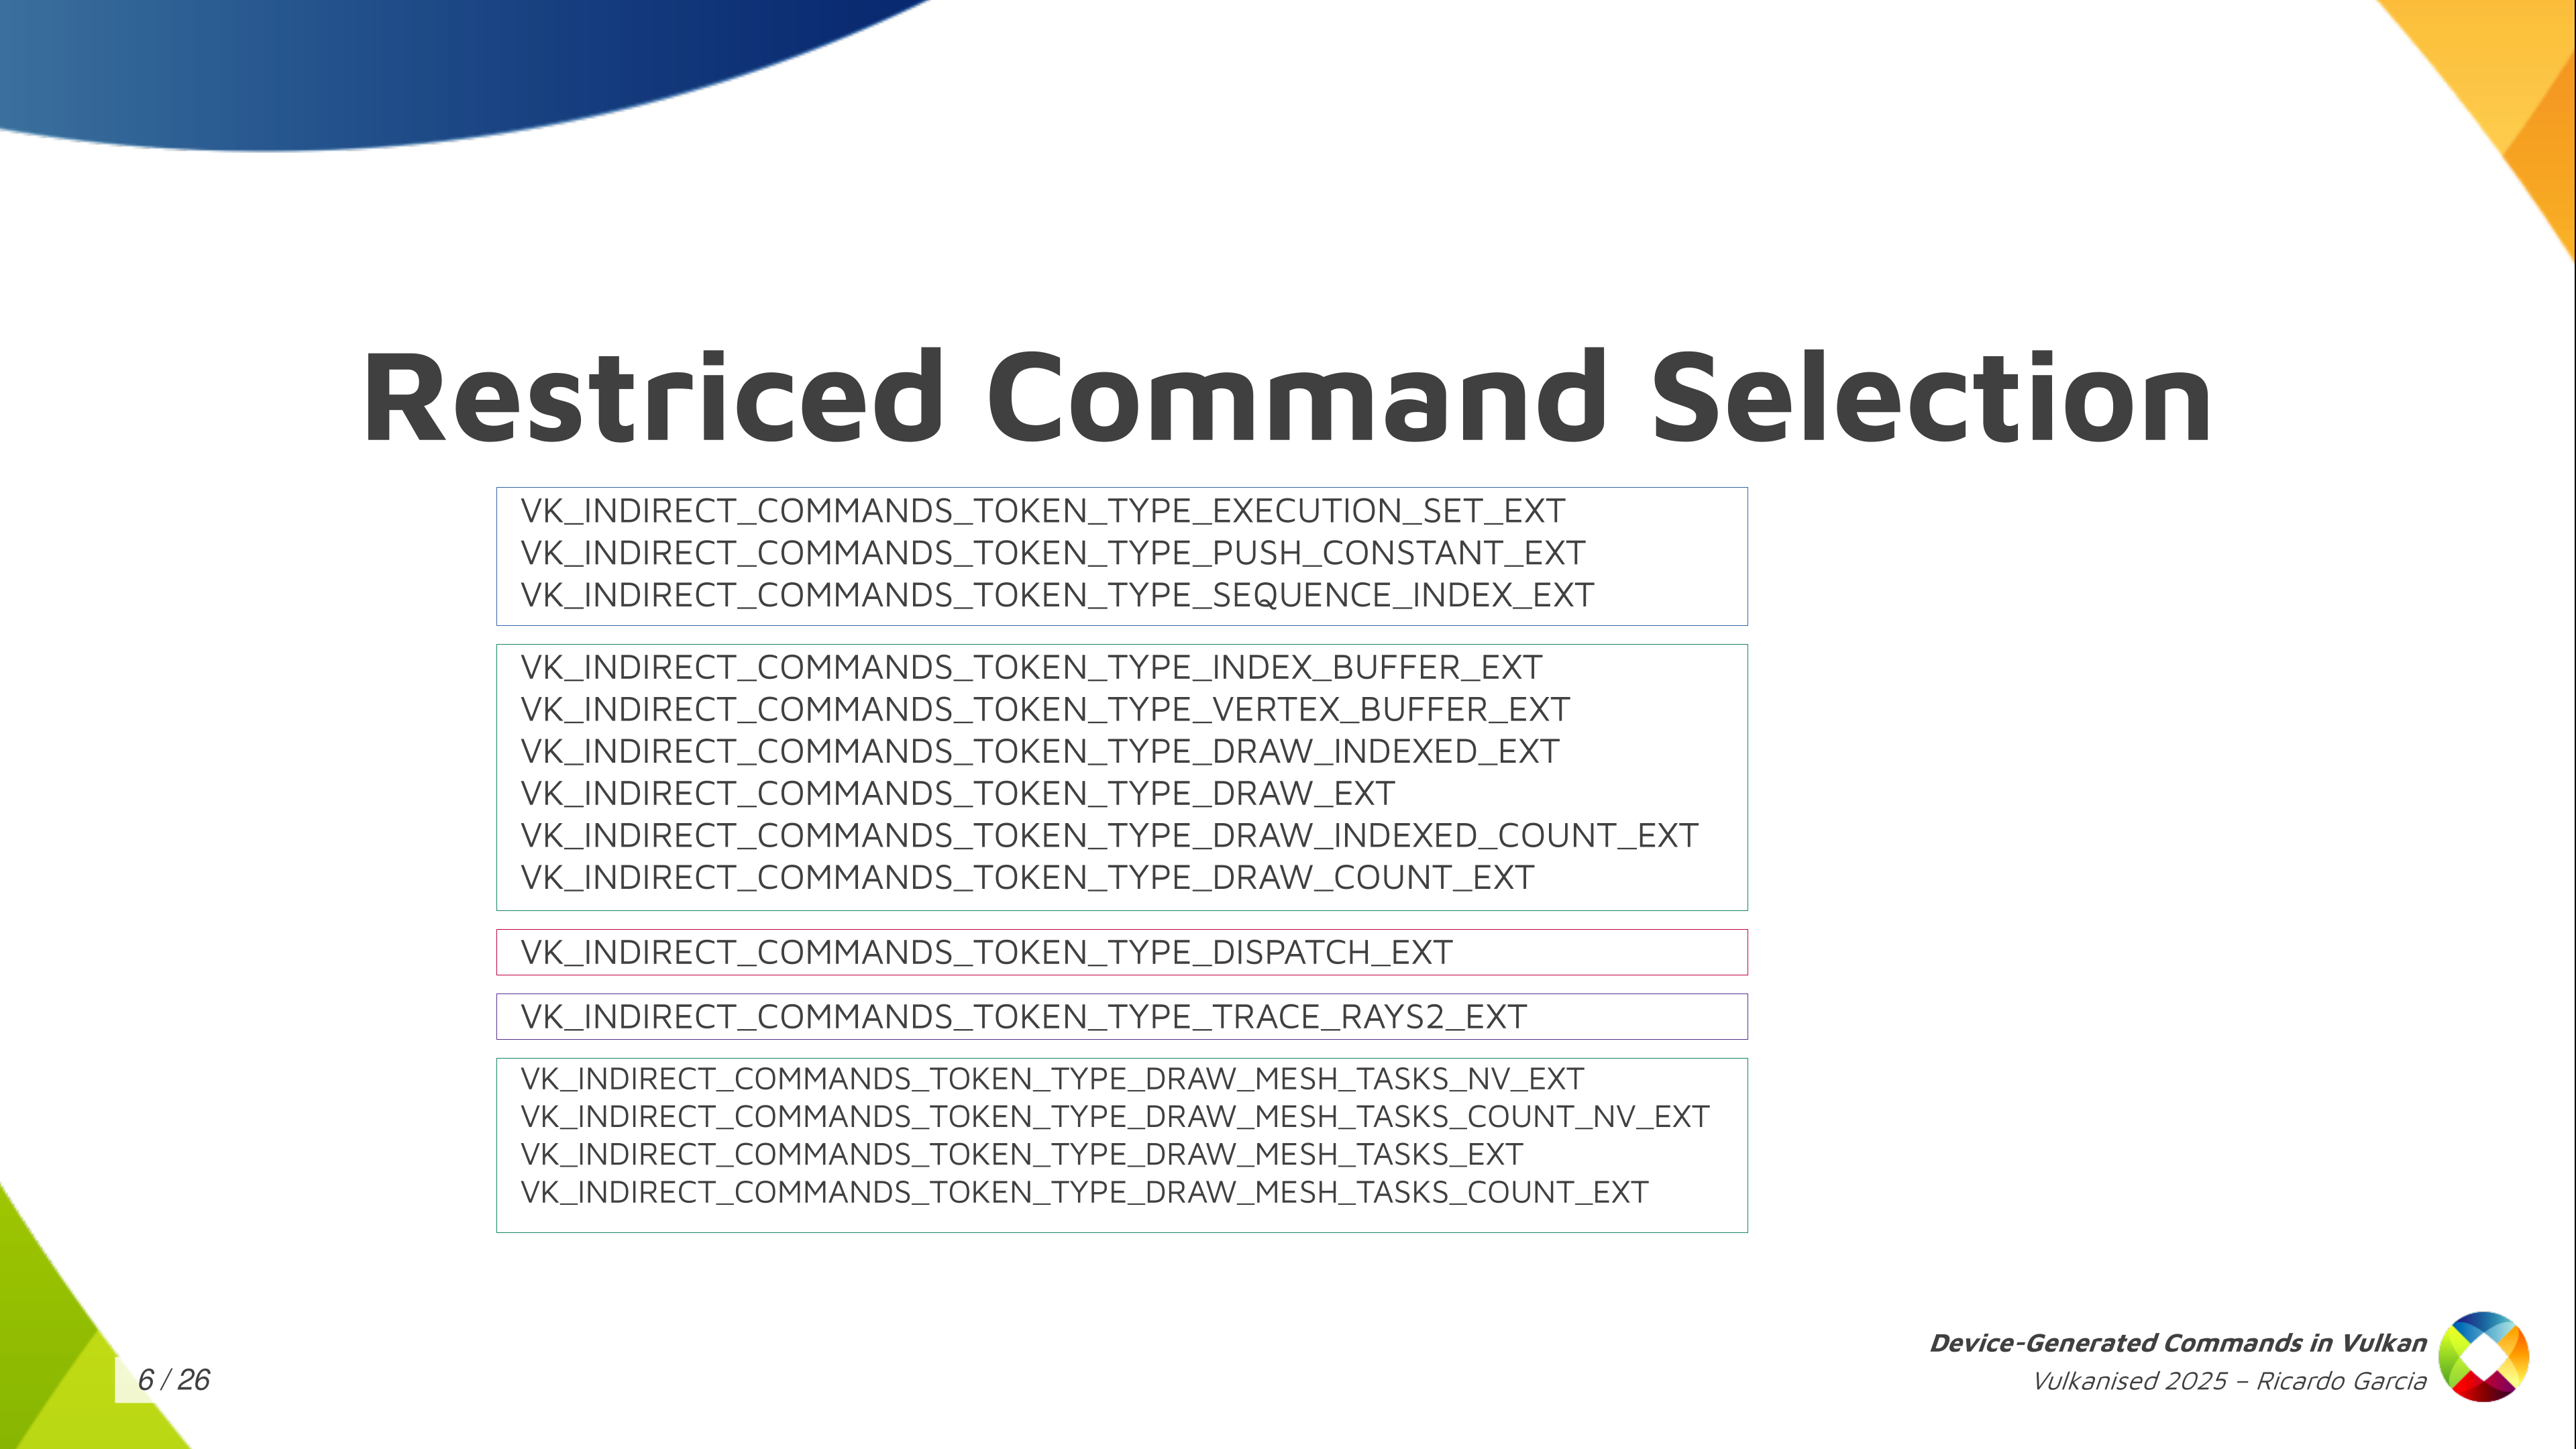
The second thing that Vulkan does to be able to make this work is that we limit a lot what you can do with device-generated commands. There are a lot of things you cannot do. In fact, the only things you can do are the ones that are present in this slide.
You have some things like, for example, update push constants, you can bind index buffers, vertex buffers, and you can draw in different ways, using mesh shading maybe, you can dispatch compute work and you can dispatch raytracing work, and that’s it. You also need to check which features the driver supports, because maybe the driver only supports device-generated commands for compute or ray tracing or graphics. But you notice you cannot do things like start render passes or insert barriers or bind descriptor sets or that kind of thing. No, you cannot do that. You can only do these things.
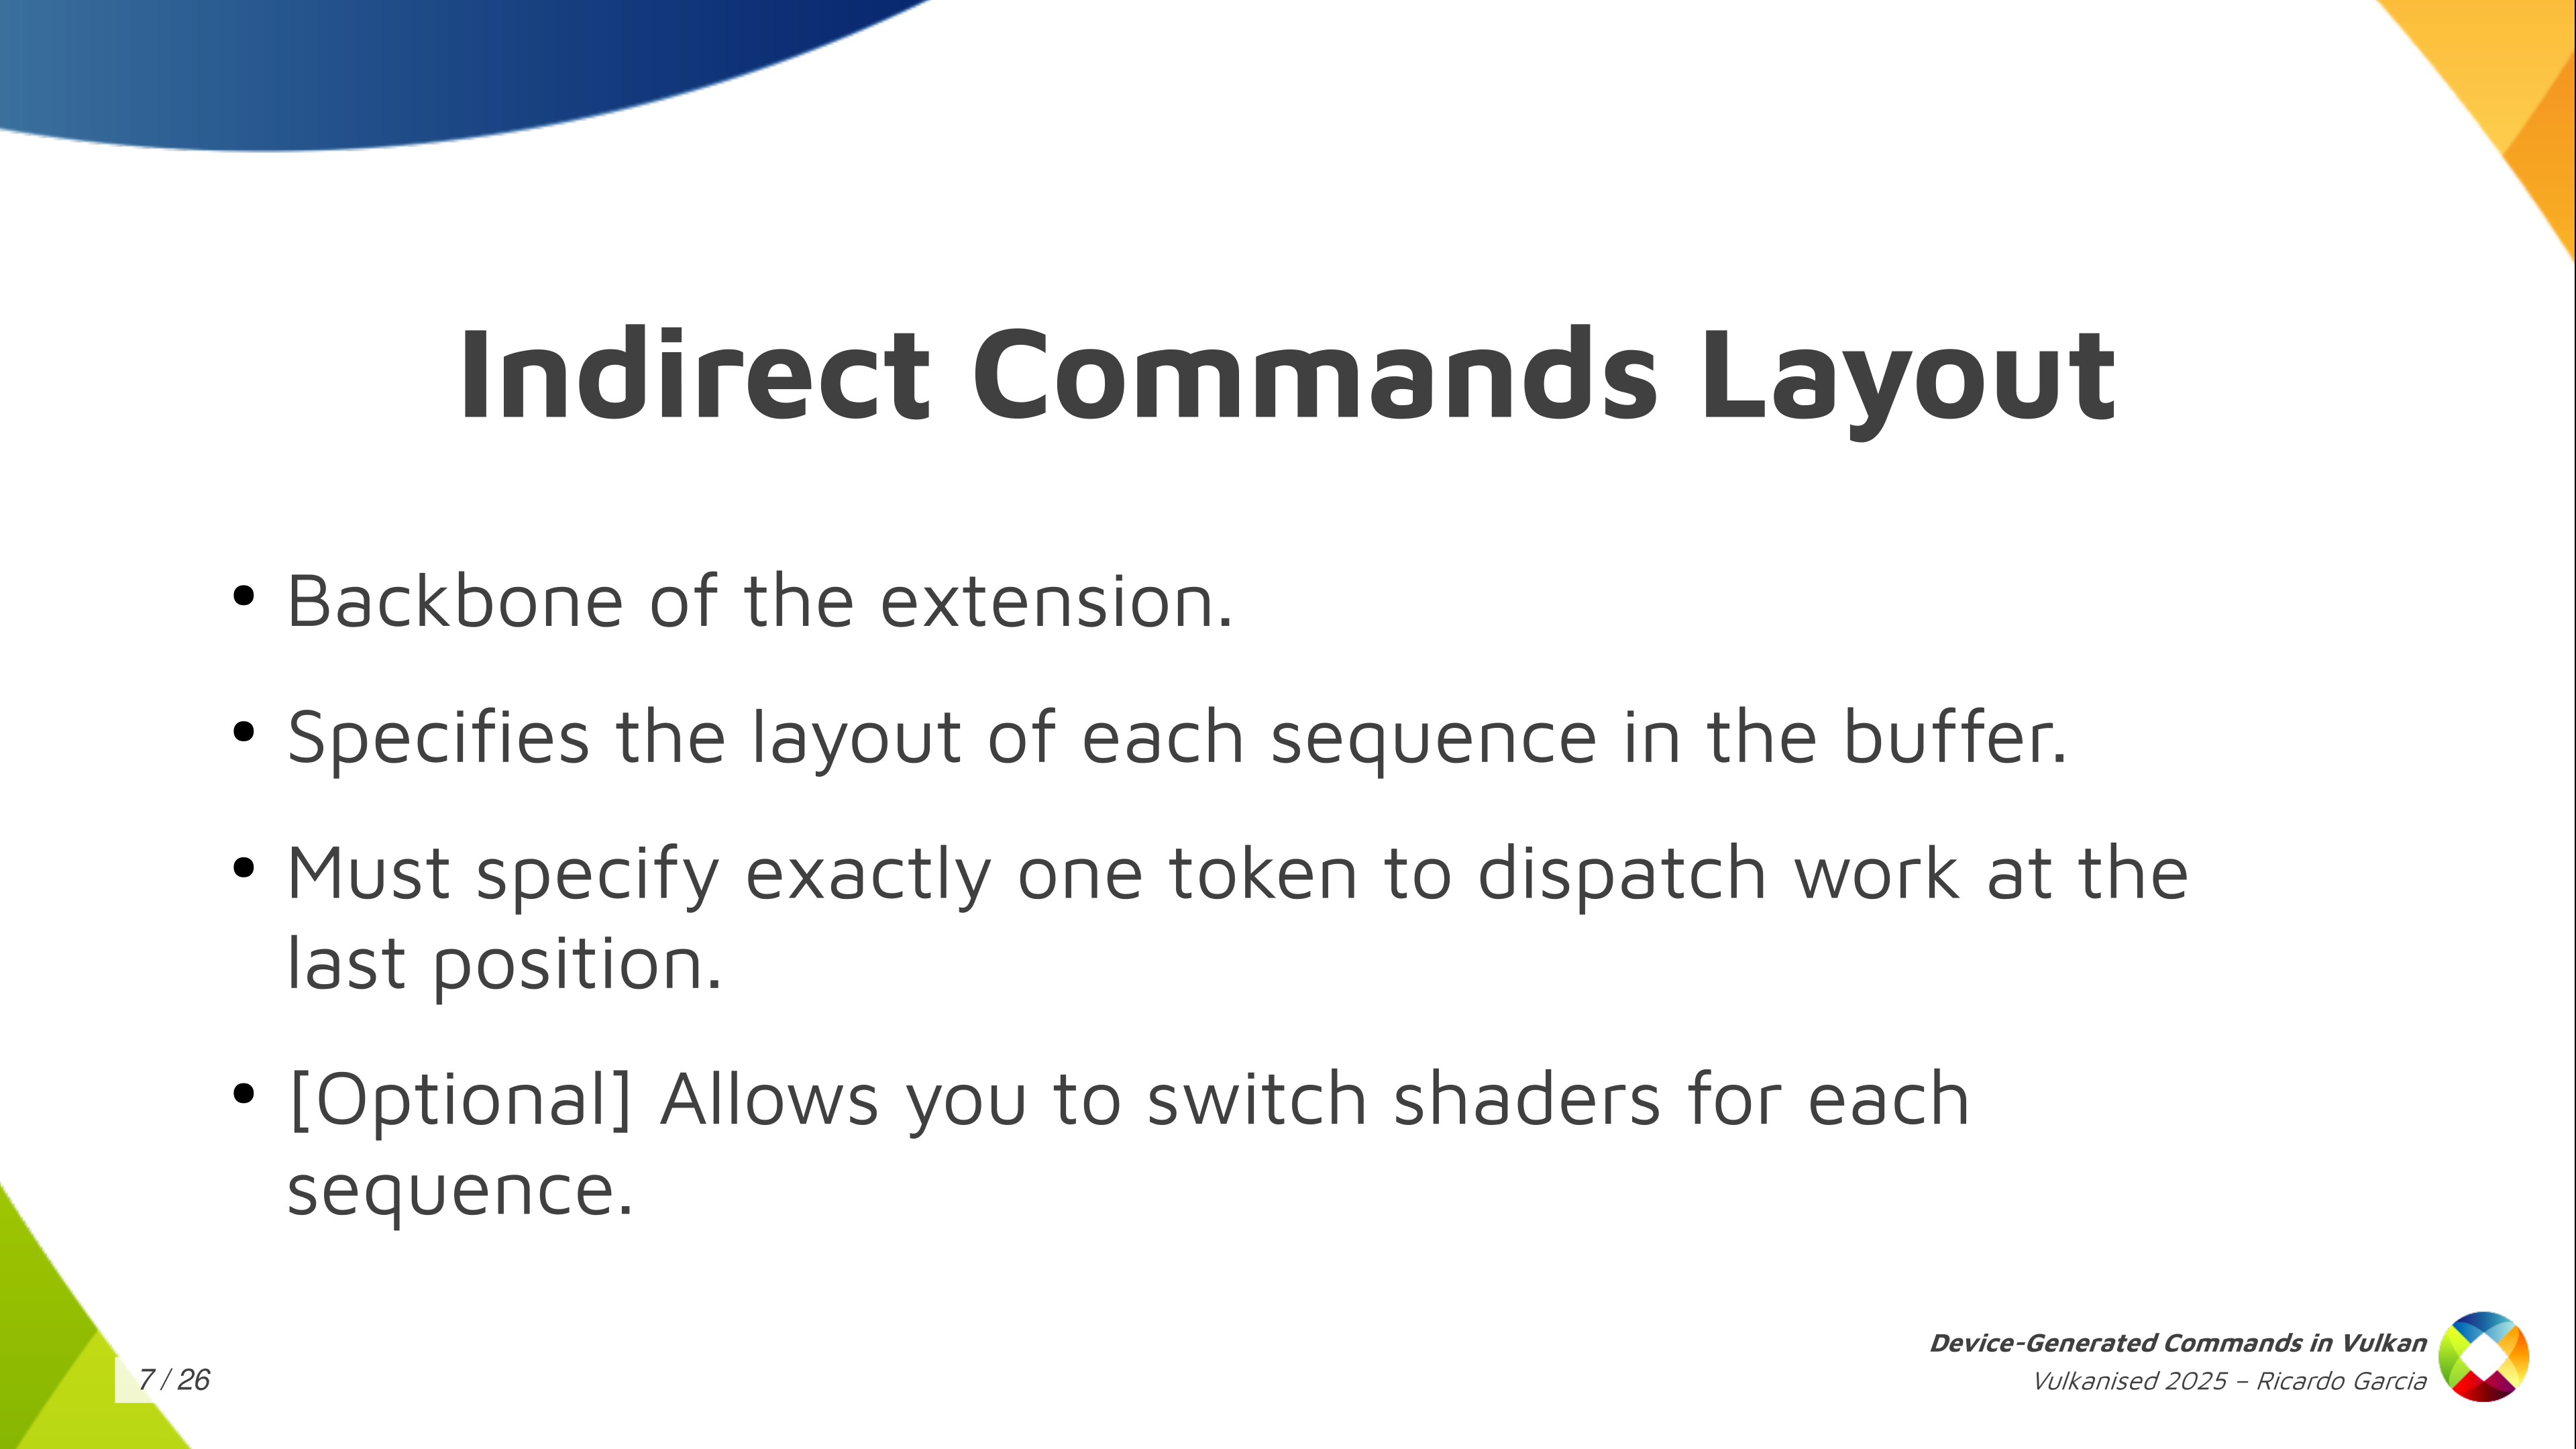
This indirect commands layout, which is the backbone of the extension, specifies, as I said, the layout for each sequence in the buffer and it has additional restrictions. The first one is that it must specify exactly one token that dispatches some kind of work and it must be the last token in the sequence. You cannot have a sequence that dispatches graphics work twice, or that dispatches computer work twice, or that dispatches compute first and then draws, or something like that. No, you can only do one thing with each DGC buffer and each commands layout and it has to be the last one in the sequence.
And one interesting thing that also Vulkan allows you to do, that DX12 doesn’t let you do, is that it allows you (on some drivers, you need to check the properties for this) to choose which shaders you want to use for each sequence. This is a restricted version of the bind pipeline command in Vulkan. You cannot choose arbitrary pipelines and you cannot change arbitrary states but you can switch shaders. For example, if you want to use a different fragment shader for each of the draws in the sequence, you can do that. This is pretty powerful.
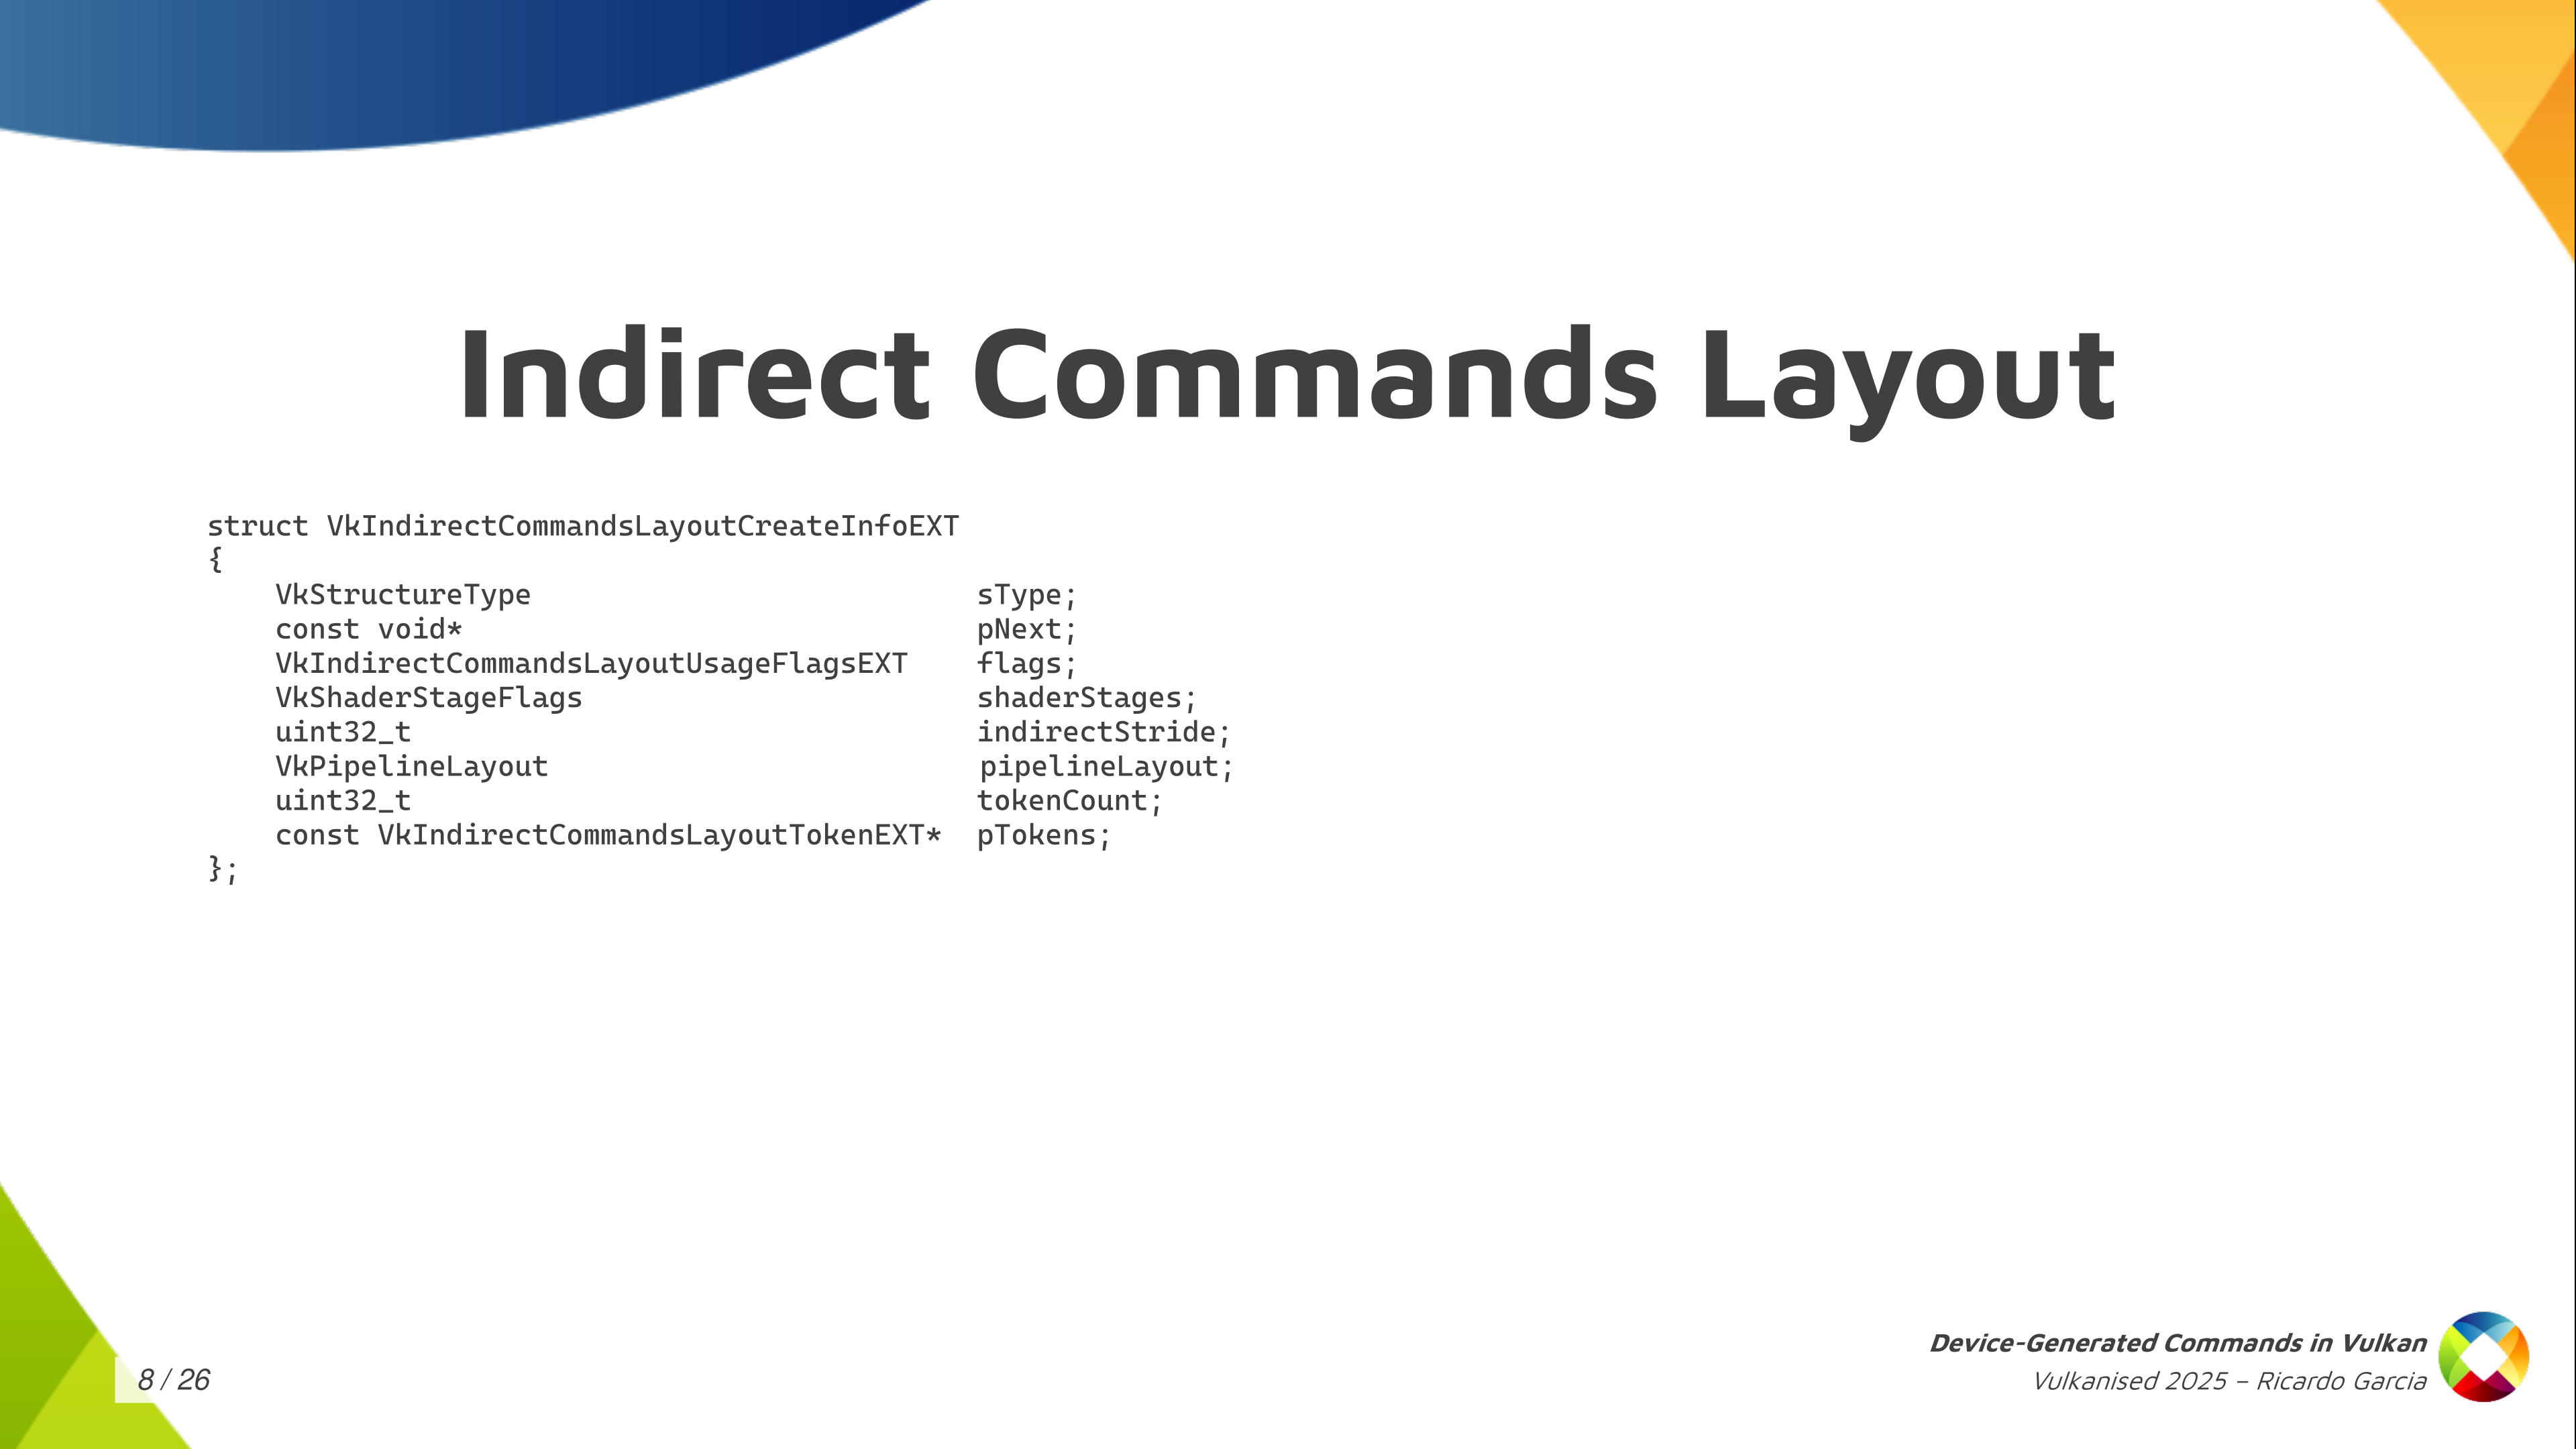
How do you create one of those indirect commands layout? Well, with one of those typical Vulkan calls, to create an object that you pass these CreateInfo structures that are always present in Vulkan.
And, as you can see, you have to pass these shader stages that will be used, will be active, while you draw or you execute those indirect commands. You have to pass the pipeline layout, and you have to pass in an indirect stride. The stride is the amount of bytes for each sequence, from the start of a sequence to the next one. And the most important information of course, is the list of tokens: an array of tokens that you pass as the token count and then the pointer to the first element.
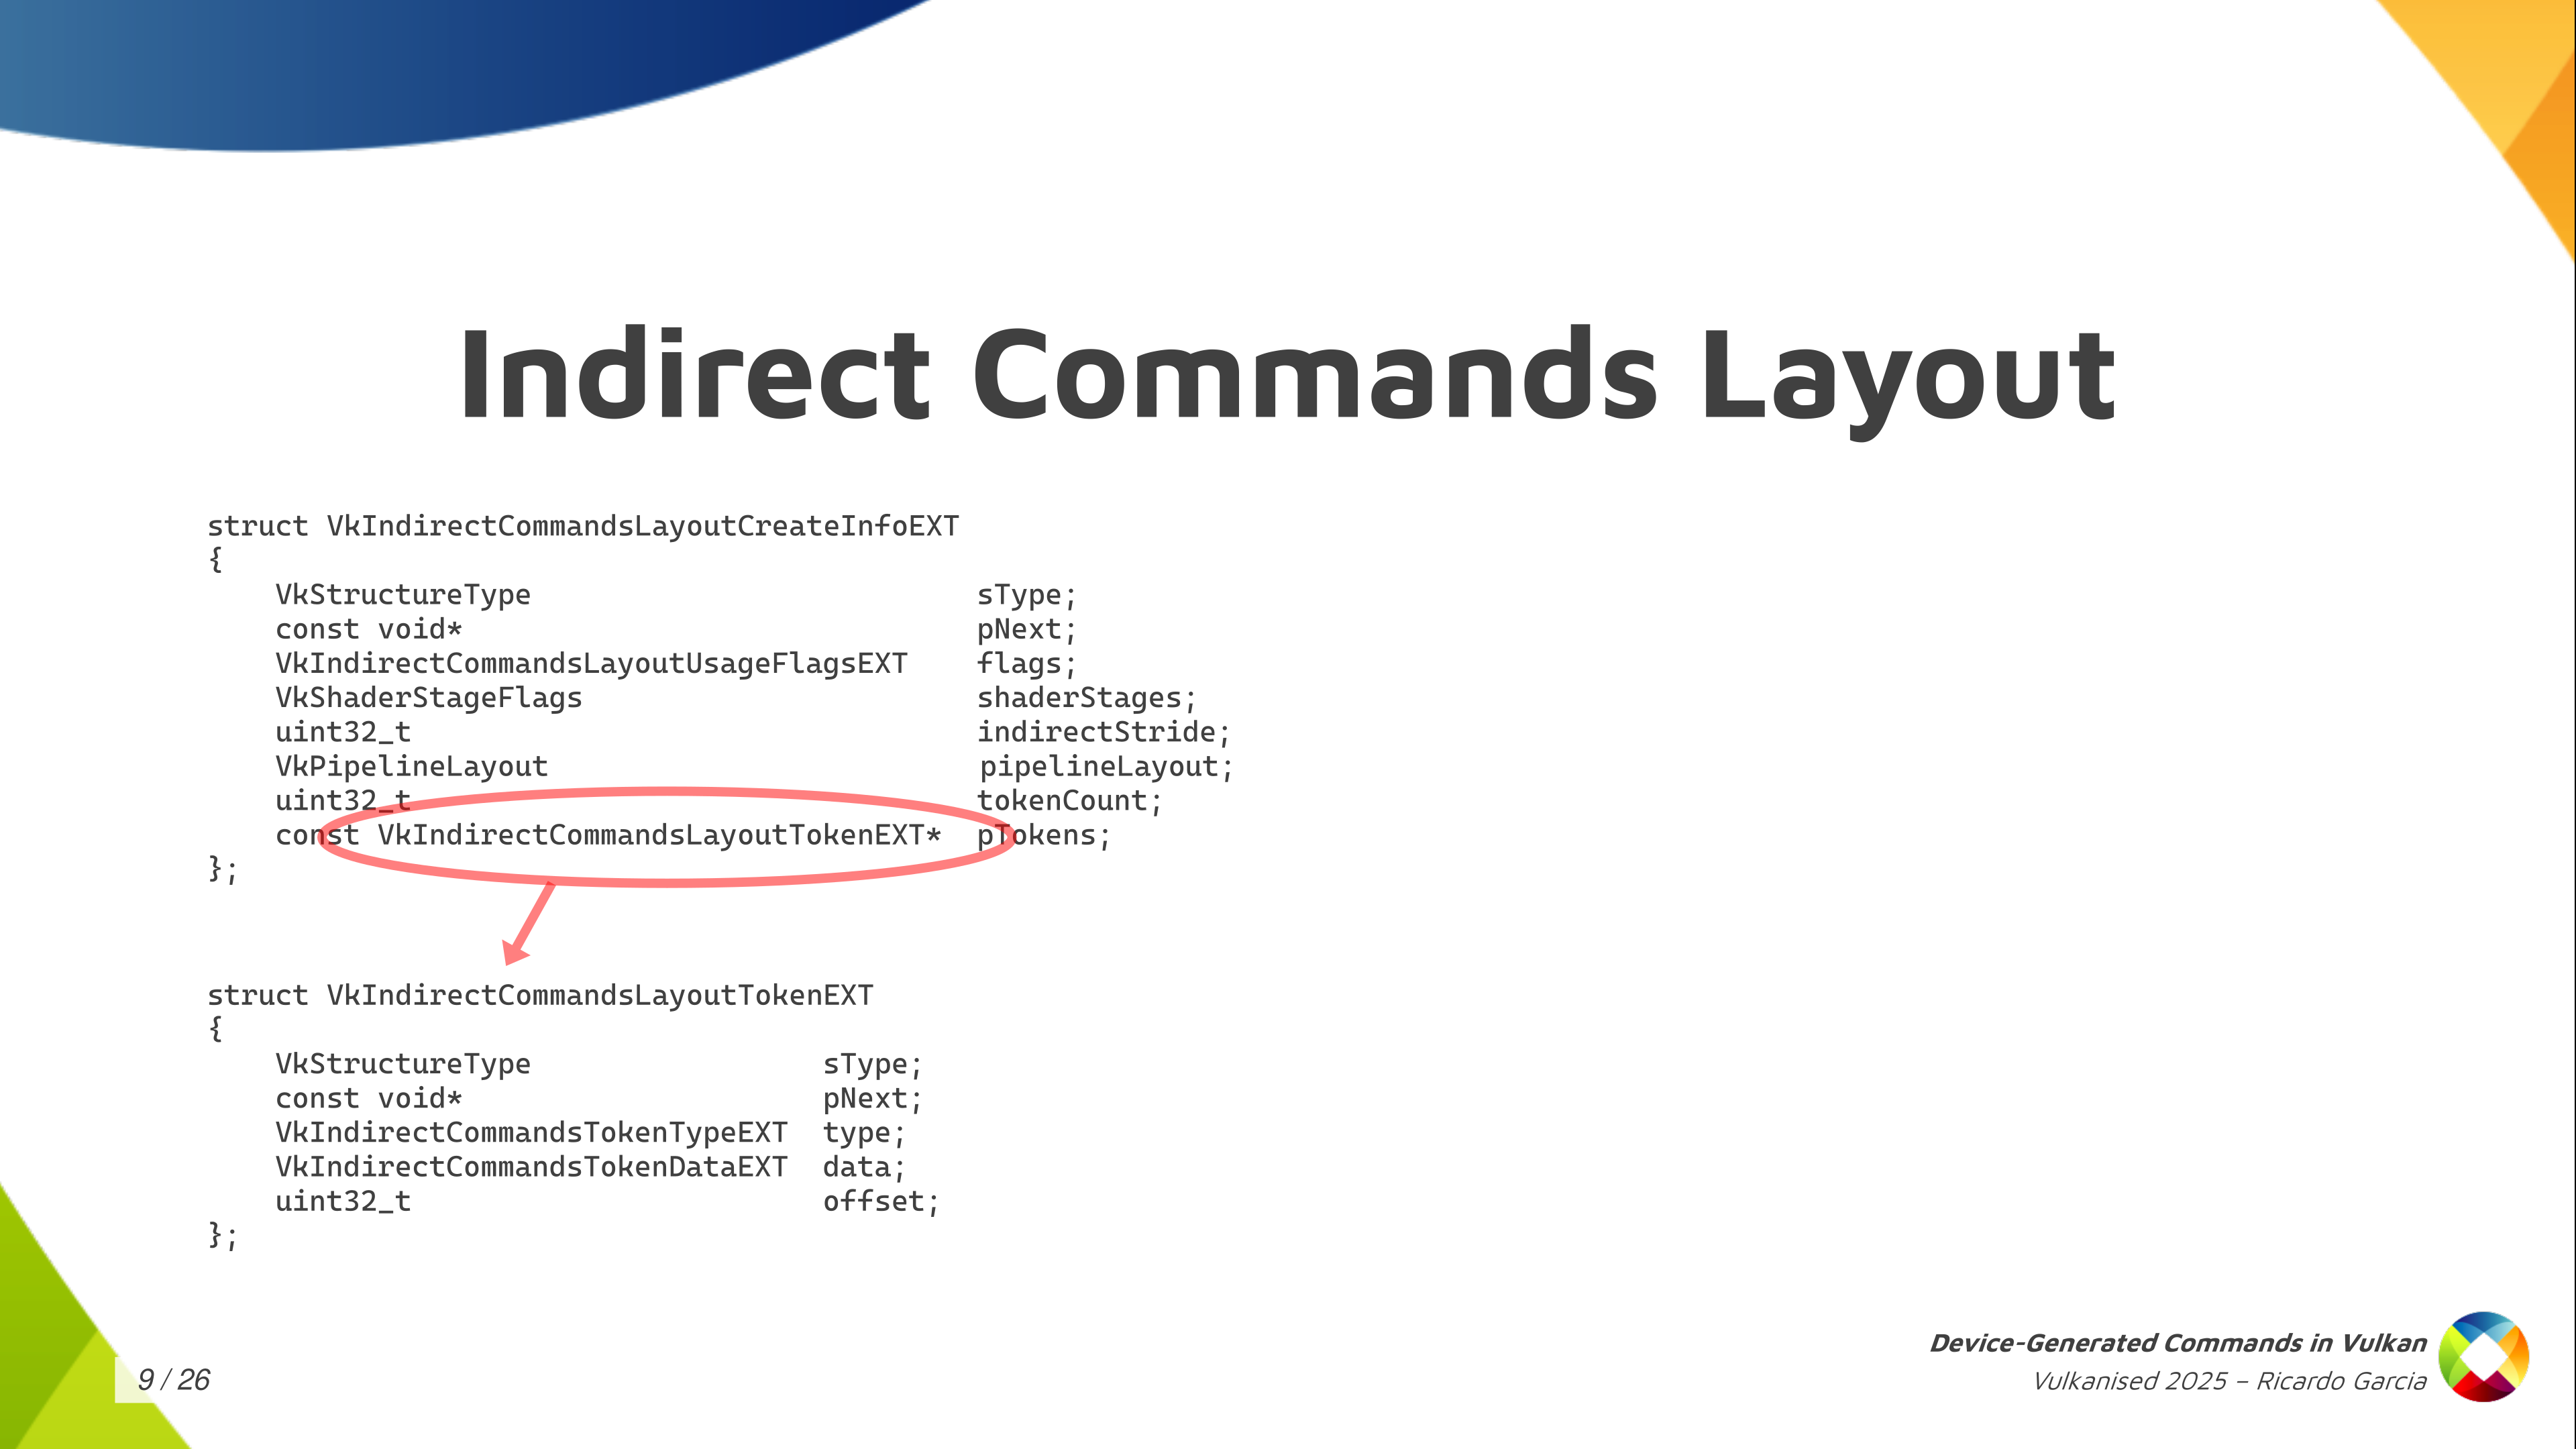
Now, each of those tokens contains a bit of information and the most important one is the type, of course. Then you can also pass an offset that tells you how many bytes into the sequence for the start of the data for that command. Together with the stride, it tells us that you don’t need to pack the data for those commands together. If you want to include some padding, because it’s convenient or something, you can do that.

And then there’s also the token data which allows you to pass the information that I was painting in green in other slides like information to be able to run the command with some extra parameters. Only a few tokens, a few commands, need that. Depending on the command it is, you have to fill one of the pointers in the union but for most commands they don’t need this kind of information. Knowing which command it is you just know you are going to find some fixed data in the buffer and you just read that and process that.
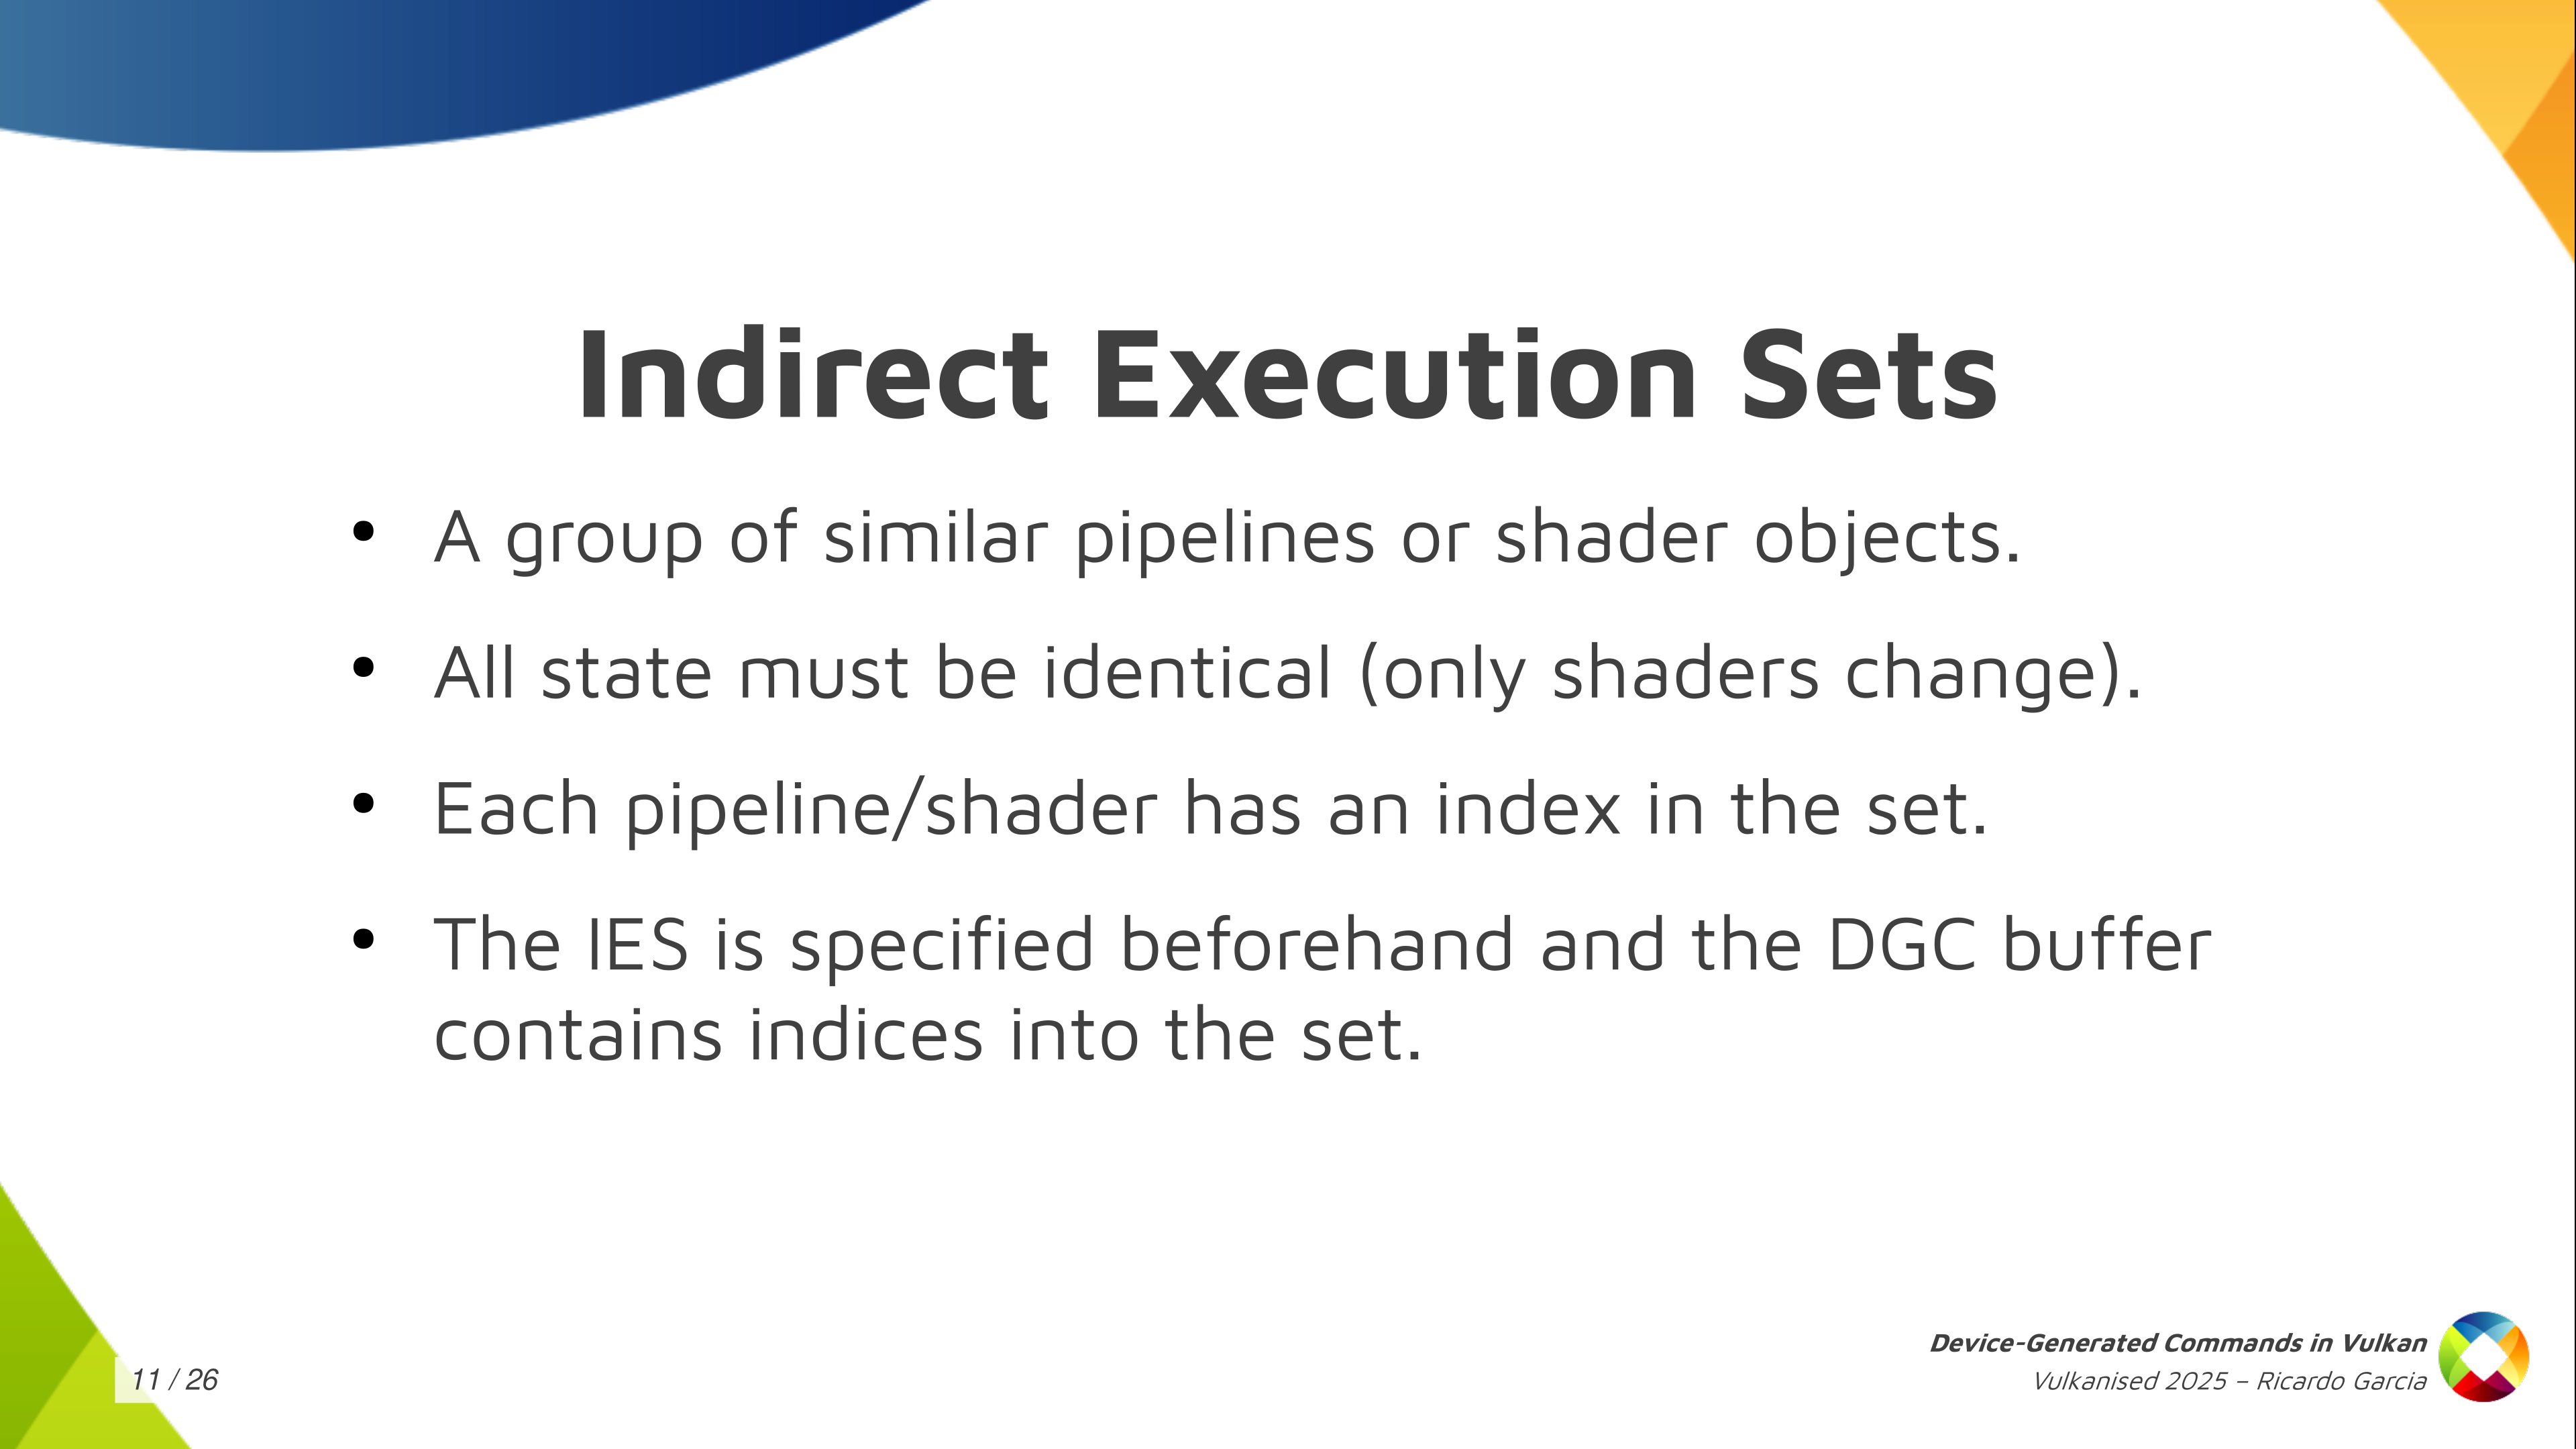
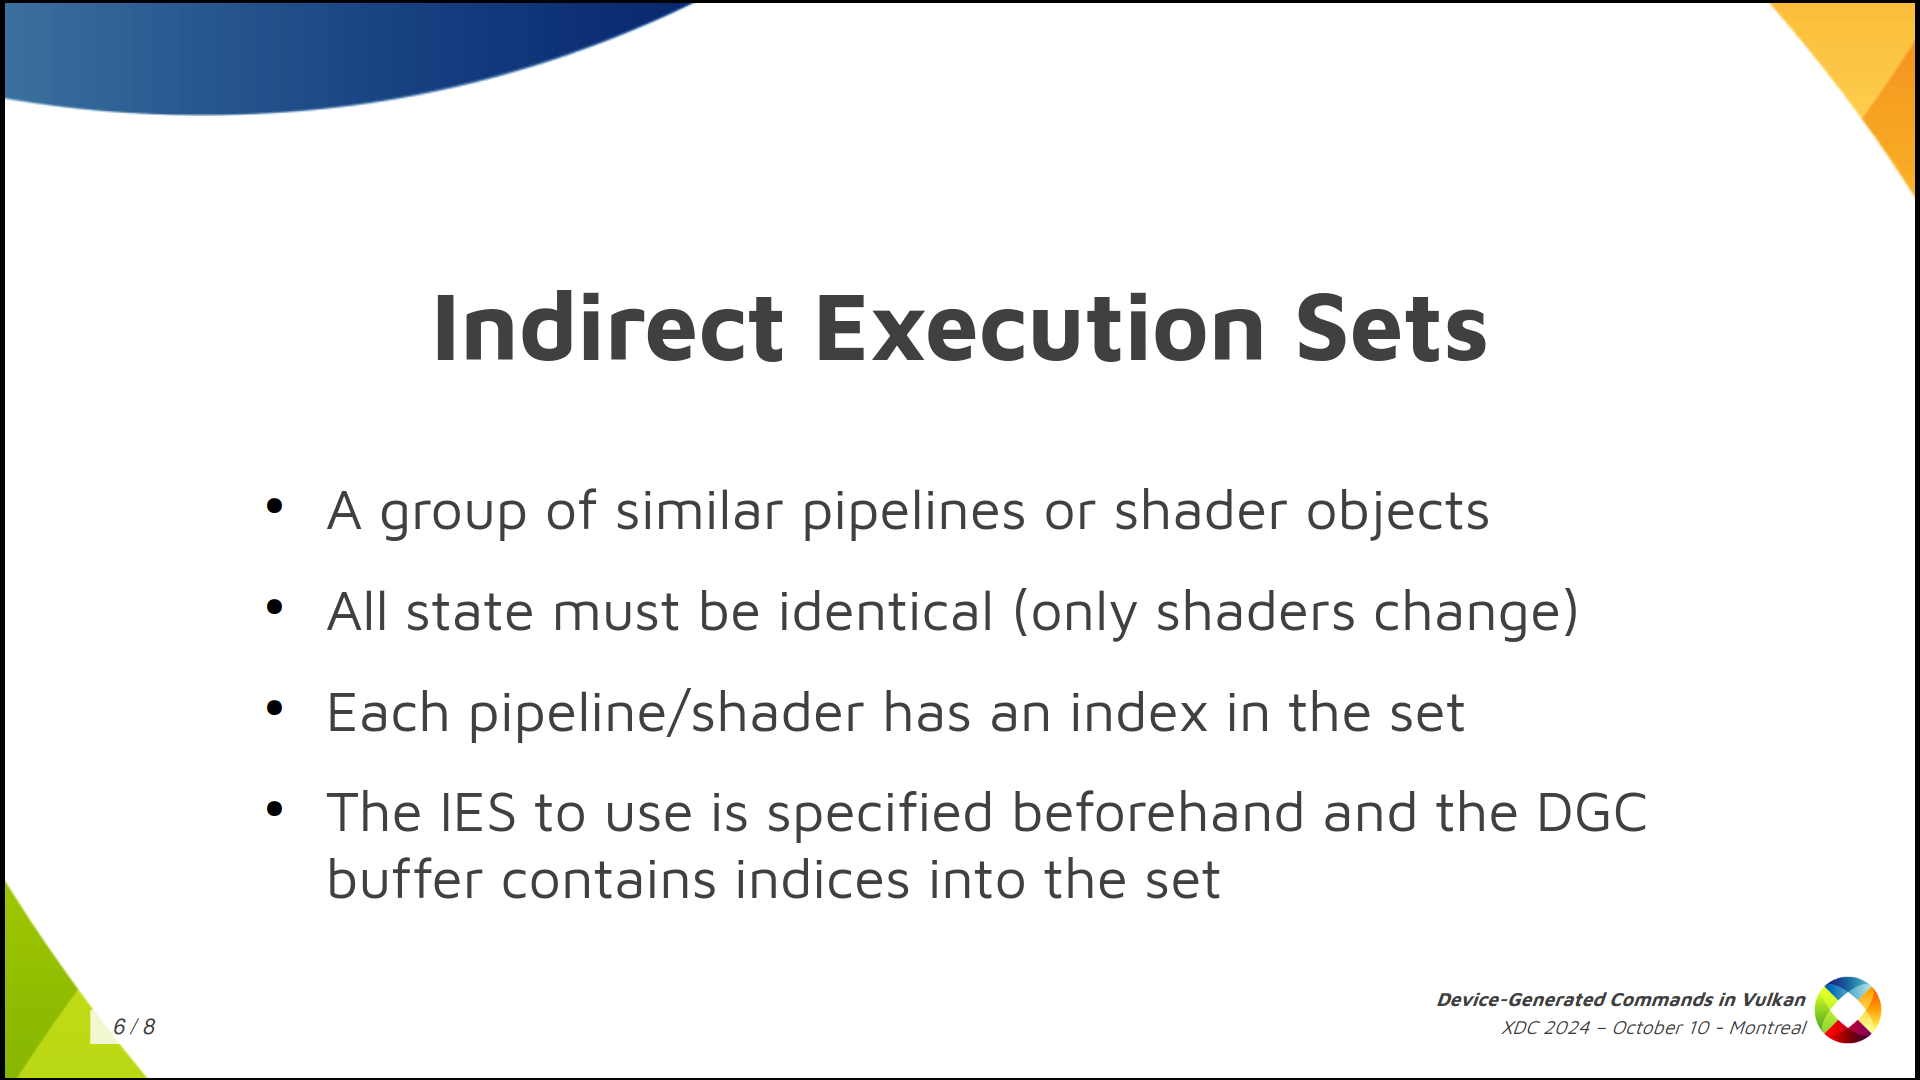
One thing that is interesting, like I said, is the ability to switch shaders and to choose which shaders are going to be used for each of those individual sequences. Some form of pipeline switching, or restricted pipeline switching. To do that you have to create something that is called Indirect Execution Sets.
Each of these execution sets is like a group or an array, if you want to think about it like that, of pipelines: similar pipelines or shader objects. They have to share something in common, which is that all of the state in the pipeline has to be identical, basically. Only the shaders can change.
When you create these execution sets and you start adding pipelines or shaders to them, you assign an index to each pipeline in the set. Then, you pass this execution set beforehand, before executing the commands, so that the driver knows which set of pipelines you are going to use. And then, in the DGC buffer, when you have this pipeline token, you only have to store the index of the pipeline that you want to use. You create the execution set with 20 pipelines and you pass an index for the pipeline that you want to use for each draw, for each dispatch, or whatever.
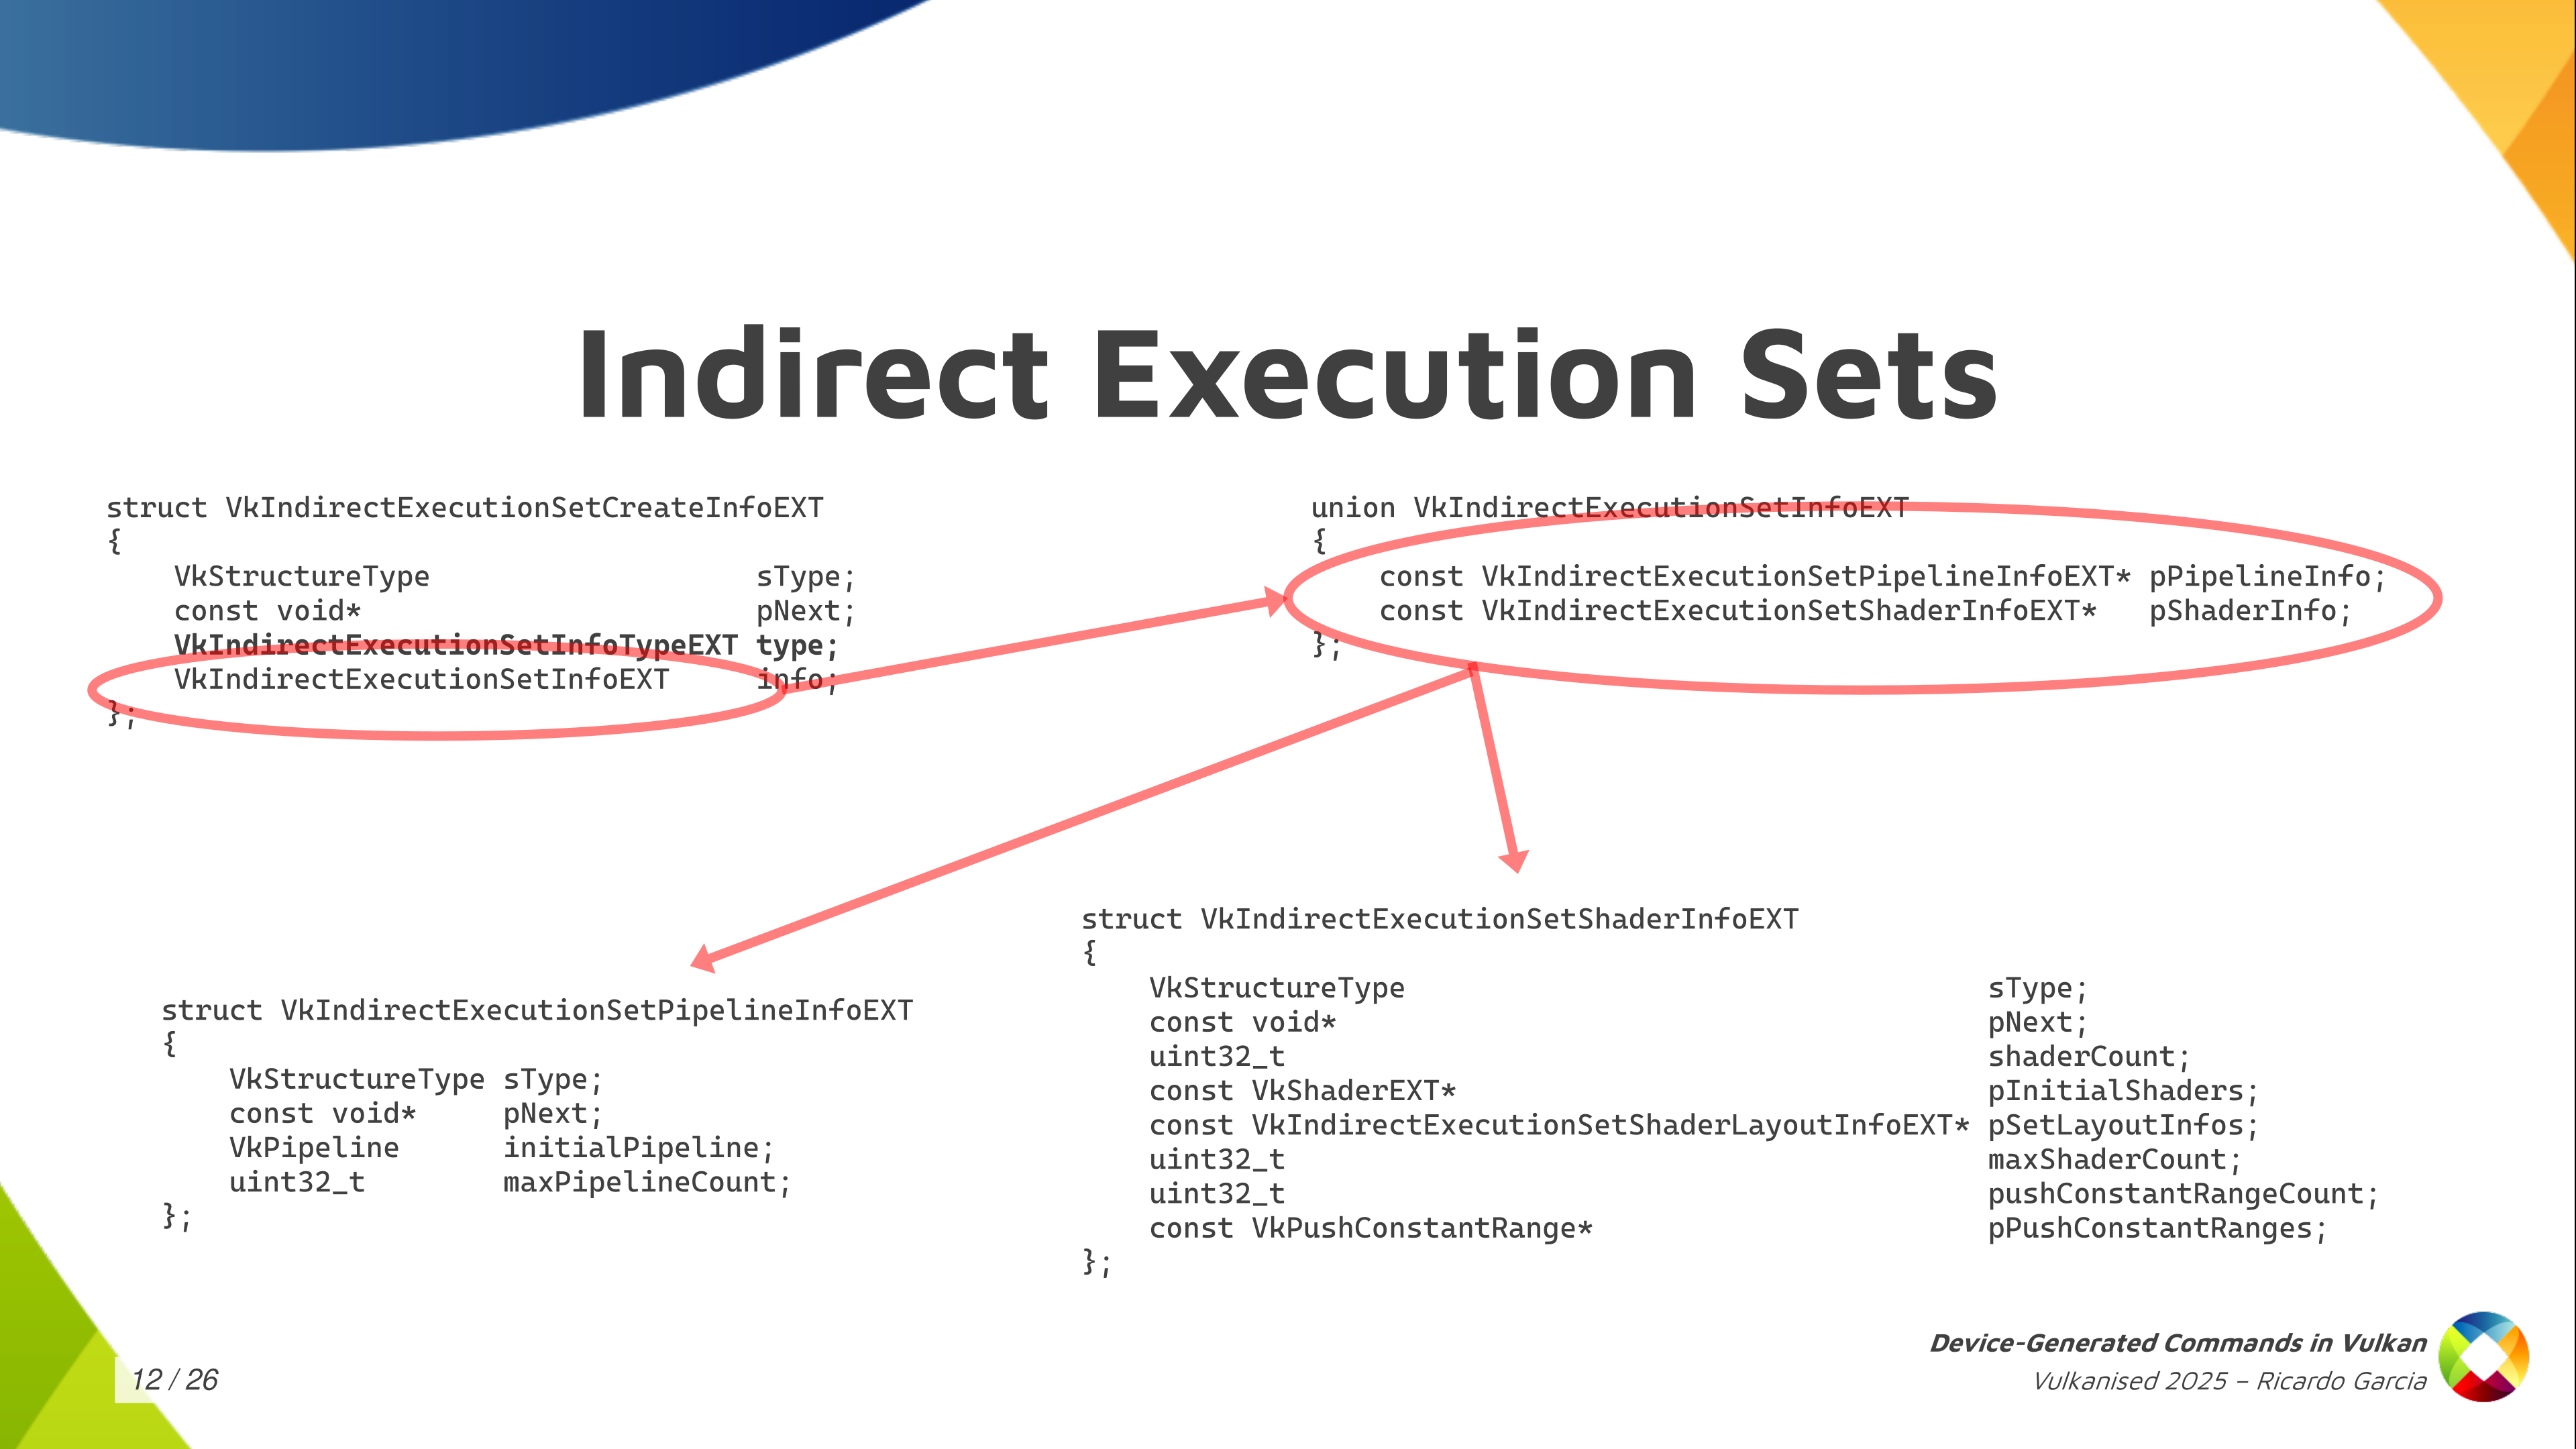
The way to create the execution sets is the one you see here, where we have, again, one of those CreateInfo structures. There, we have to indicate the type, which is pipelines or shader objects. Depending on that, you have to fill one of the pointers from the union on the top right here.
If we focus on pipelines because it’s easier on the bottom left, you have to pass the maximum pipeline count that you’re going to store in the set and an initial pipeline. The initial pipeline is what is going to set the template that all pipelines in the set are going to conform to. They all have to share essentially the same state as the initial pipeline and then you can change the shaders. With shader objects, it’s basically the same, but you have to pass more information for the shader objects, like the descriptor set layouts used by each stage, push-constant information… but it’s essentially the same.
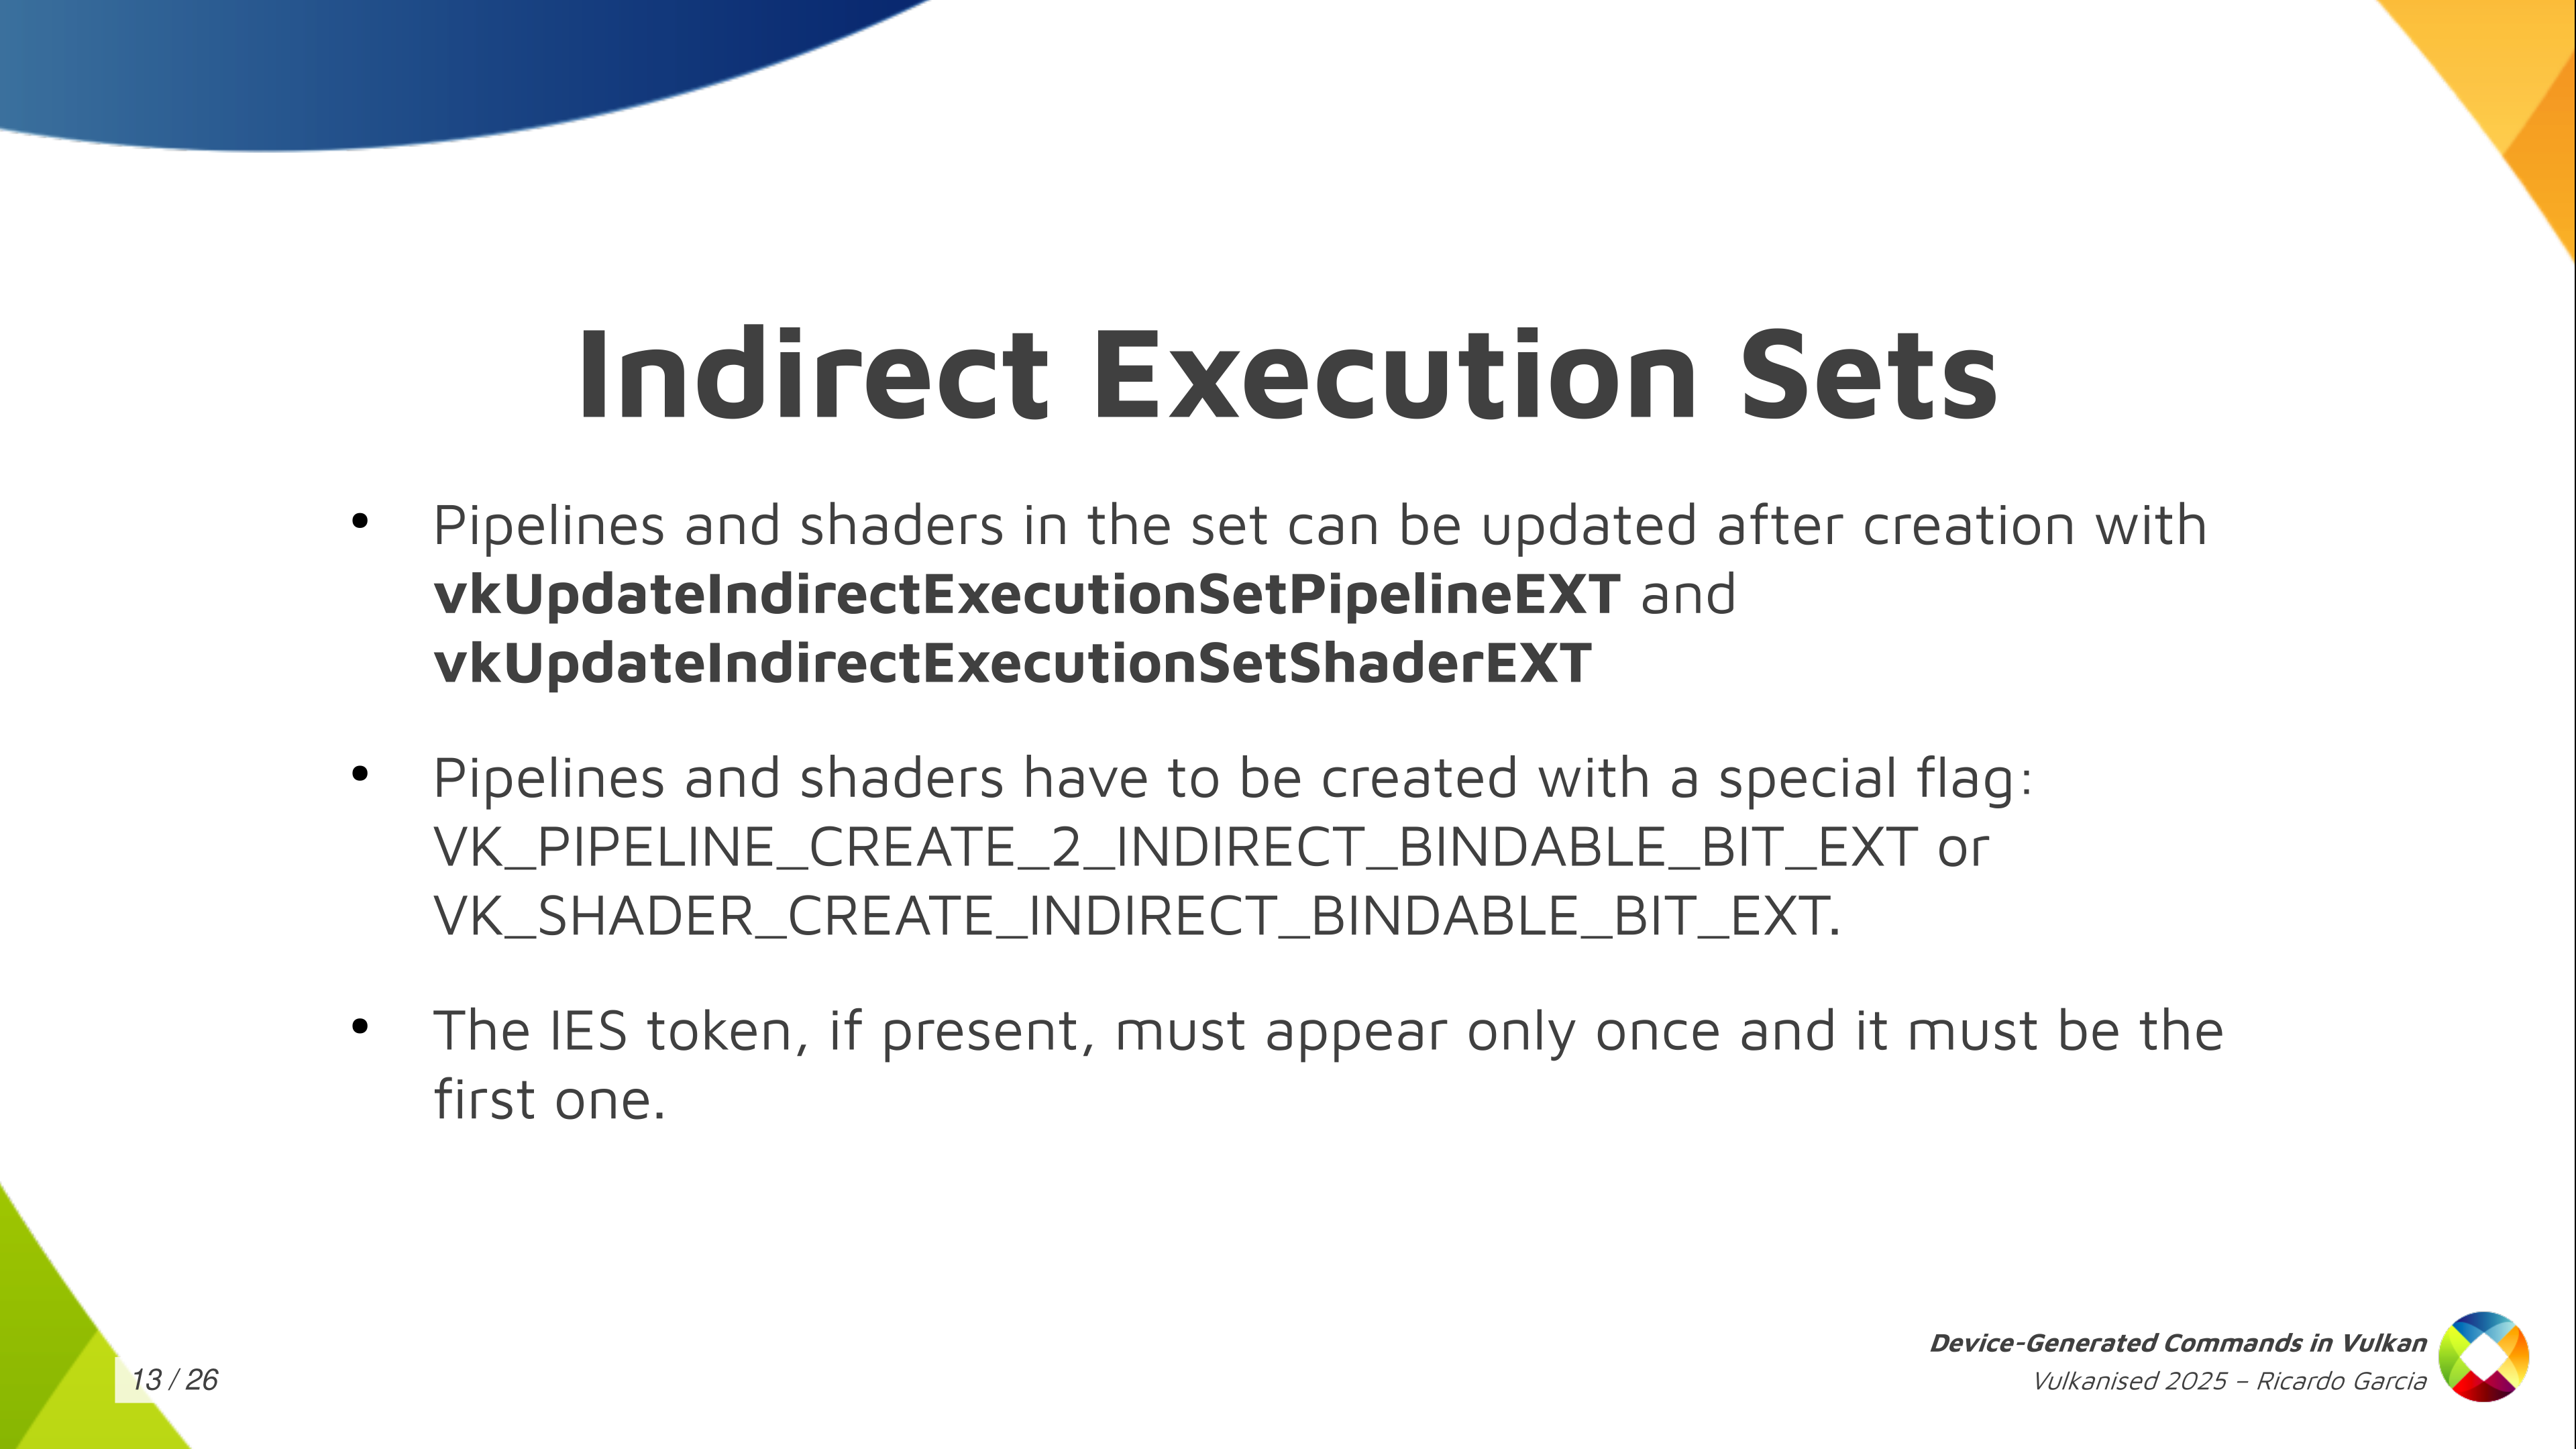
Once you have that execution set created, you can use those two functions (vkUpdateIndirectExecutionSetPipelineEXT and vkUpdateIndirectExecutionSetShaderEXT) to update and add pipelines to that execution set. You need to take into account that you have to pass a couple of special creation flags to the pipelines, or the shader objects, to tell the driver that you may use those inside an execution set because the driver may need to do something special for them. And one additional restriction that we have is that if you use an execution set token in your sequences, it must appear only once and it must be the first one in the sequence.
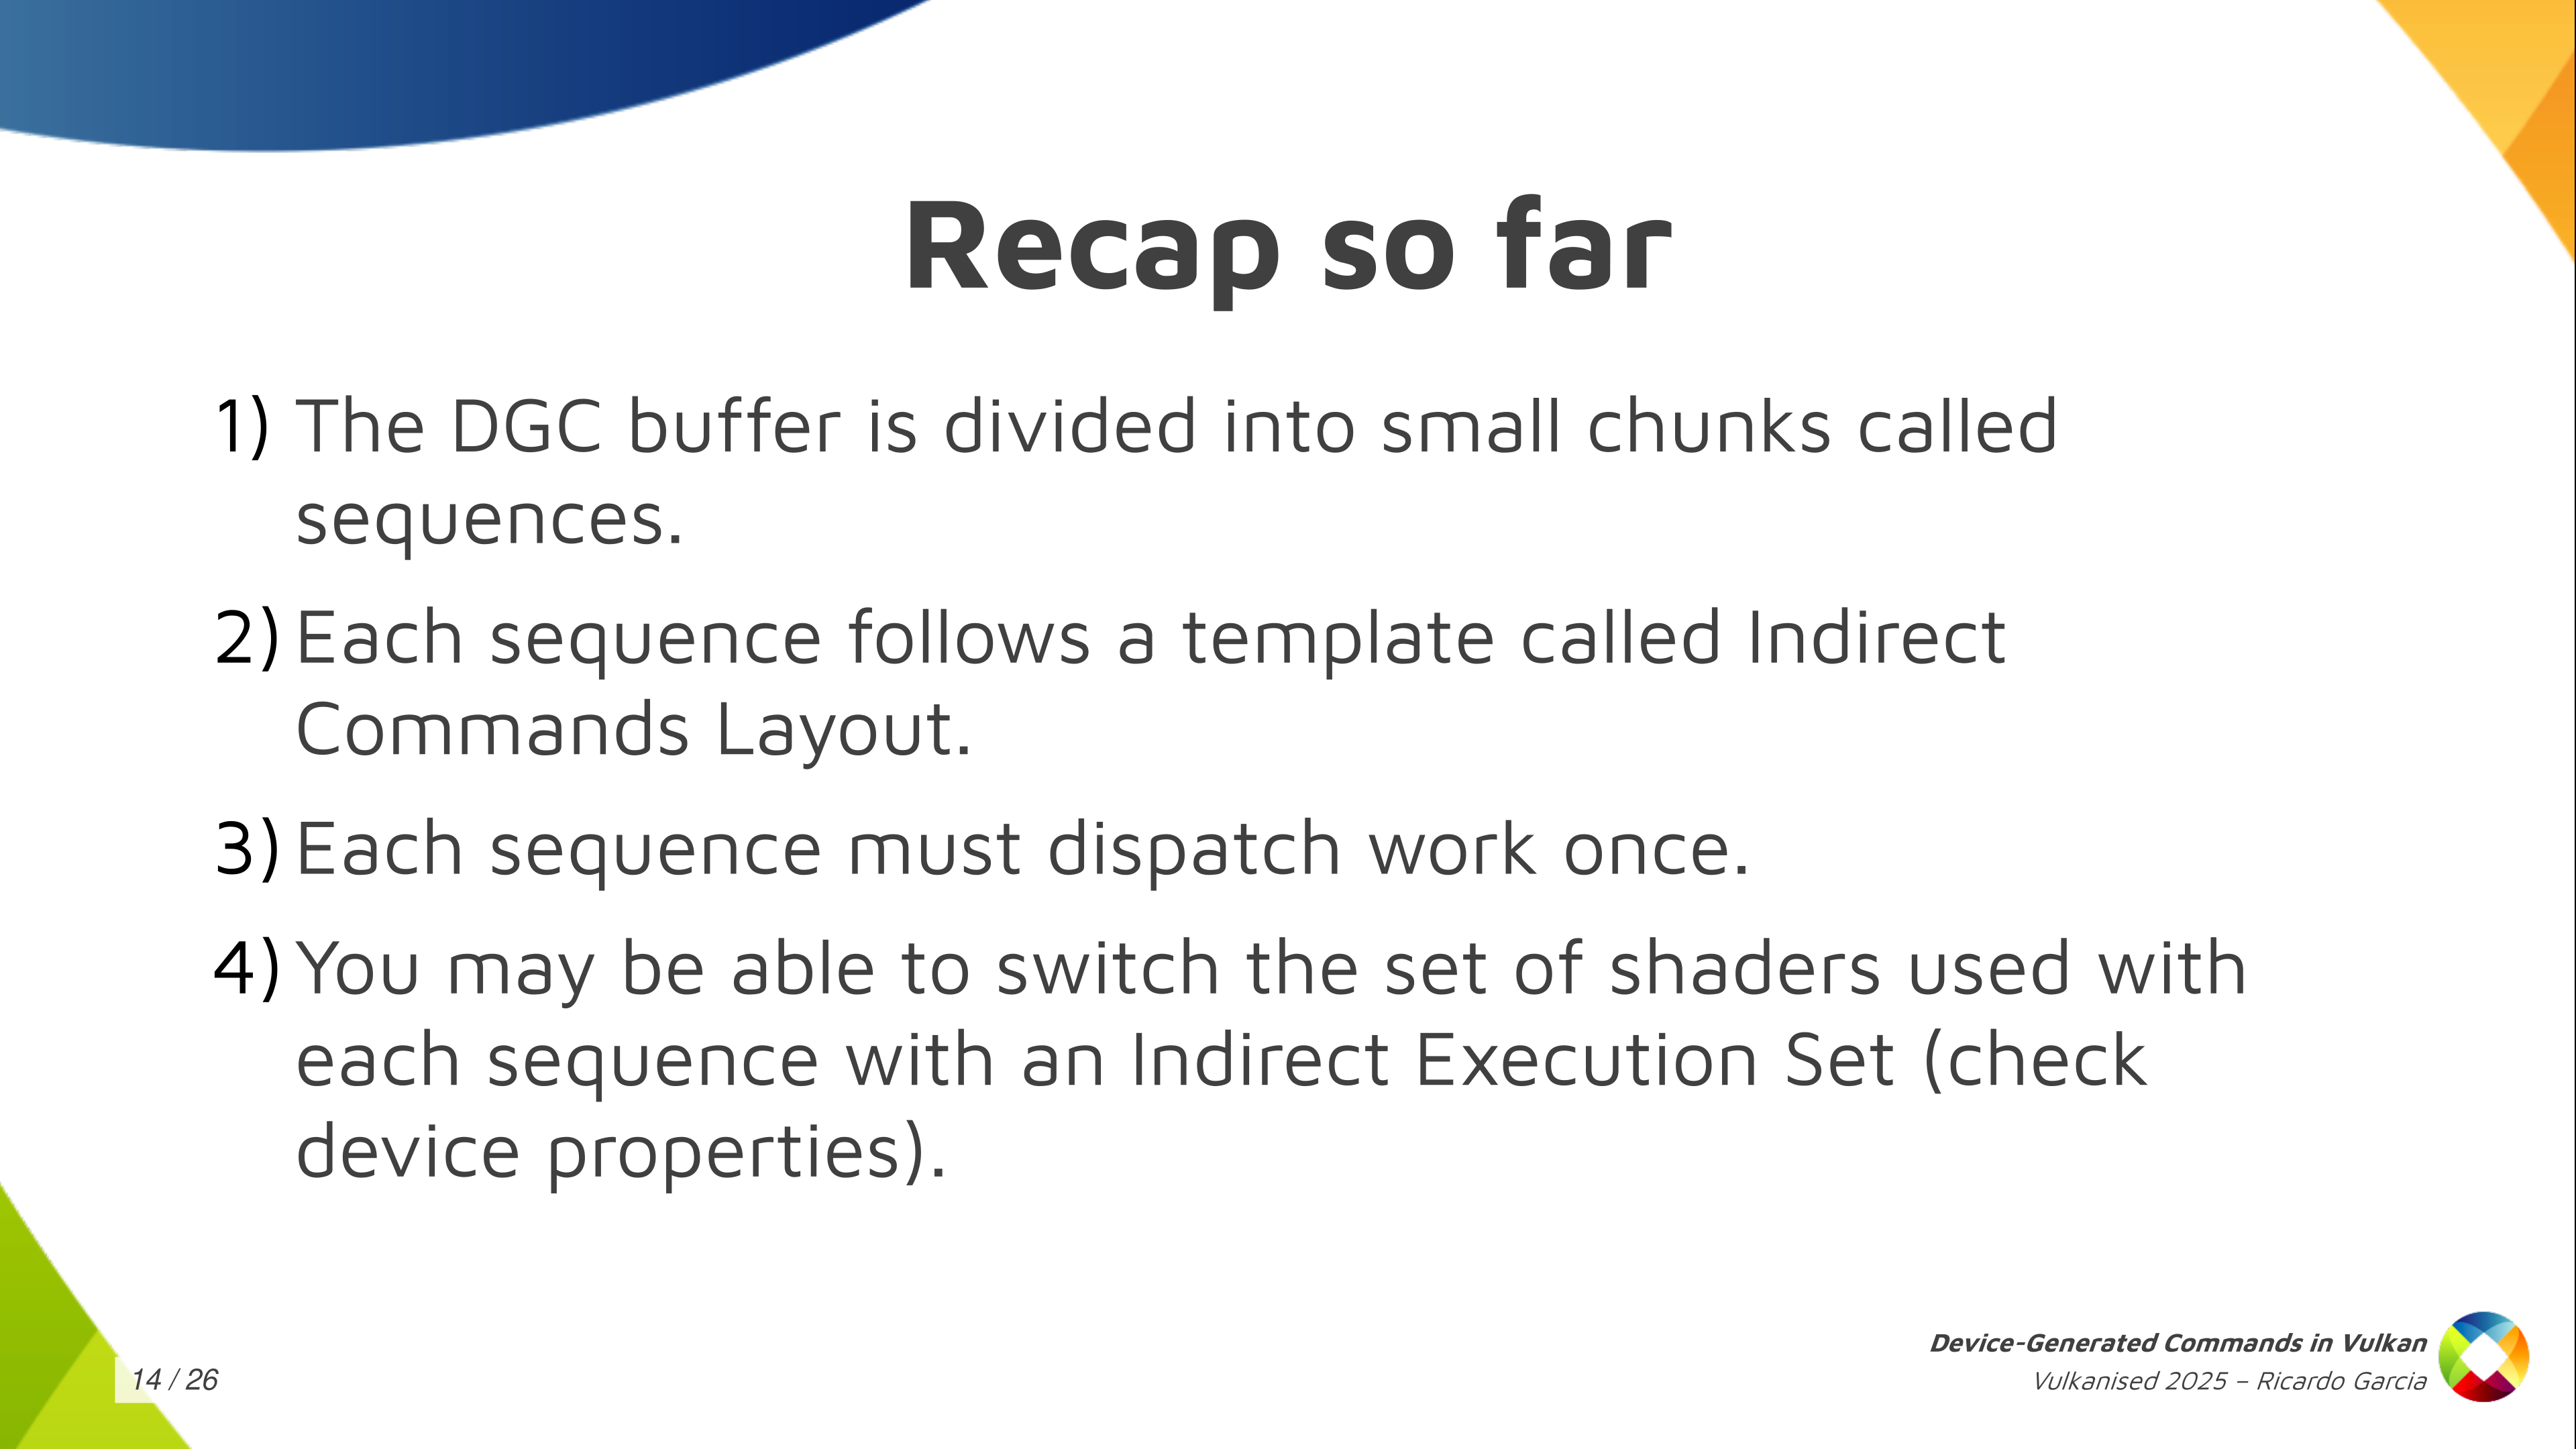
The recap, so far, is that the DGC buffer is divided into small chunks that we call sequences. Each sequence follows a template that we call the Indirect Commands Layout. Each sequence must dispatch work exactly once and you may be able to switch the set of shaders we used with with each sequence with an Indirect Execution Set.
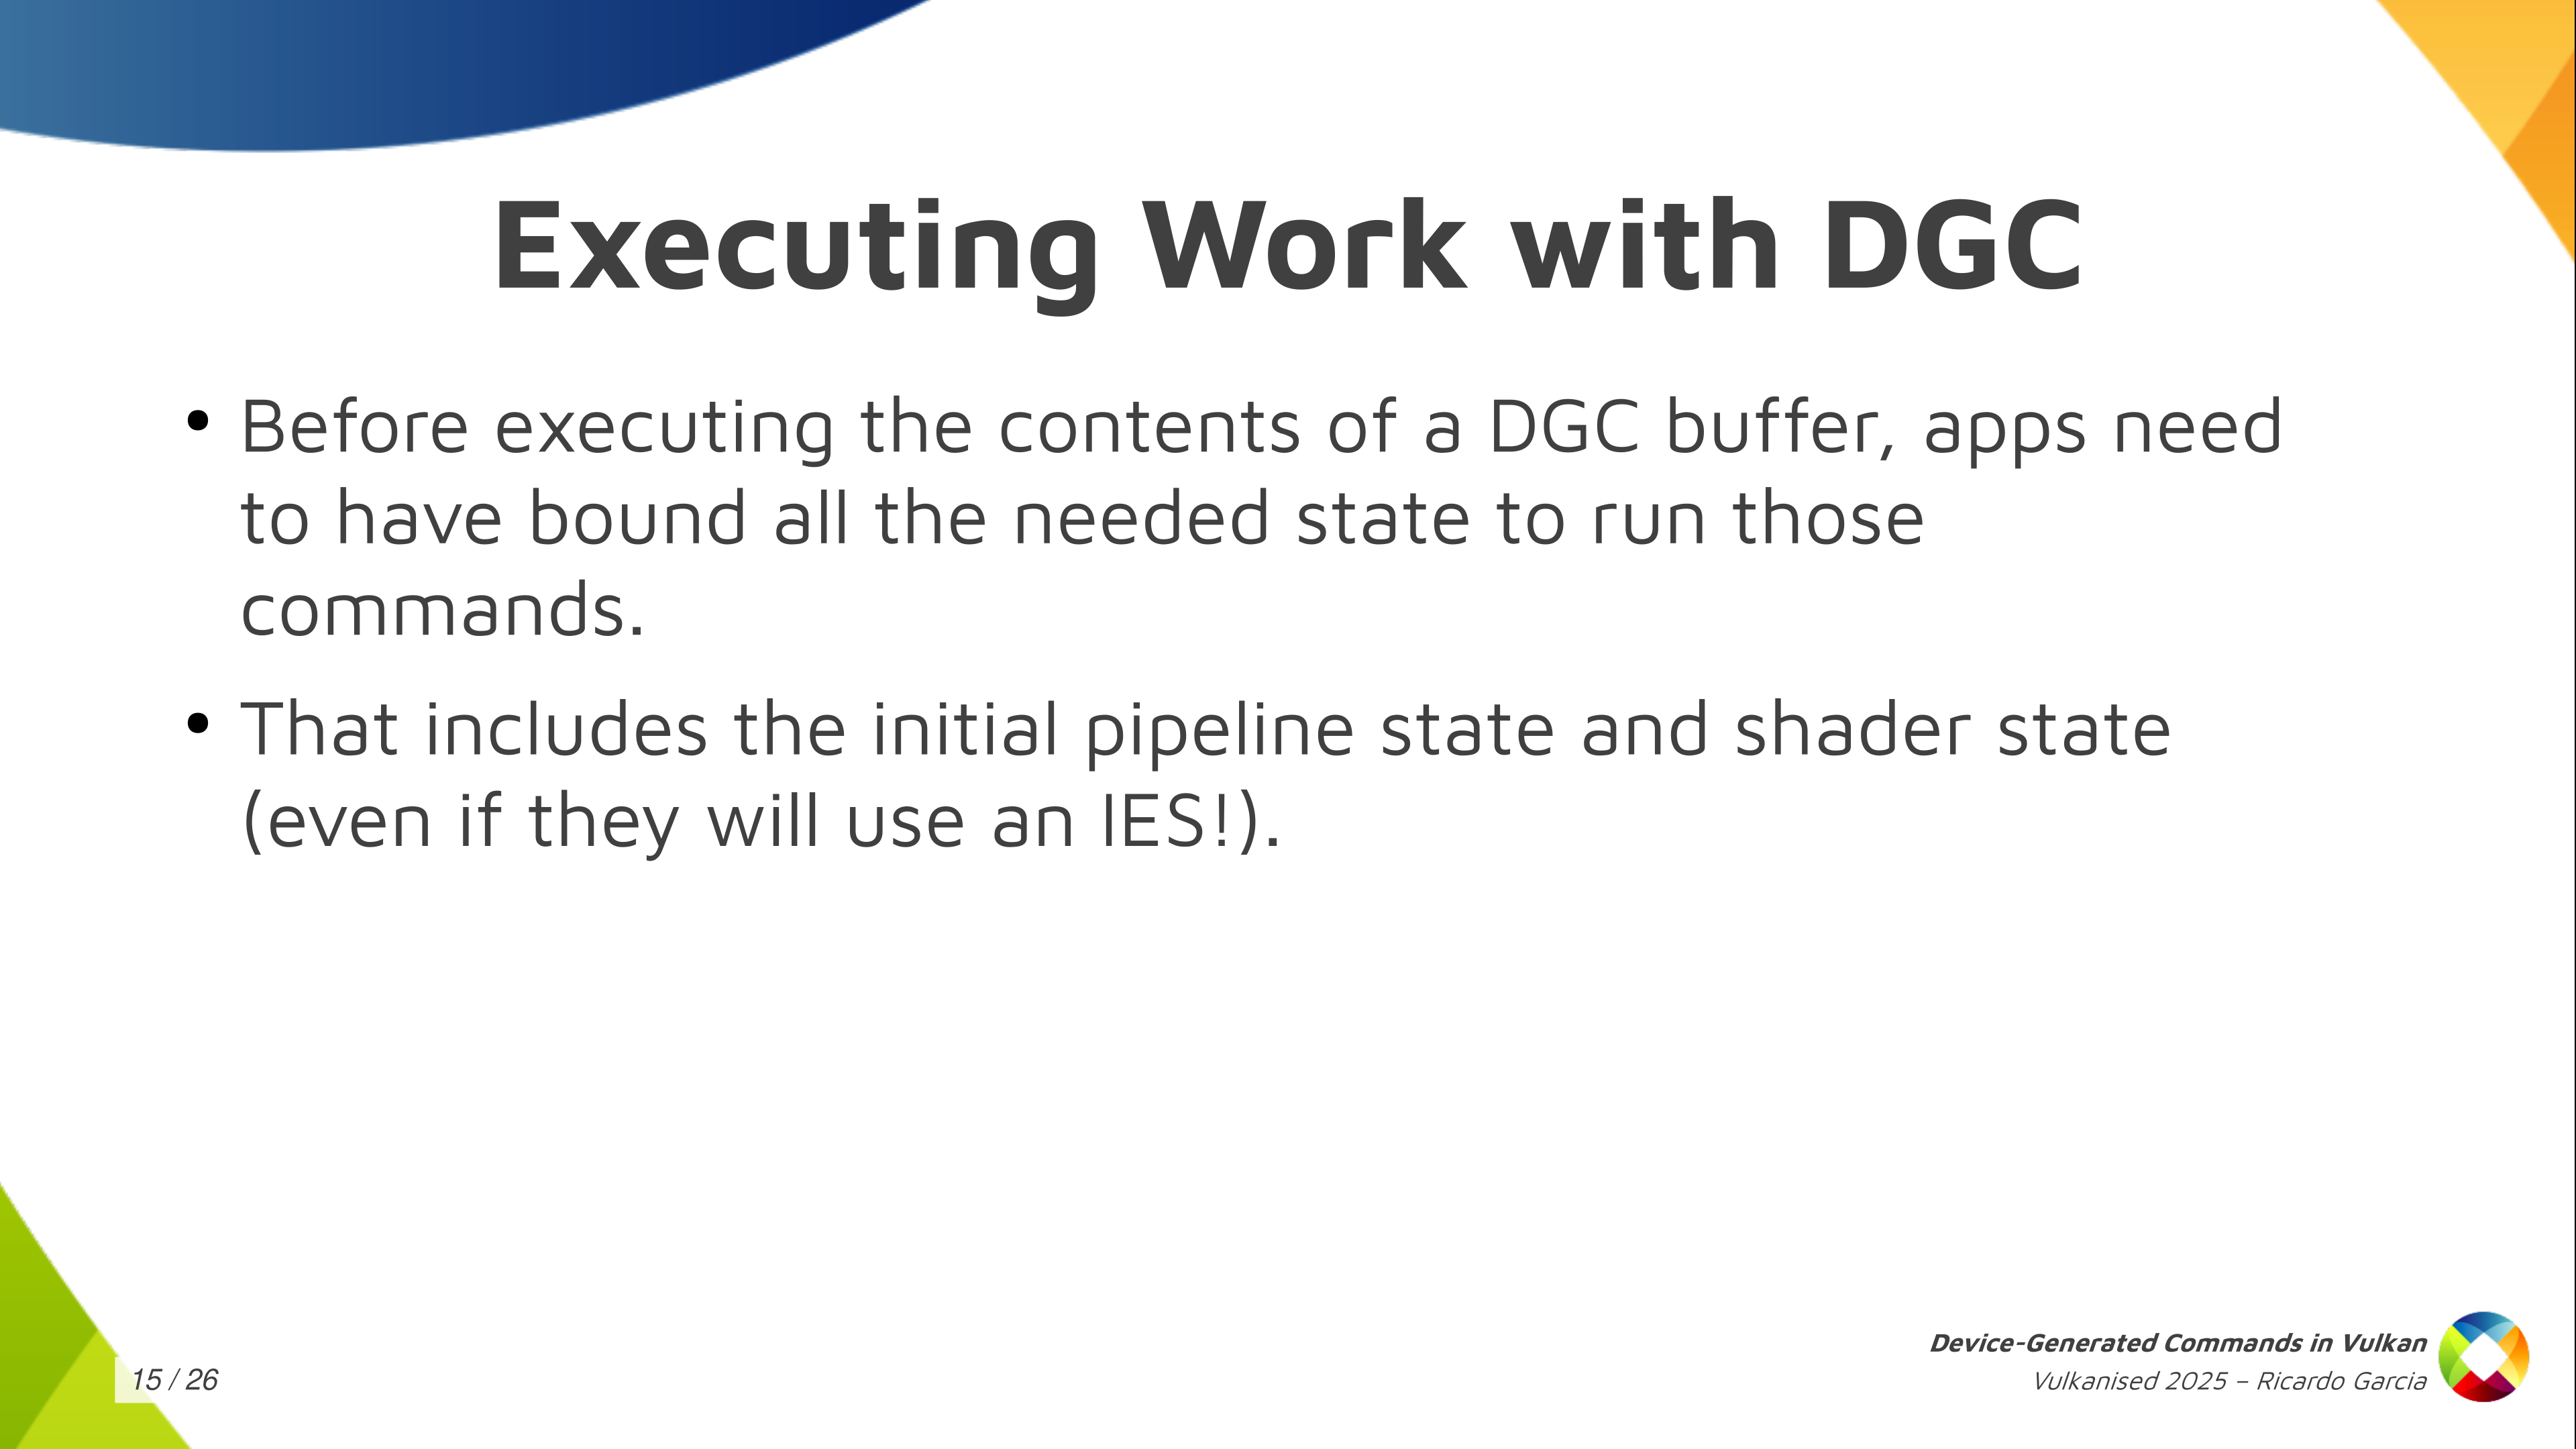
Wow do we go about actually telling Vulkan to execute the contents of a specific buffer? Well, before executing the contents of the DGC buffer the application needs to have bound all the needed states to run those commands. That includes descriptor sets, initial push constant values, initial shader state, initial pipeline state. Even if you are going to use an Execution Set to switch shaders later you have to specify some kind of initial shader state.
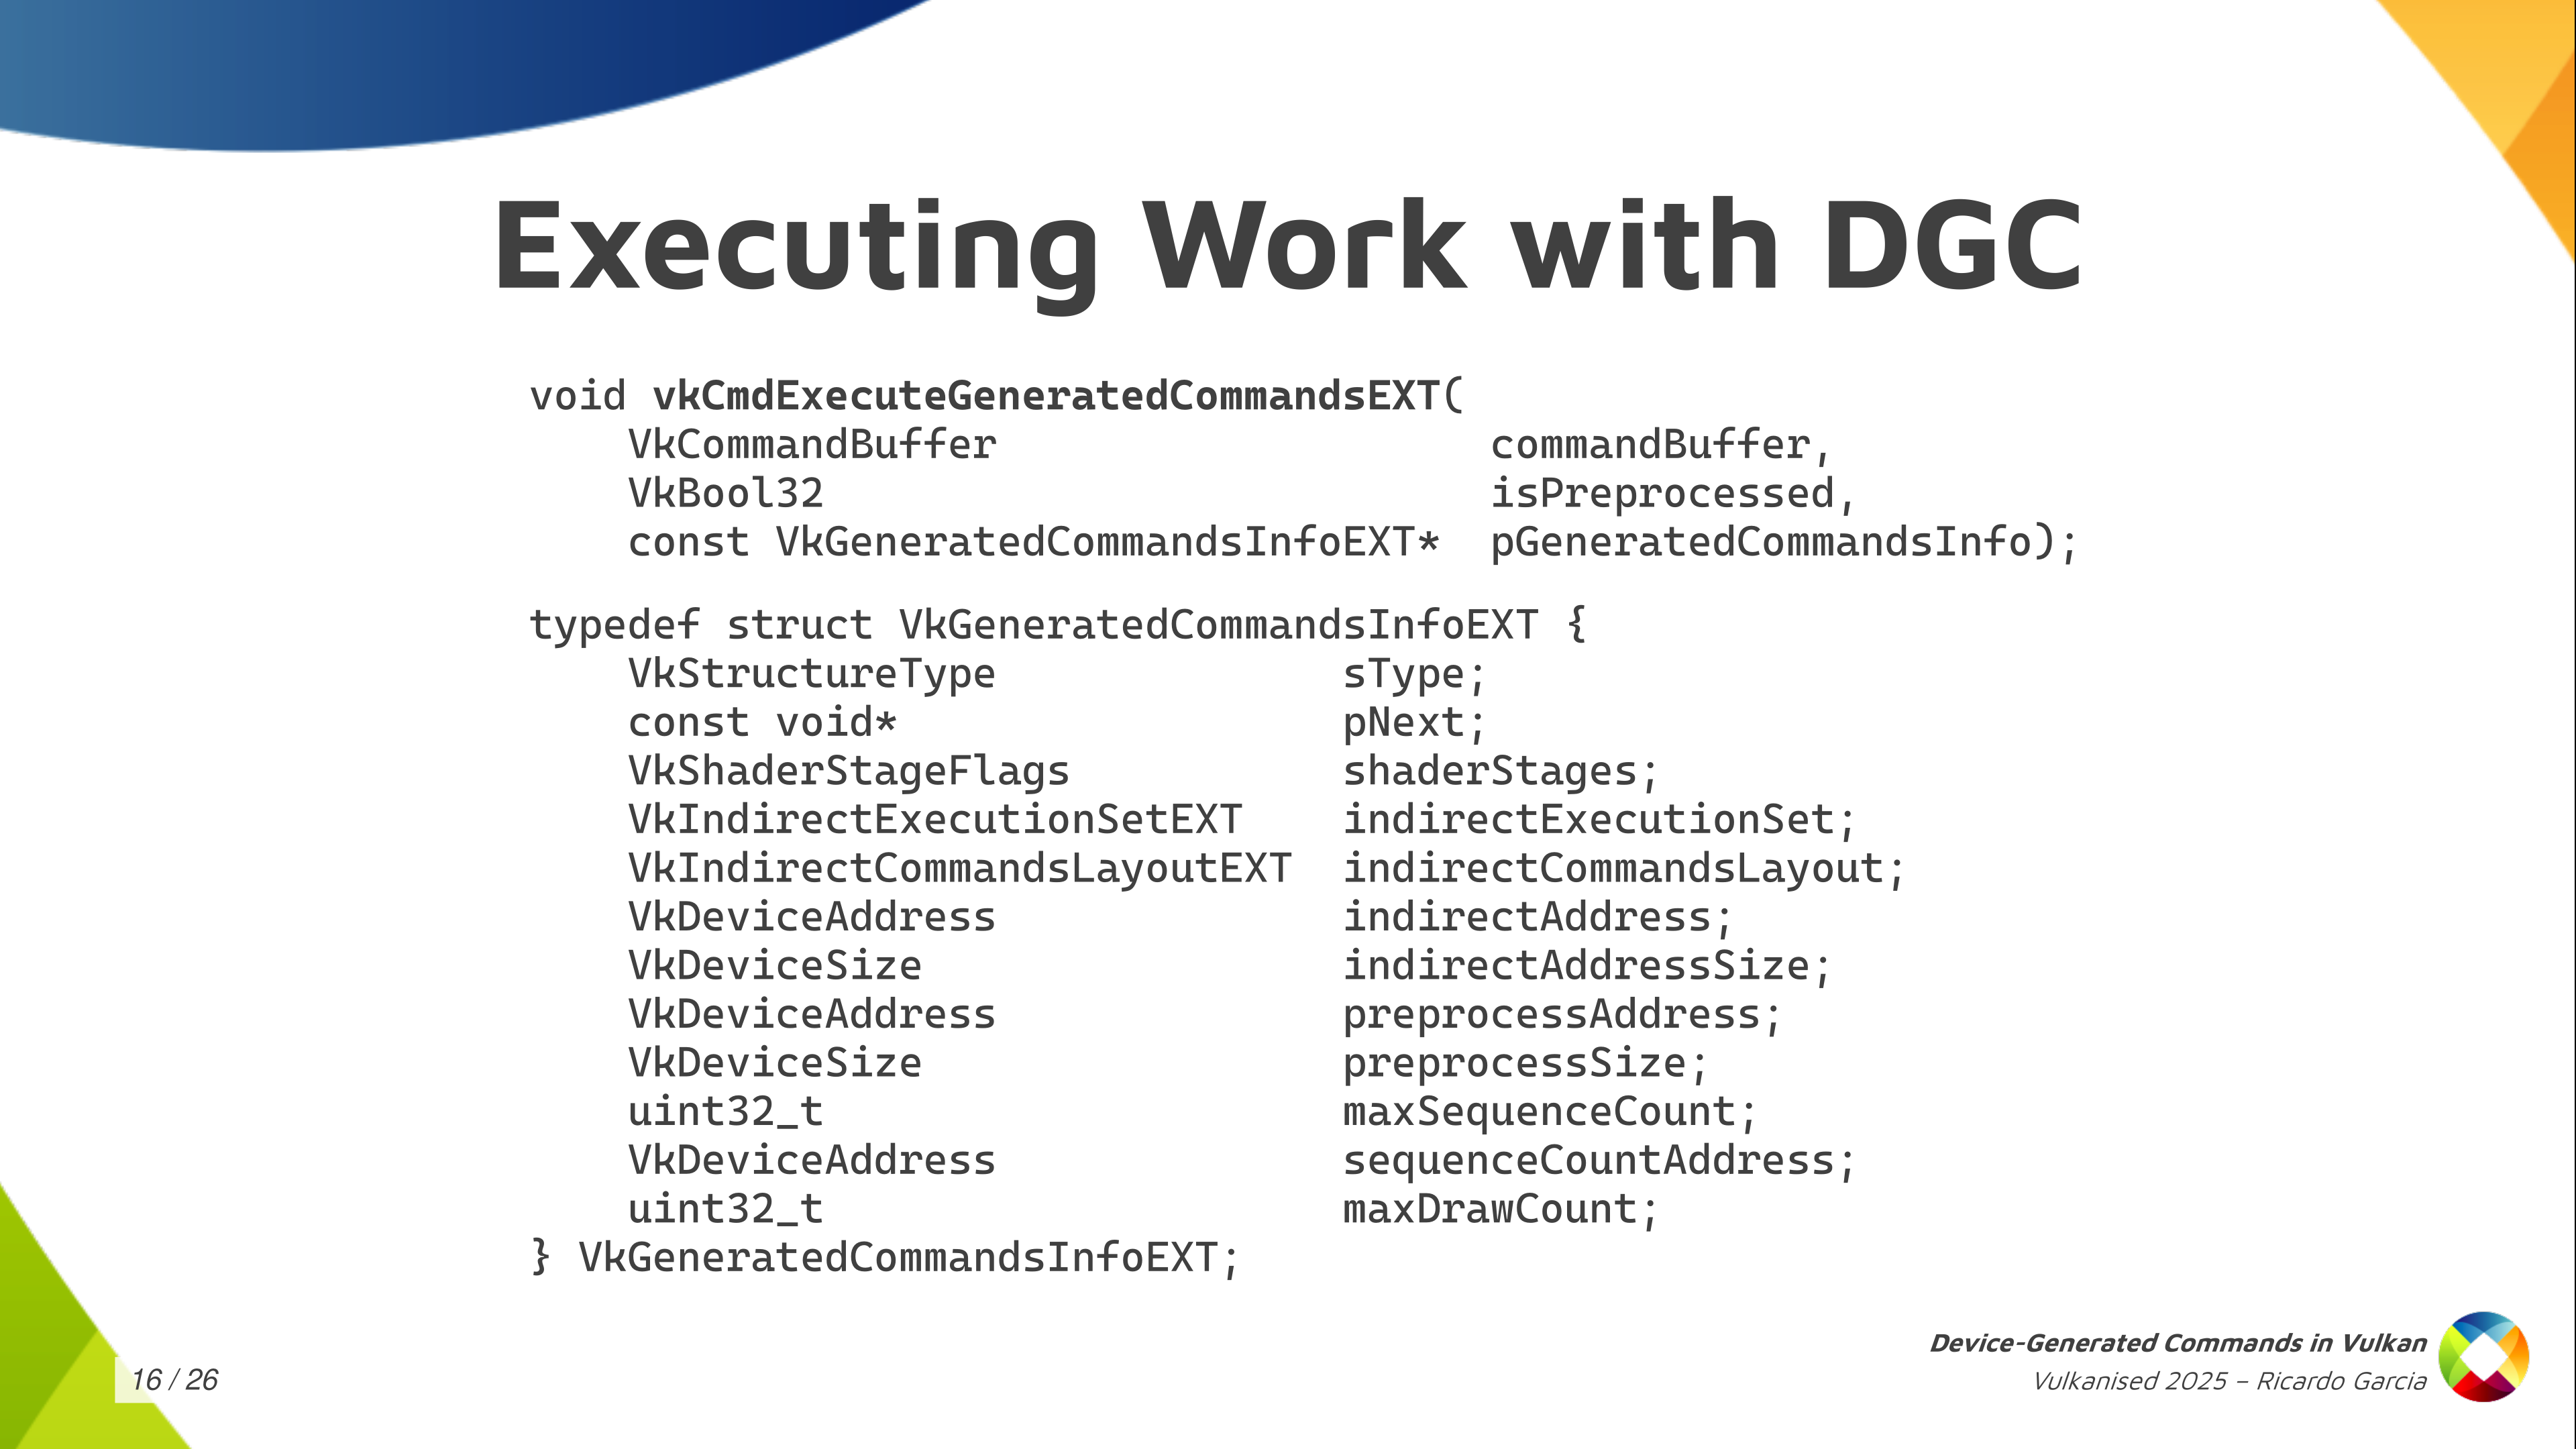
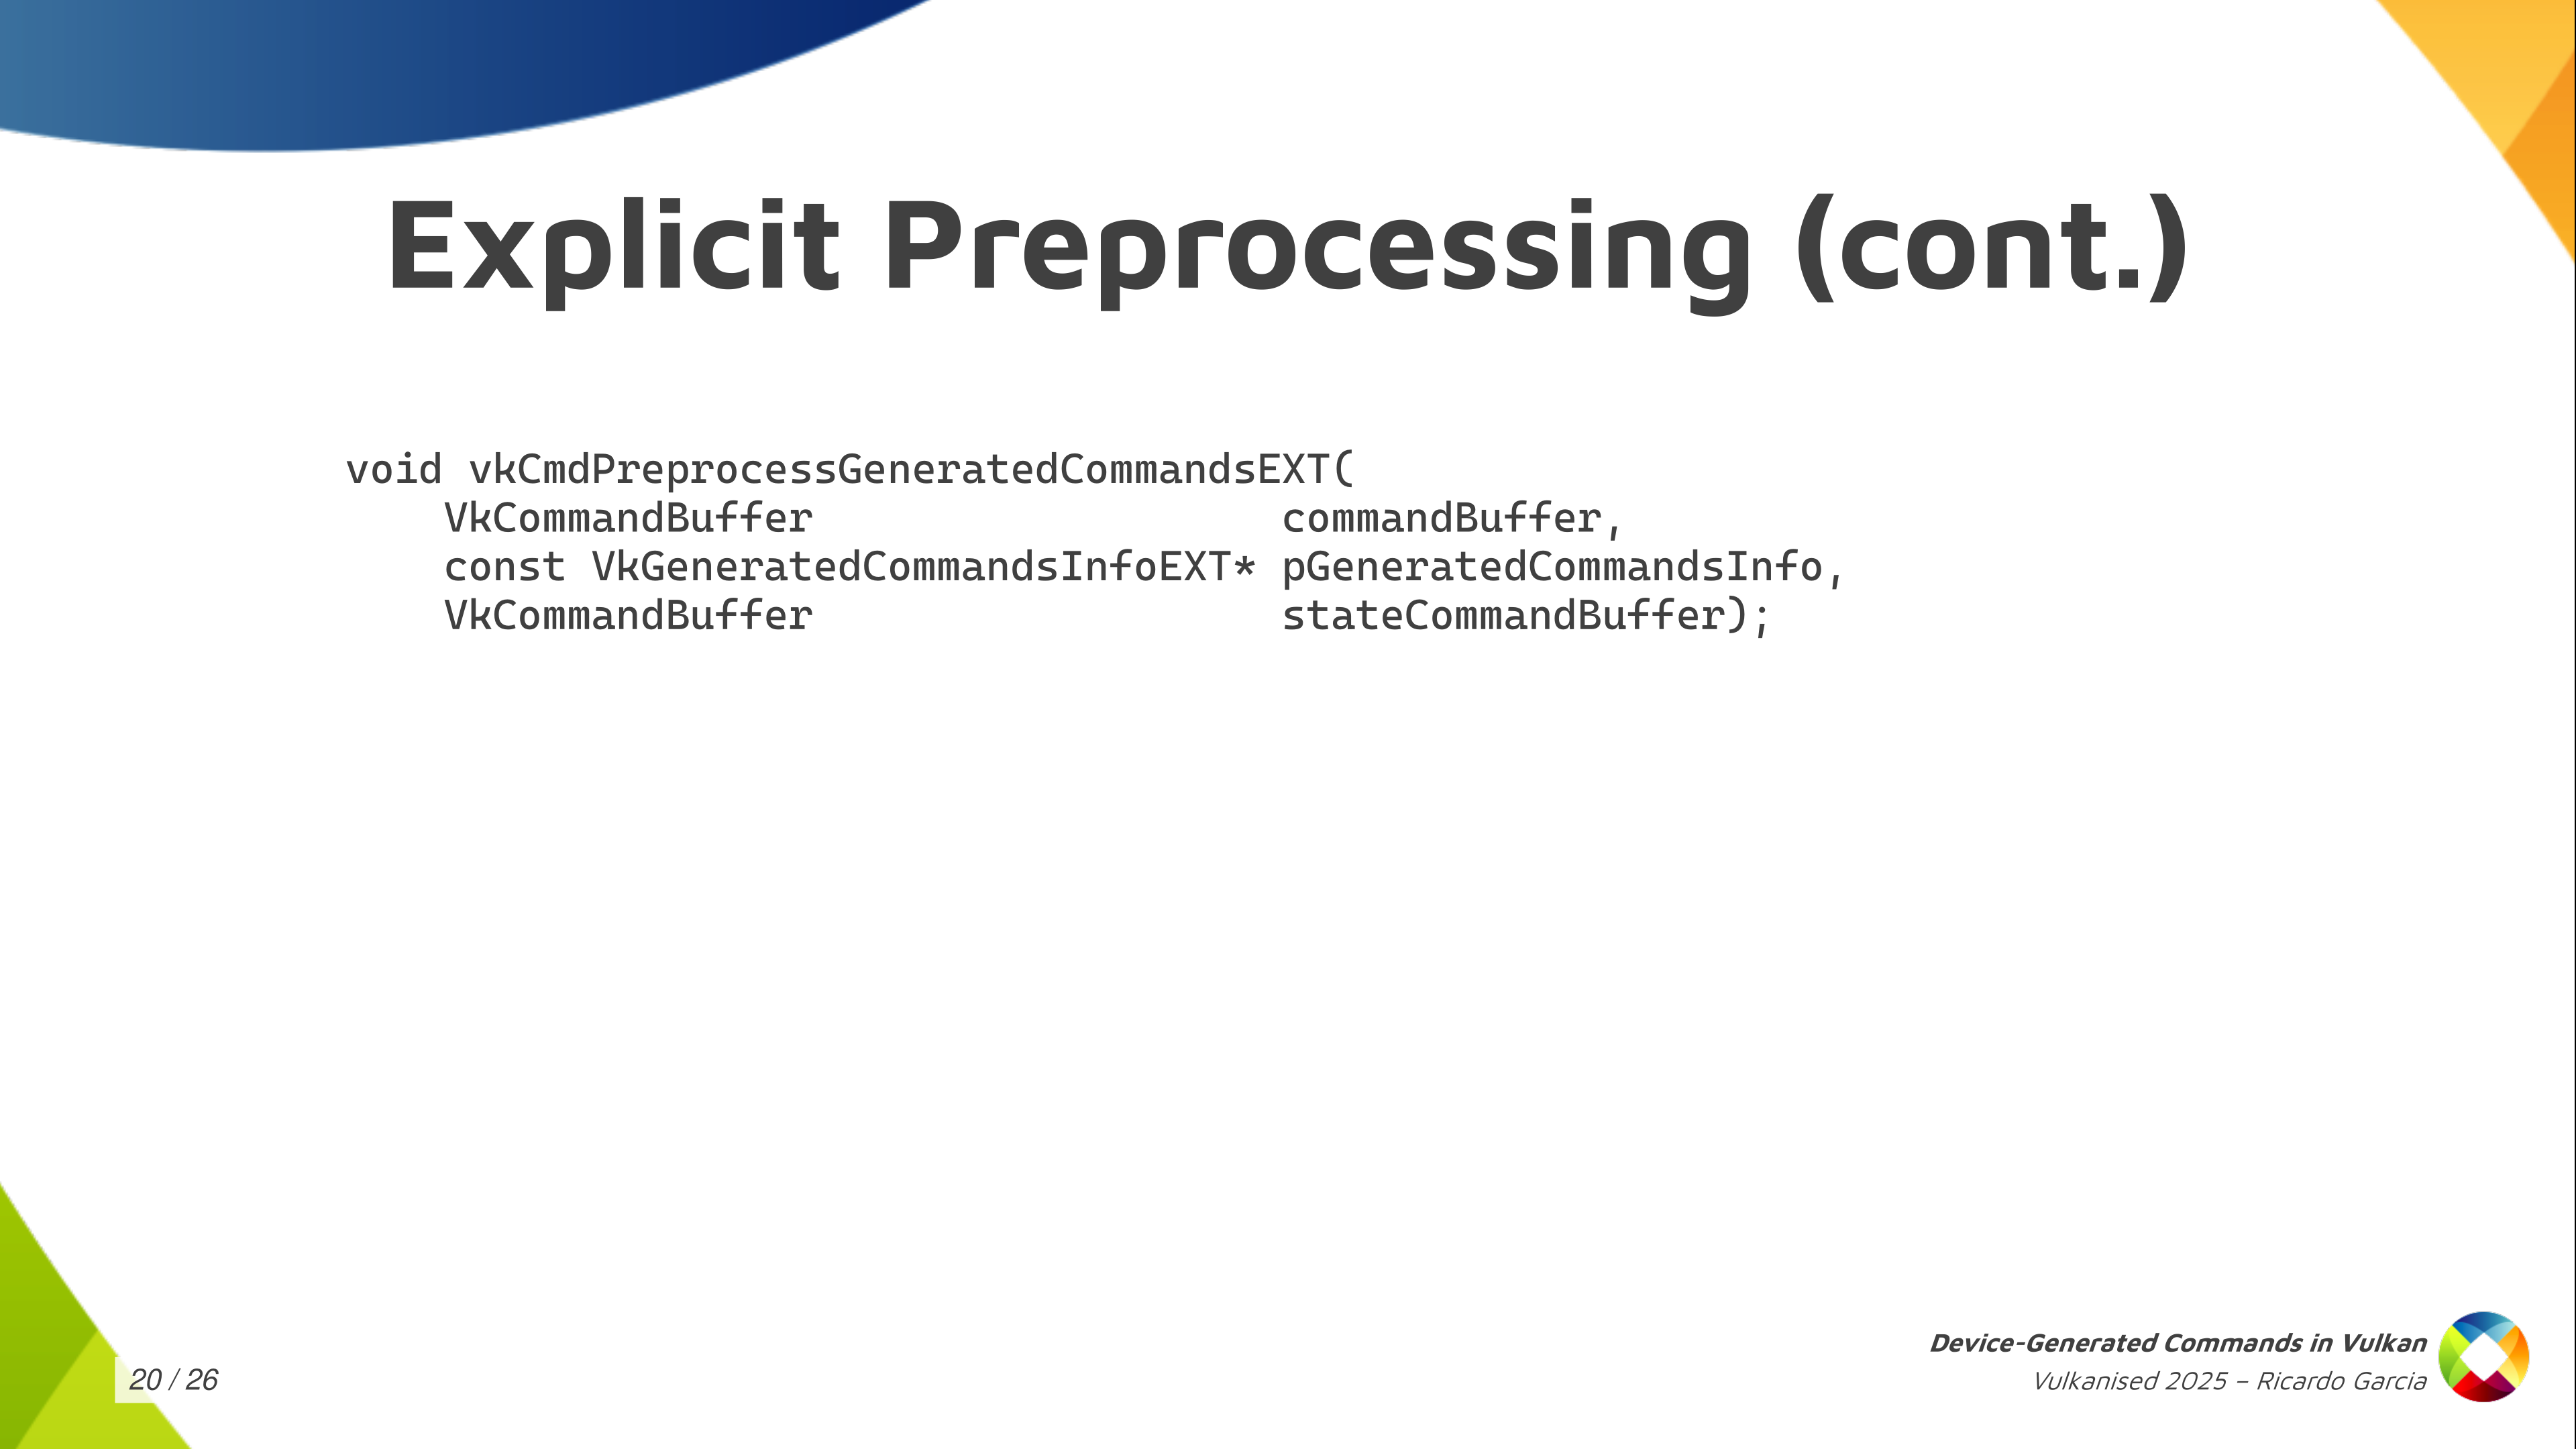
Once you have that, you can call this vkCmdExecuteGeneratedCommands. You bind all the state into your regular command buffer and then you record this command to tell the driver: at this point, execute the contents of this buffer. As you can see, you typically pass a regular command buffer as the first argument. Then there’s some kind of boolean value called isPreprocessed, which is kind of confusing because it’s the first time it appears and you don’t know what it is about, but we will talk about it in a minute. And then you pass a relatively larger structure containing information about what to execute.
In that GeneratedCommandsInfo structure, you need to pass again the shader stages that will be used. You have to pass the handle for the Execution Set, if you’re going to use one (if not you can use the null handle). Of course, the indirect commands layout, which is the central piece here. And then you pass the information about the buffer that you want to execute, which is the indirect address and the indirect address size as the buffer size. We are using buffer device address to pass information.
And then we have something again mentioning some kind of preprocessing thing, which is really weird: preprocess address and preprocess size which looks like a buffer of some kind (we will talk about it later). You have to pass the maximum number of sequences that you are going to execute. Optionally, you can also pass a buffer address for an actual counter of sequences. And the last thing that you need is the max draw count, but you can forget about that if you are not dispatching work using draw-with-count tokens as it only applies there. If not, you leave it as zero and it should work.
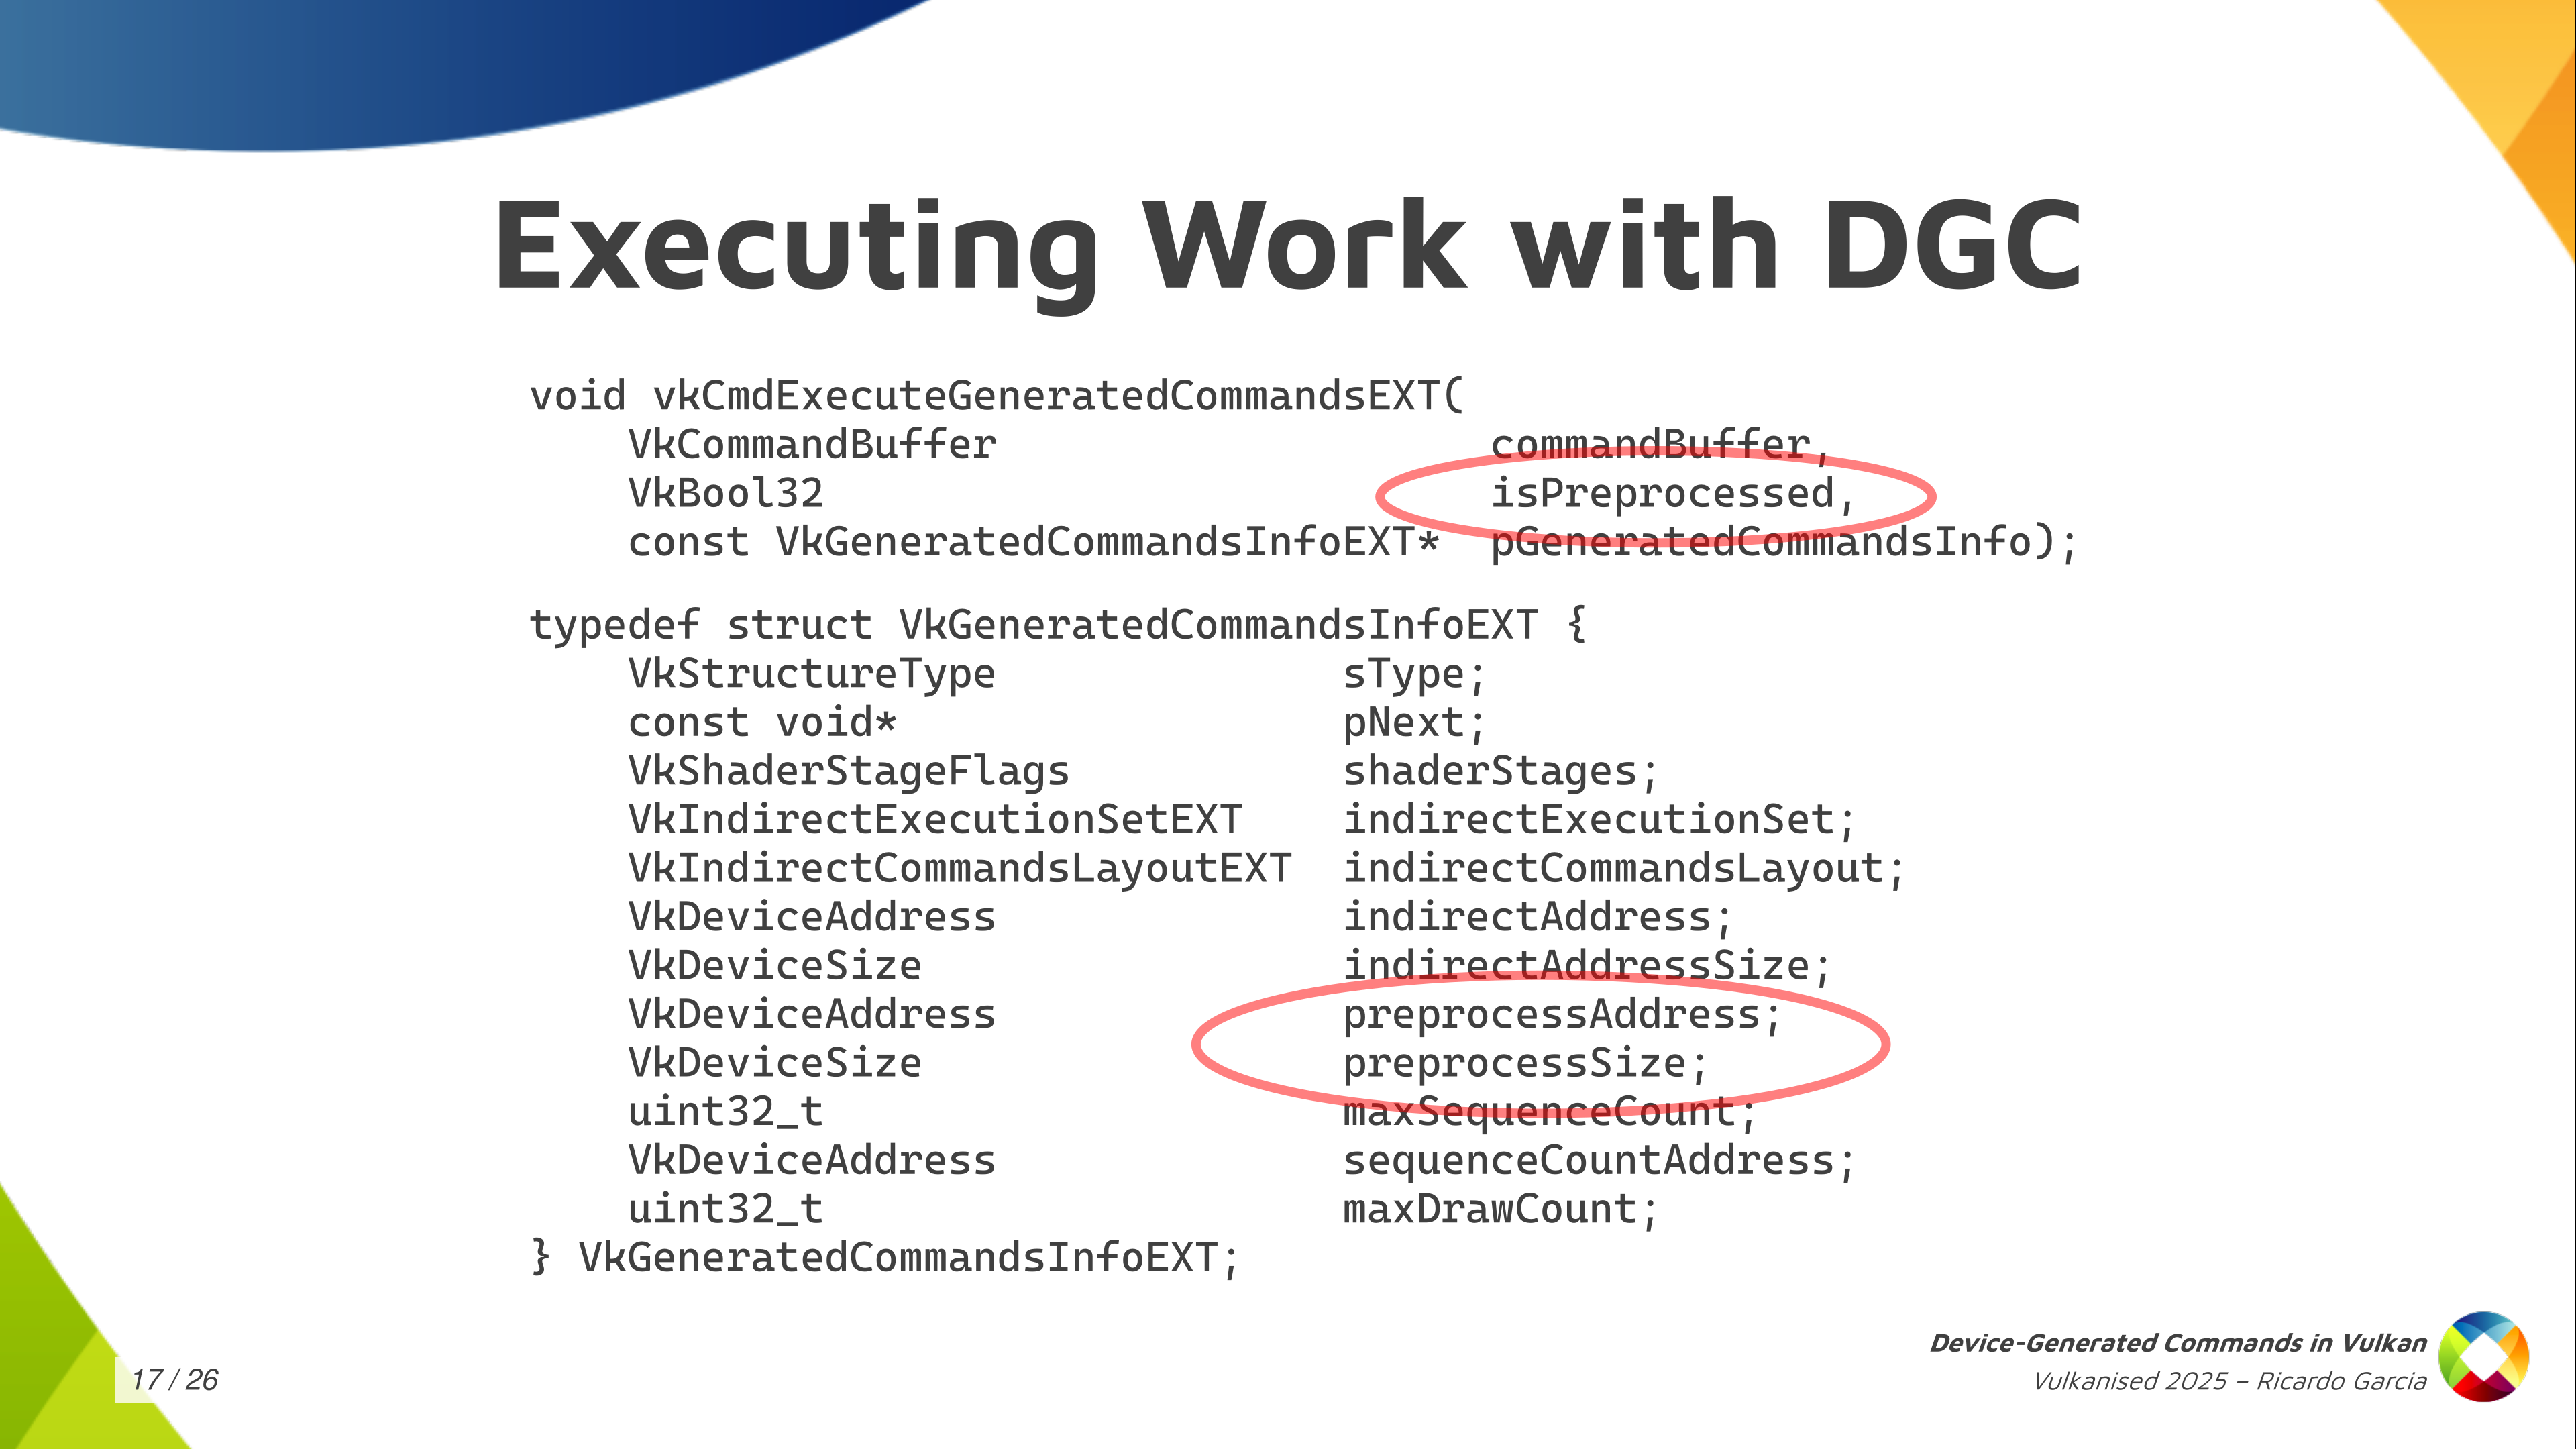
We have a couple of things here that we haven’t talked about yet, which are the preprocessing things. Starting from the bottom, that preprocess address and size give us a hint that there may be a pre-processing step going on. Some kind of thing that the driver may need to do before actually executing the commands, and we need to pass information about the buffer there.
The boolean value that we pass to the command ExecuteGeneratedCommands tells us that the pre-processing step may have happened before so it may be possible to explicitly do that pre-processing instead of letting the driver do that at execution time. Let’s take a look at that in more detail.
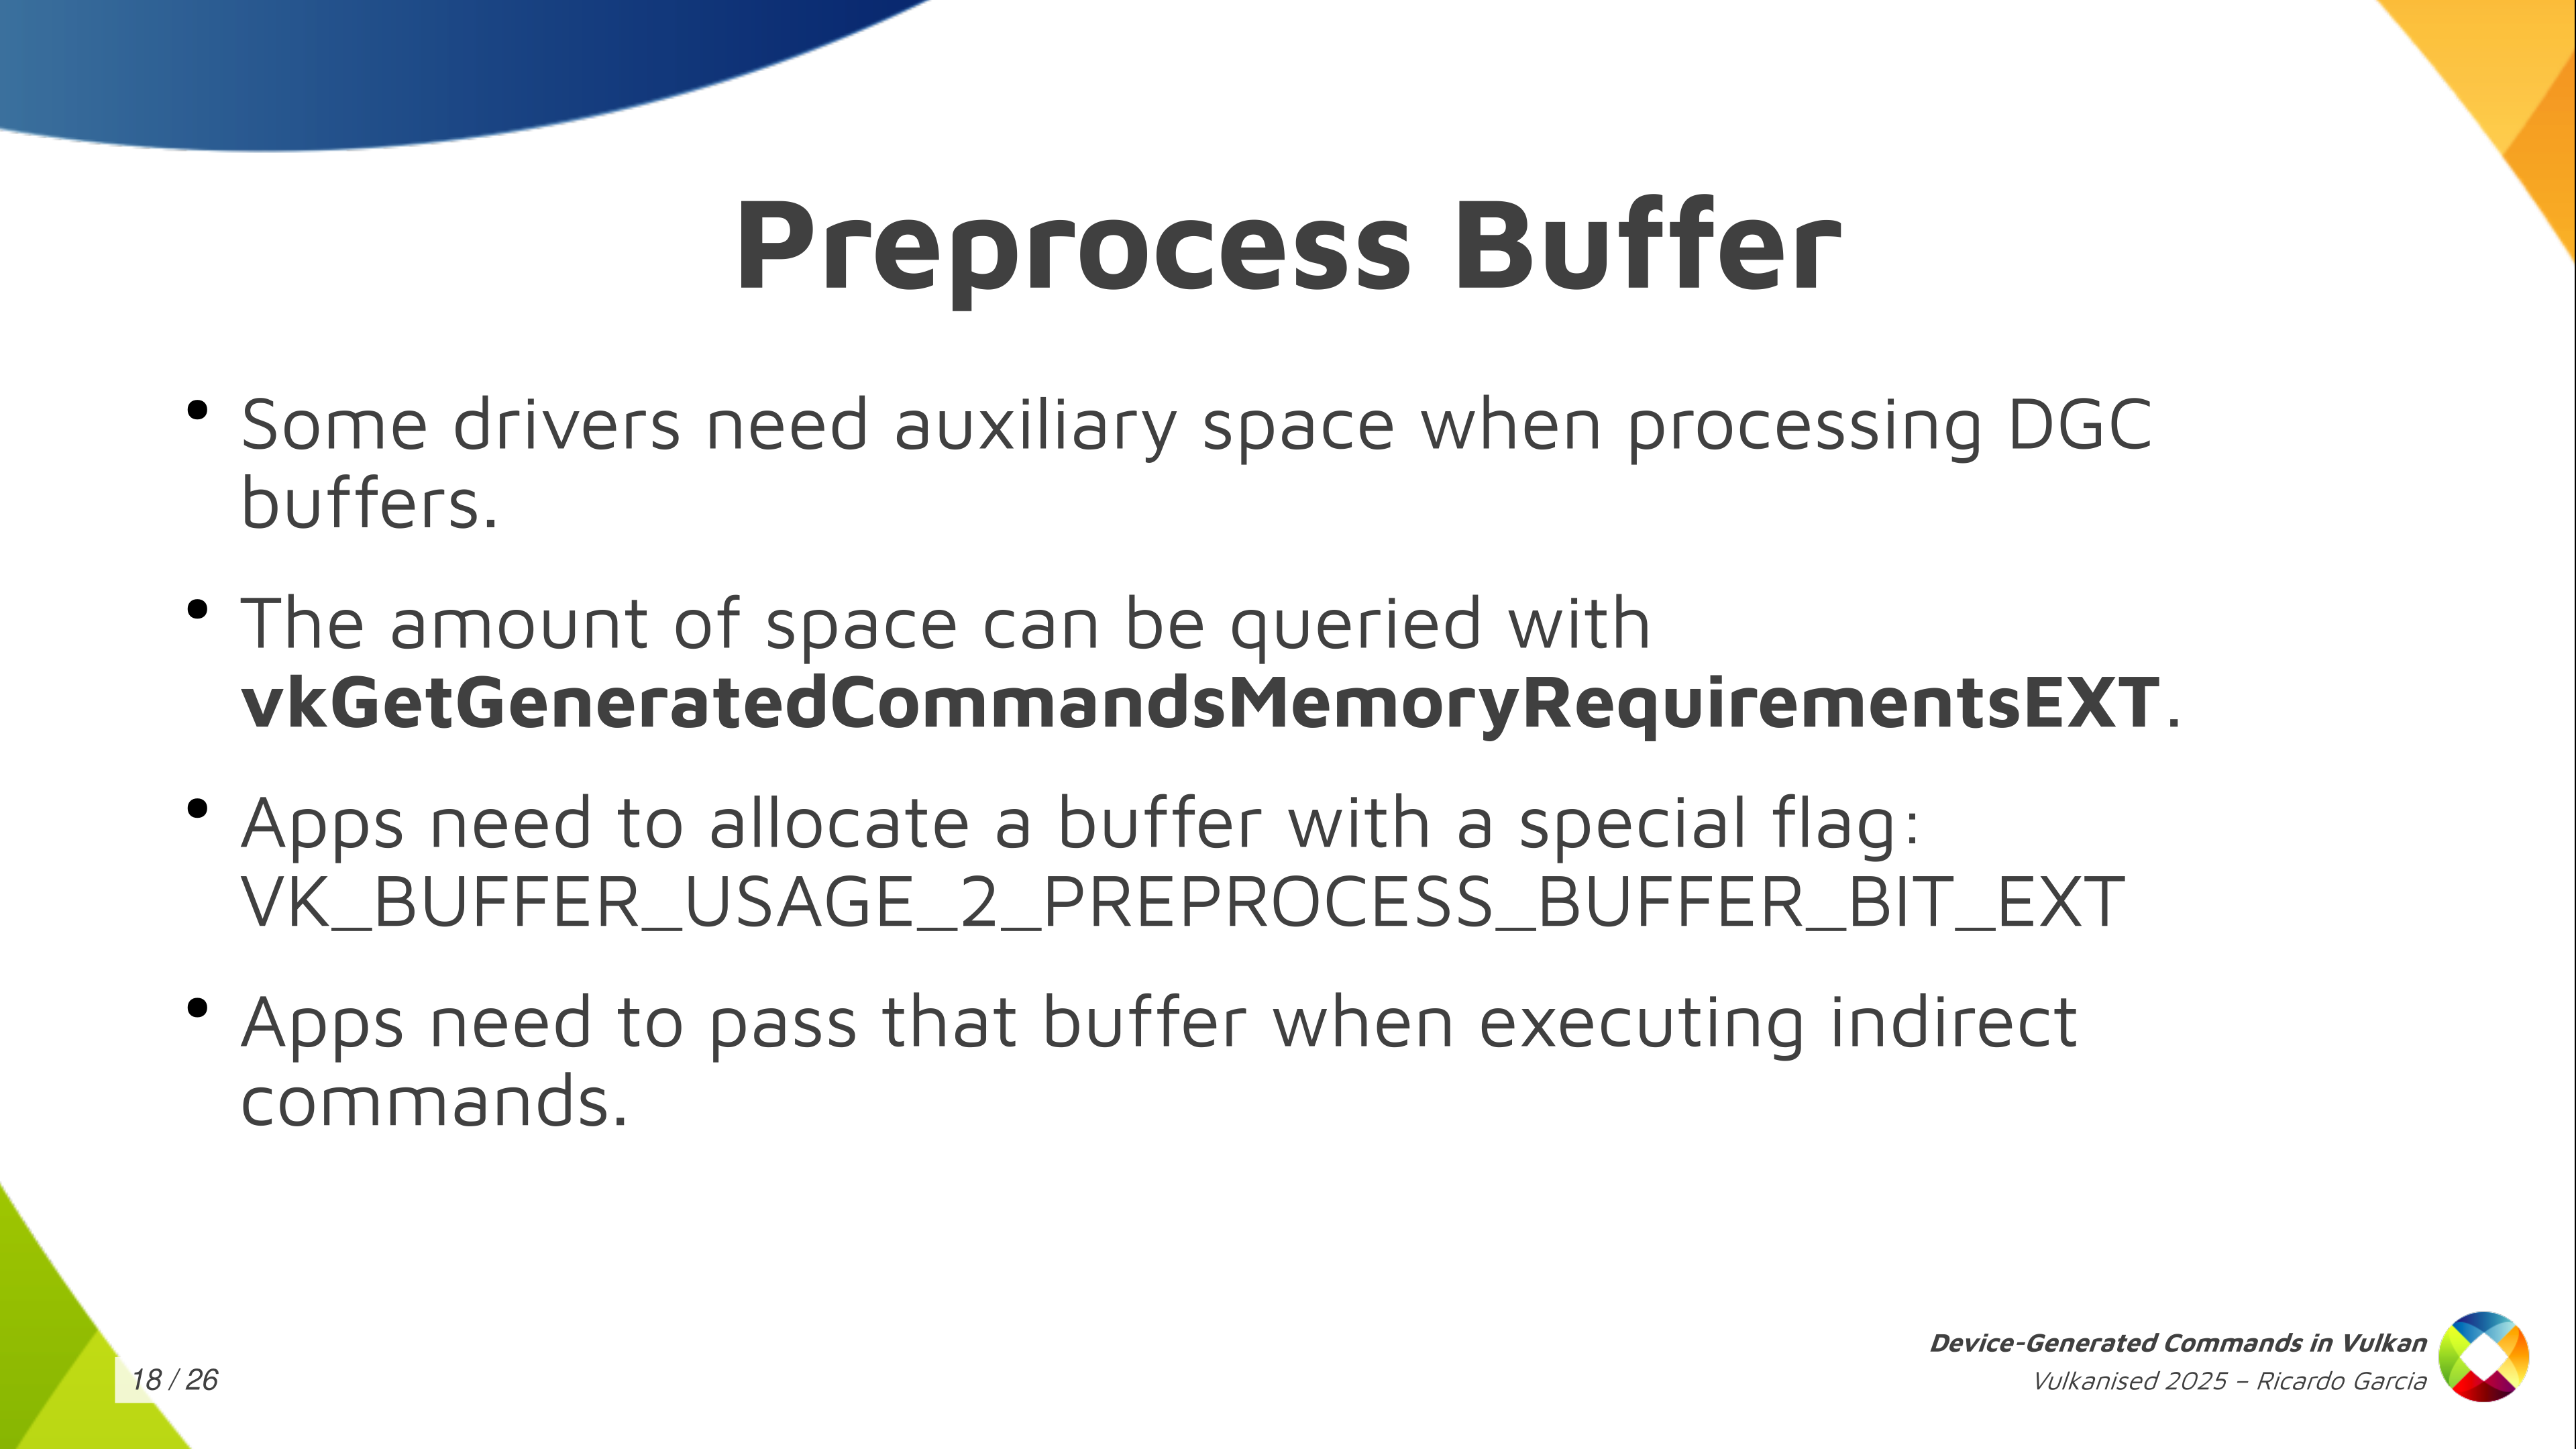
First of all, what is the pre-process buffer? The pre-process buffer is auxiliary space, a scratch buffer, because some drivers need to take a look at how the command sequence looks like before actually starting to execute things. They need to go over the sequence first and they need to write a few things down just to be able to properly do the job later to execute those commands.
Once you have the commands layout and you have the maximum number of sequences that you are going to execute, you can call this vkGetGeneratedCommandMemoryRequirementsEXT and the driver is going to tell you how much space it needs. Then, you can create a buffer, you can allocate the space for that, you need to pass a special new buffer usage flag (VK_BUFFER_USAGE_2_PREPROCESS_BUFFER_BIT_EXT) and, once you have that buffer, you pass the address and you pass a size in the previous structure.

Now the second thing is that we have the possibility of ding this preprocessing step explicitly. Explicit pre-processing is something that’s optional, but you probably want to do that if you care about performance because it’s the key to performance with some drivers.
When you use explicit pre-processing you don’t want to (1) record the state, (2) call this vkPreProcessGeneratedCommandsEXT and (3) call vkExecuteGeneratedCommandsEXT. That is what implicit pre-processing does so this doesn’t give you anything if you do it this way.
This is designed so that, if you want to do explicit pre-processing, you’re going to probably want to use a separate command buffer for pre-processing. You want to batch pre-processing calls together and submit them all together to keep the GPU busy and to give you the performance that you want. While you submit the pre-processing steps you may be still preparing the rest of the command buffers to enqueue the next batch of work. That’s the key to doing pre-processing optimally.
You need to decide beforehand if you are going to use explicit pre-processing or not because, if you’re going to use explicit preprocessing, you need to pass a flag when you create the commands layout, and then you have to call the function to preprocess generated commands. If you don’t pass that flag, you cannot call the preprocessing function, so it’s an all or nothing. You have to decide, and you do what you want.
One thing that is important to note is that preprocessing needs to know and has to have the same state, the same contents of the input buffers as when you execute so it can run properly.
The video contains a cut here because the presentation laptop ran out of battery.
If the pre-processing step needs to have the same state as the execution, you need to have bound the same pipeline state, the same shaders, the same descriptor sets, the same contents. I said that explicit pre-processing is normally used using a separate command buffer that we submit before actual execution. You have a small problem to solve, which is that you would need to record state twice: once on the pre-process command buffer, so that the pre-process step knows everything, and once on the execution, the regular command buffer, when you call execute. That would be annoying.
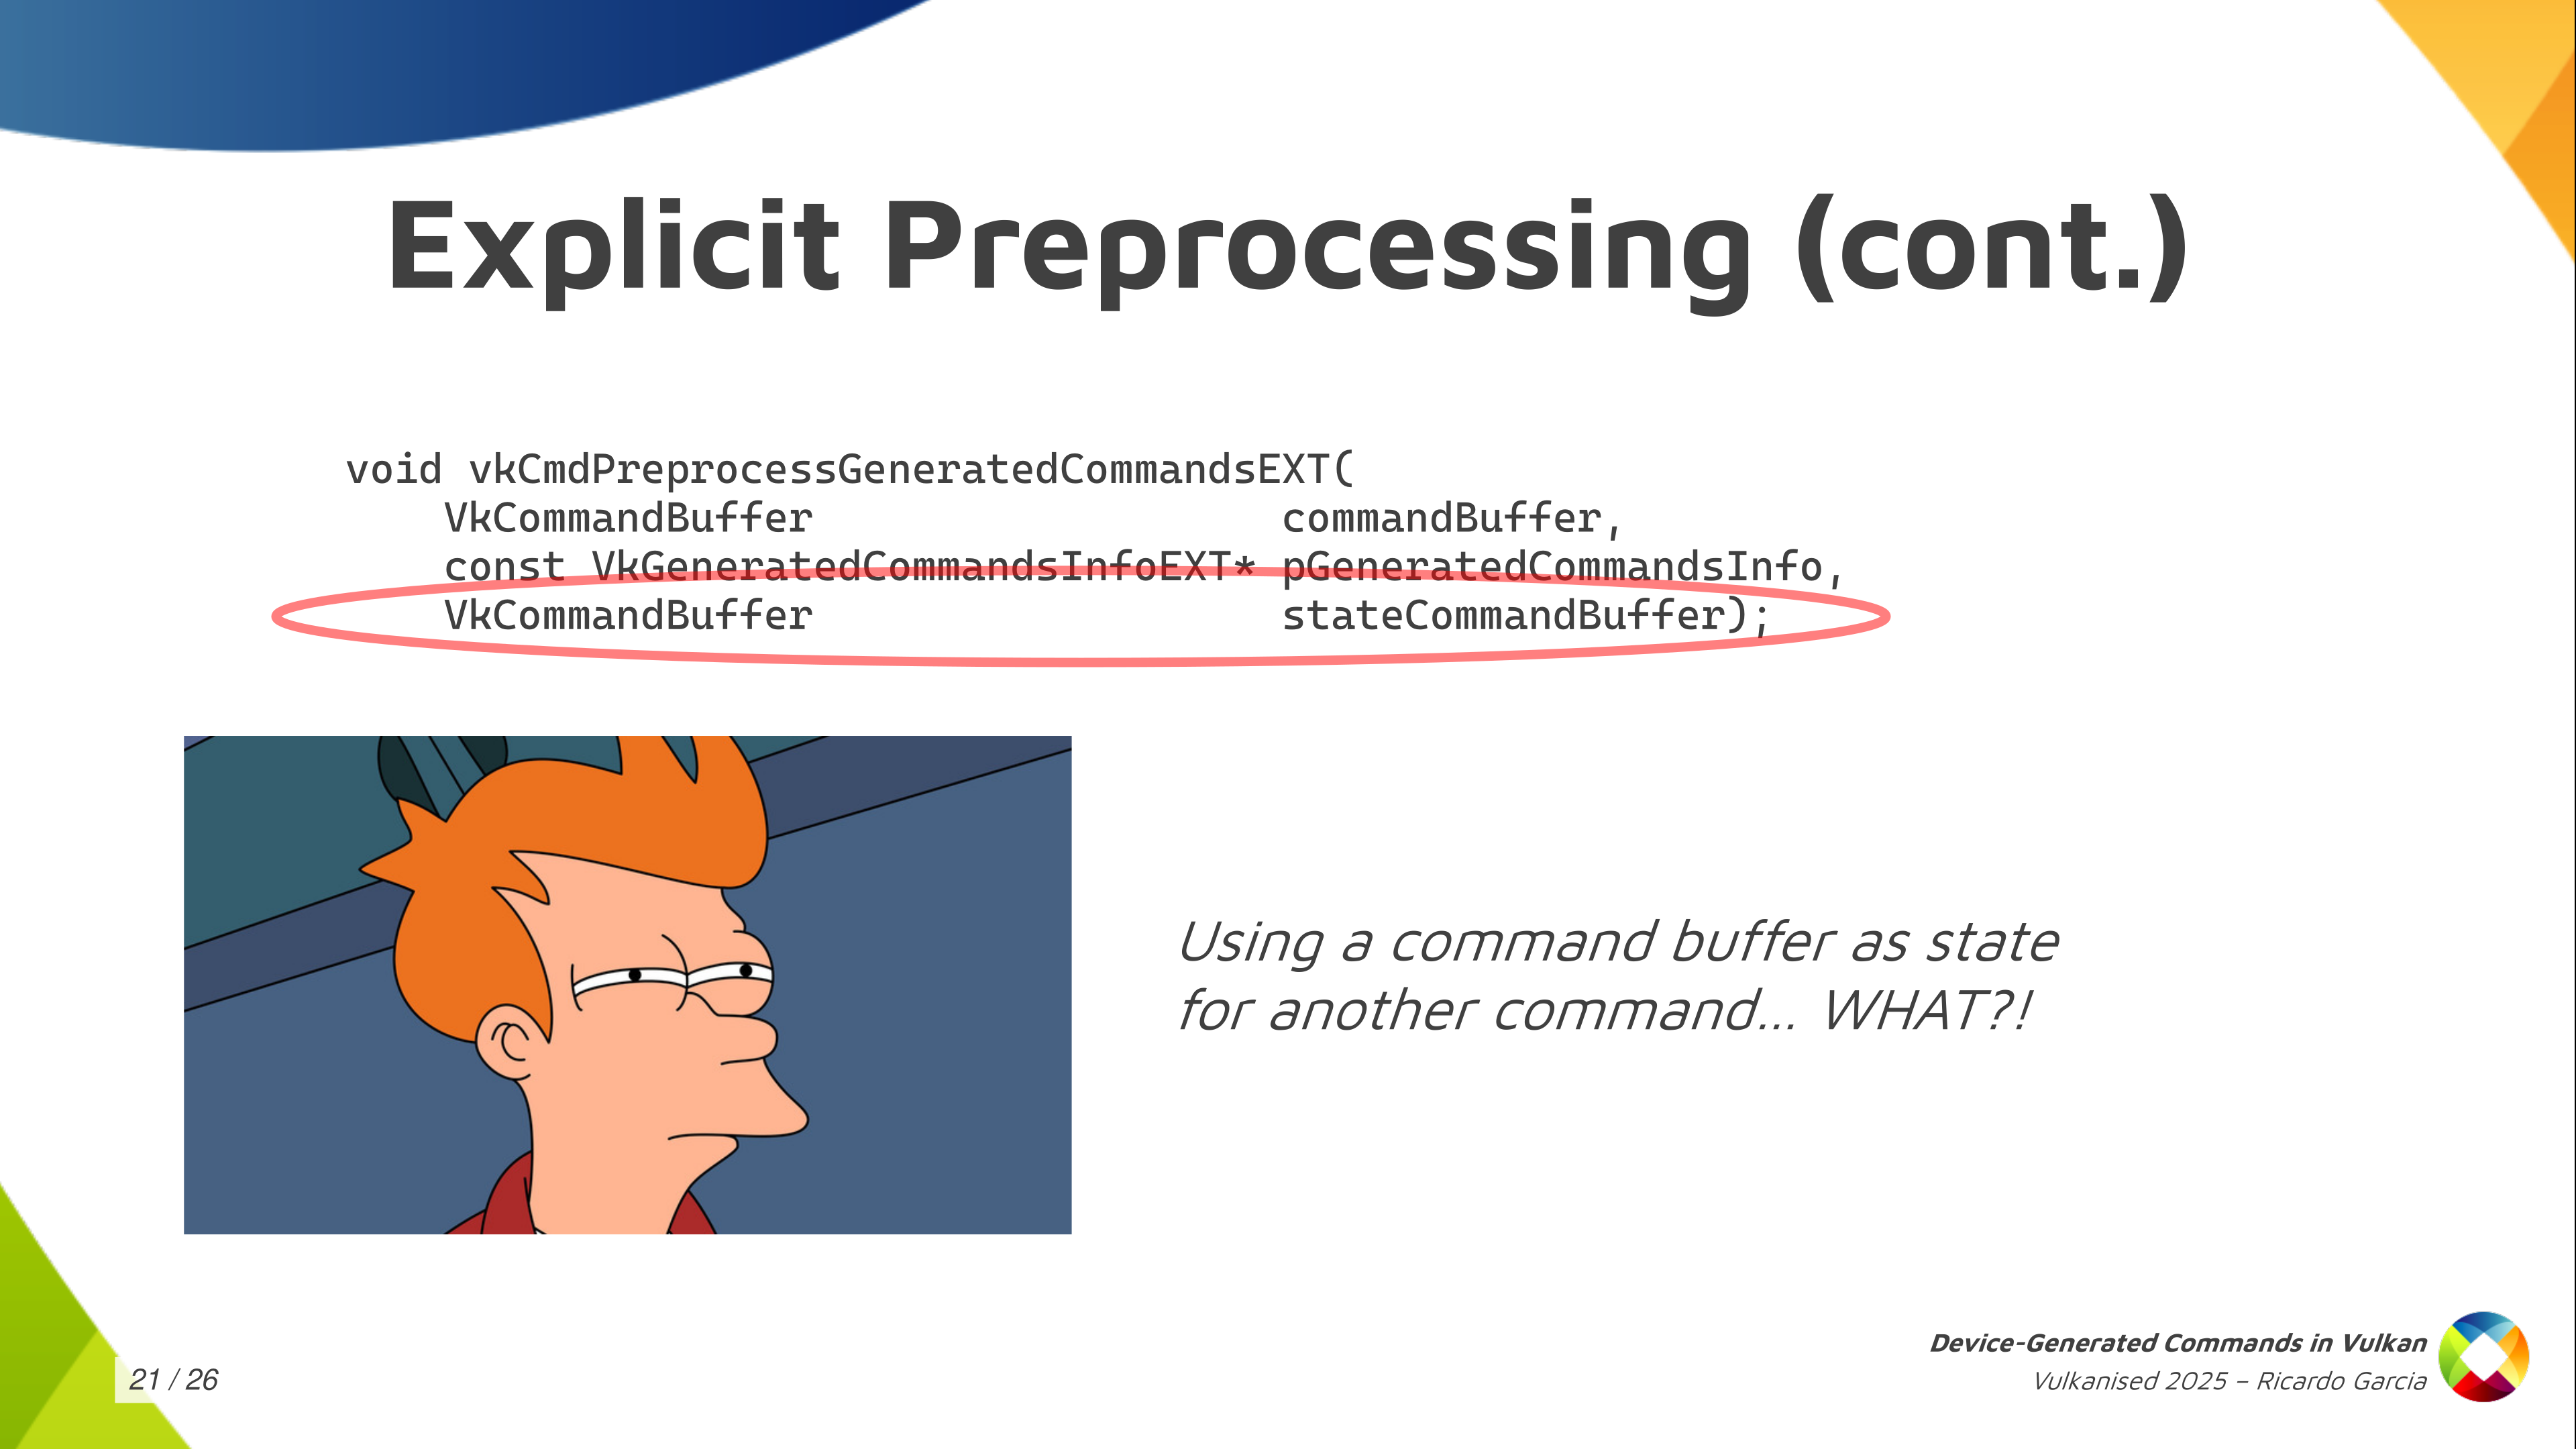
Instead of that, the pre-process generated commands function takes an argument that is a state command buffer and the specification tells you: this is a command buffer that needs to be in the recording state, and the pre-process step is going to read the state from it. This is the first time, and I think the only time in the specification, that something like this is done. You may be puzzled about what this is exactly: how do you use this and how do we pass this?
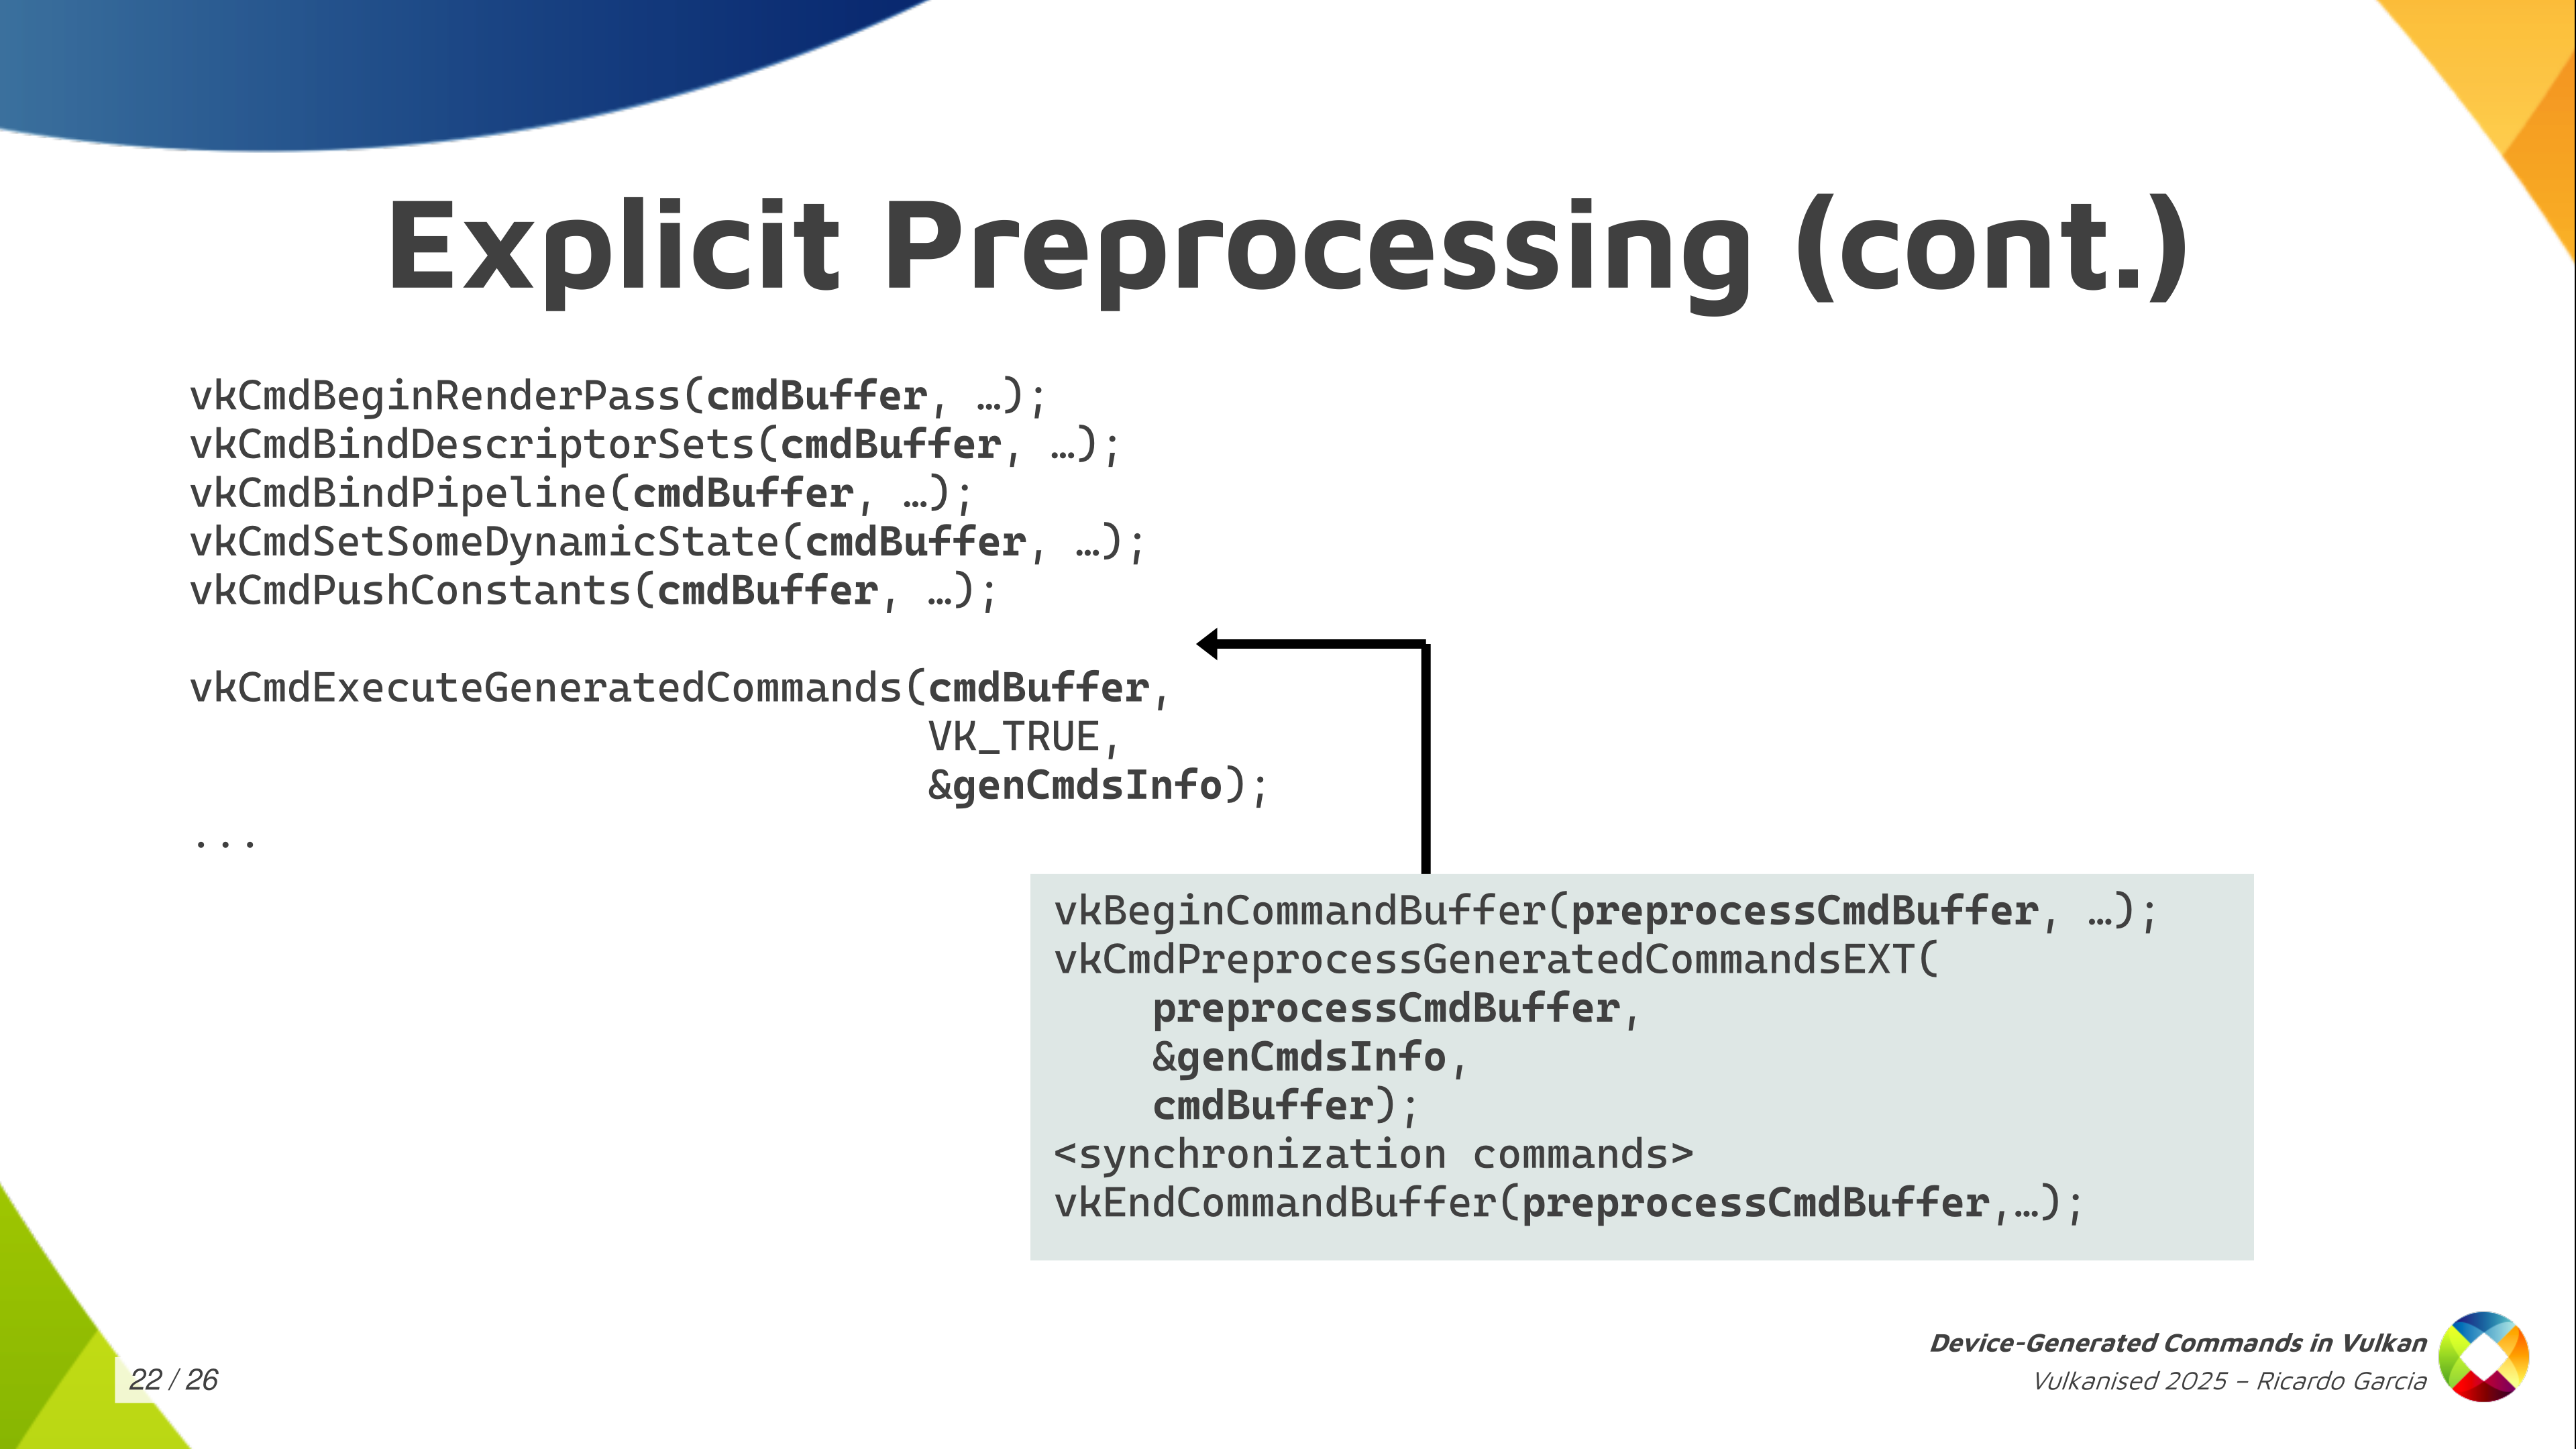
I just wanted to get this slide out to tell you: if you’re going to use explicit pre-processing, the ergonomic way of using it and how we thought about using the processing step is like you see in this slide. You take your main command buffer and you record all the state first and, just before calling execute-generated-commands, the regular command buffer contains all the state that you want and that preprocess needs. You stop there for a moment and then you prepare your separate preprocessing command buffer passing the main one as an argument to the preprocess call, and then you continue recording commands in your regular command buffer. That’s the ergonomic way of using it.

You do need some synchronization at some steps. The main one is that, if you generate the contents of the DGC buffer from the GPU itself, you’re going to need some synchronization: writes to that buffer need to be synchronized with something else that comes later which is executing or reading those commands from from the buffer.
Depending on if you use explicit preprocessing you can use the pipeline stage command-pre-process which is new and pre-process-read or you synchronize that with the regular device-generated-commands-execution which was considered part of the regular draw-indirect-stage using indirect-command-read access.
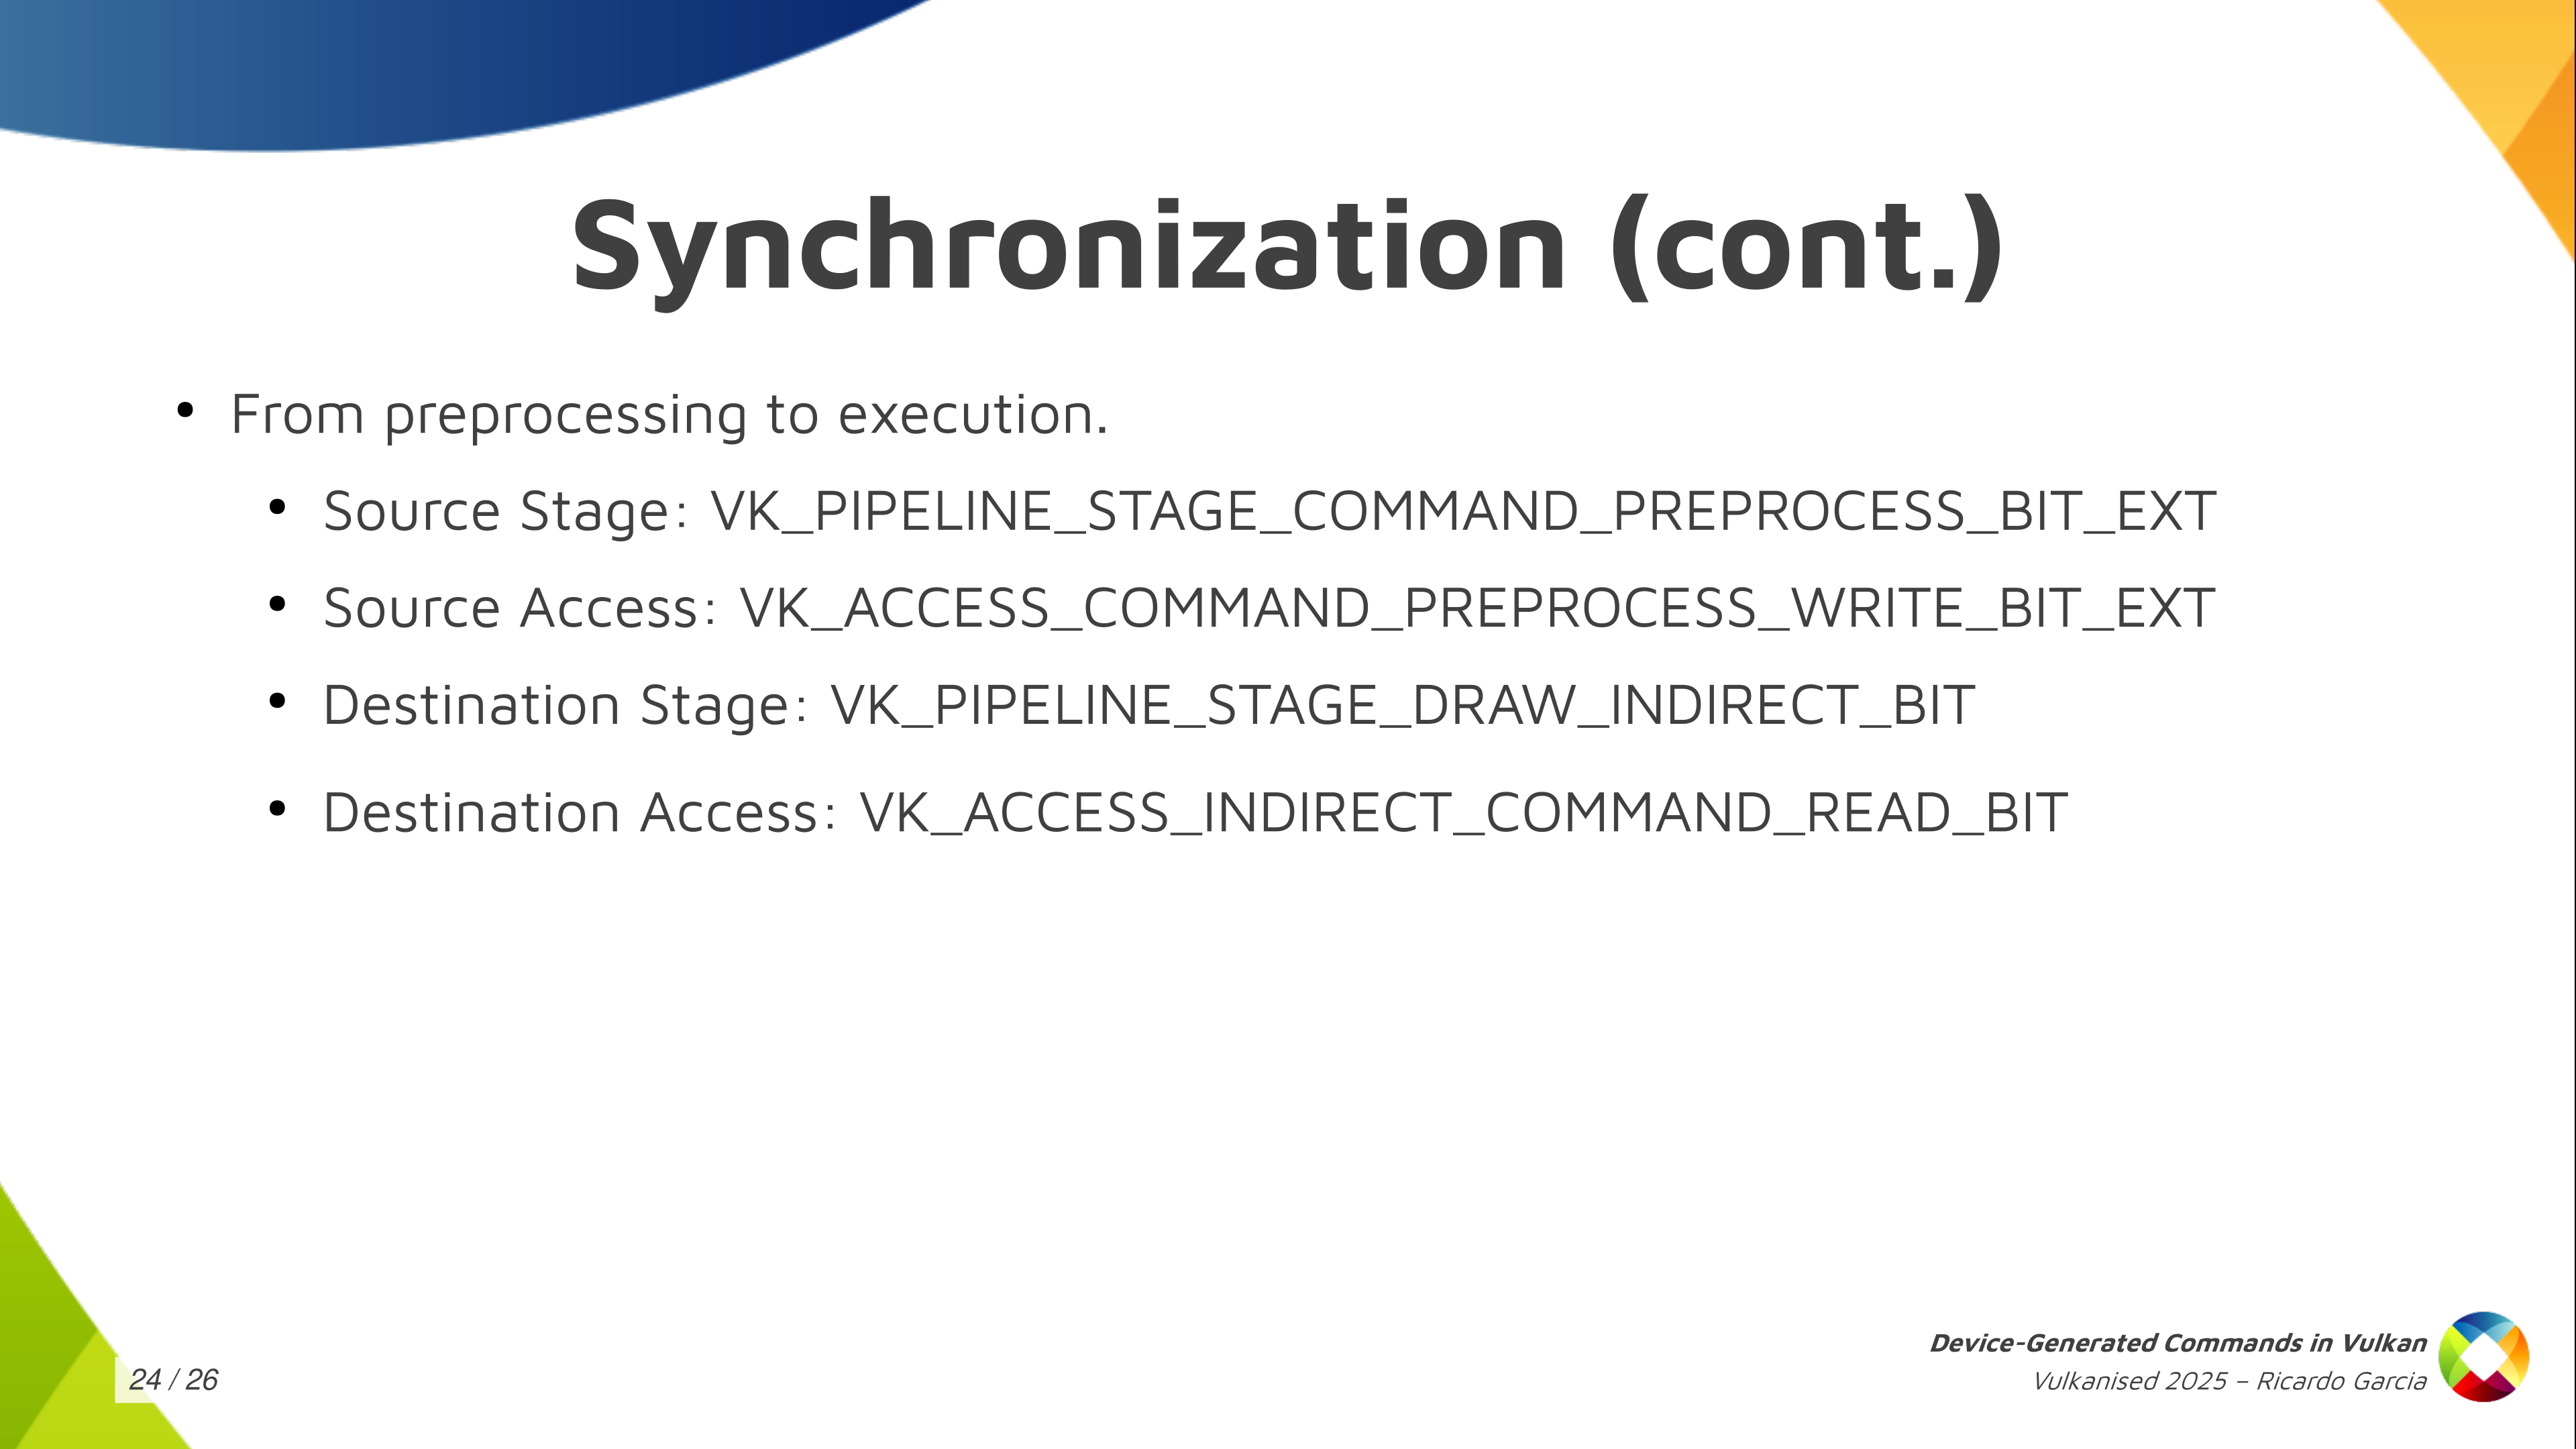
If you use explicit pre-processing you need to make sure that writes to the pre-process buffer happen before you start reading from that. So you use these just here (VK_PIPELINE_STAGE_COMMAND_PREPROCESS_BIT_EXT, VK_ACCESS_COMMAND_PREPROCESS_WRITE_BIT_EXT) to synchronize processing with execution (VK_PIPELINE_STAGE_DRAW_INDIRECT_BIT, VK_ACCESS_INDIRECT_COMMAND_READ_BIT) if you use explicit preprocessing.
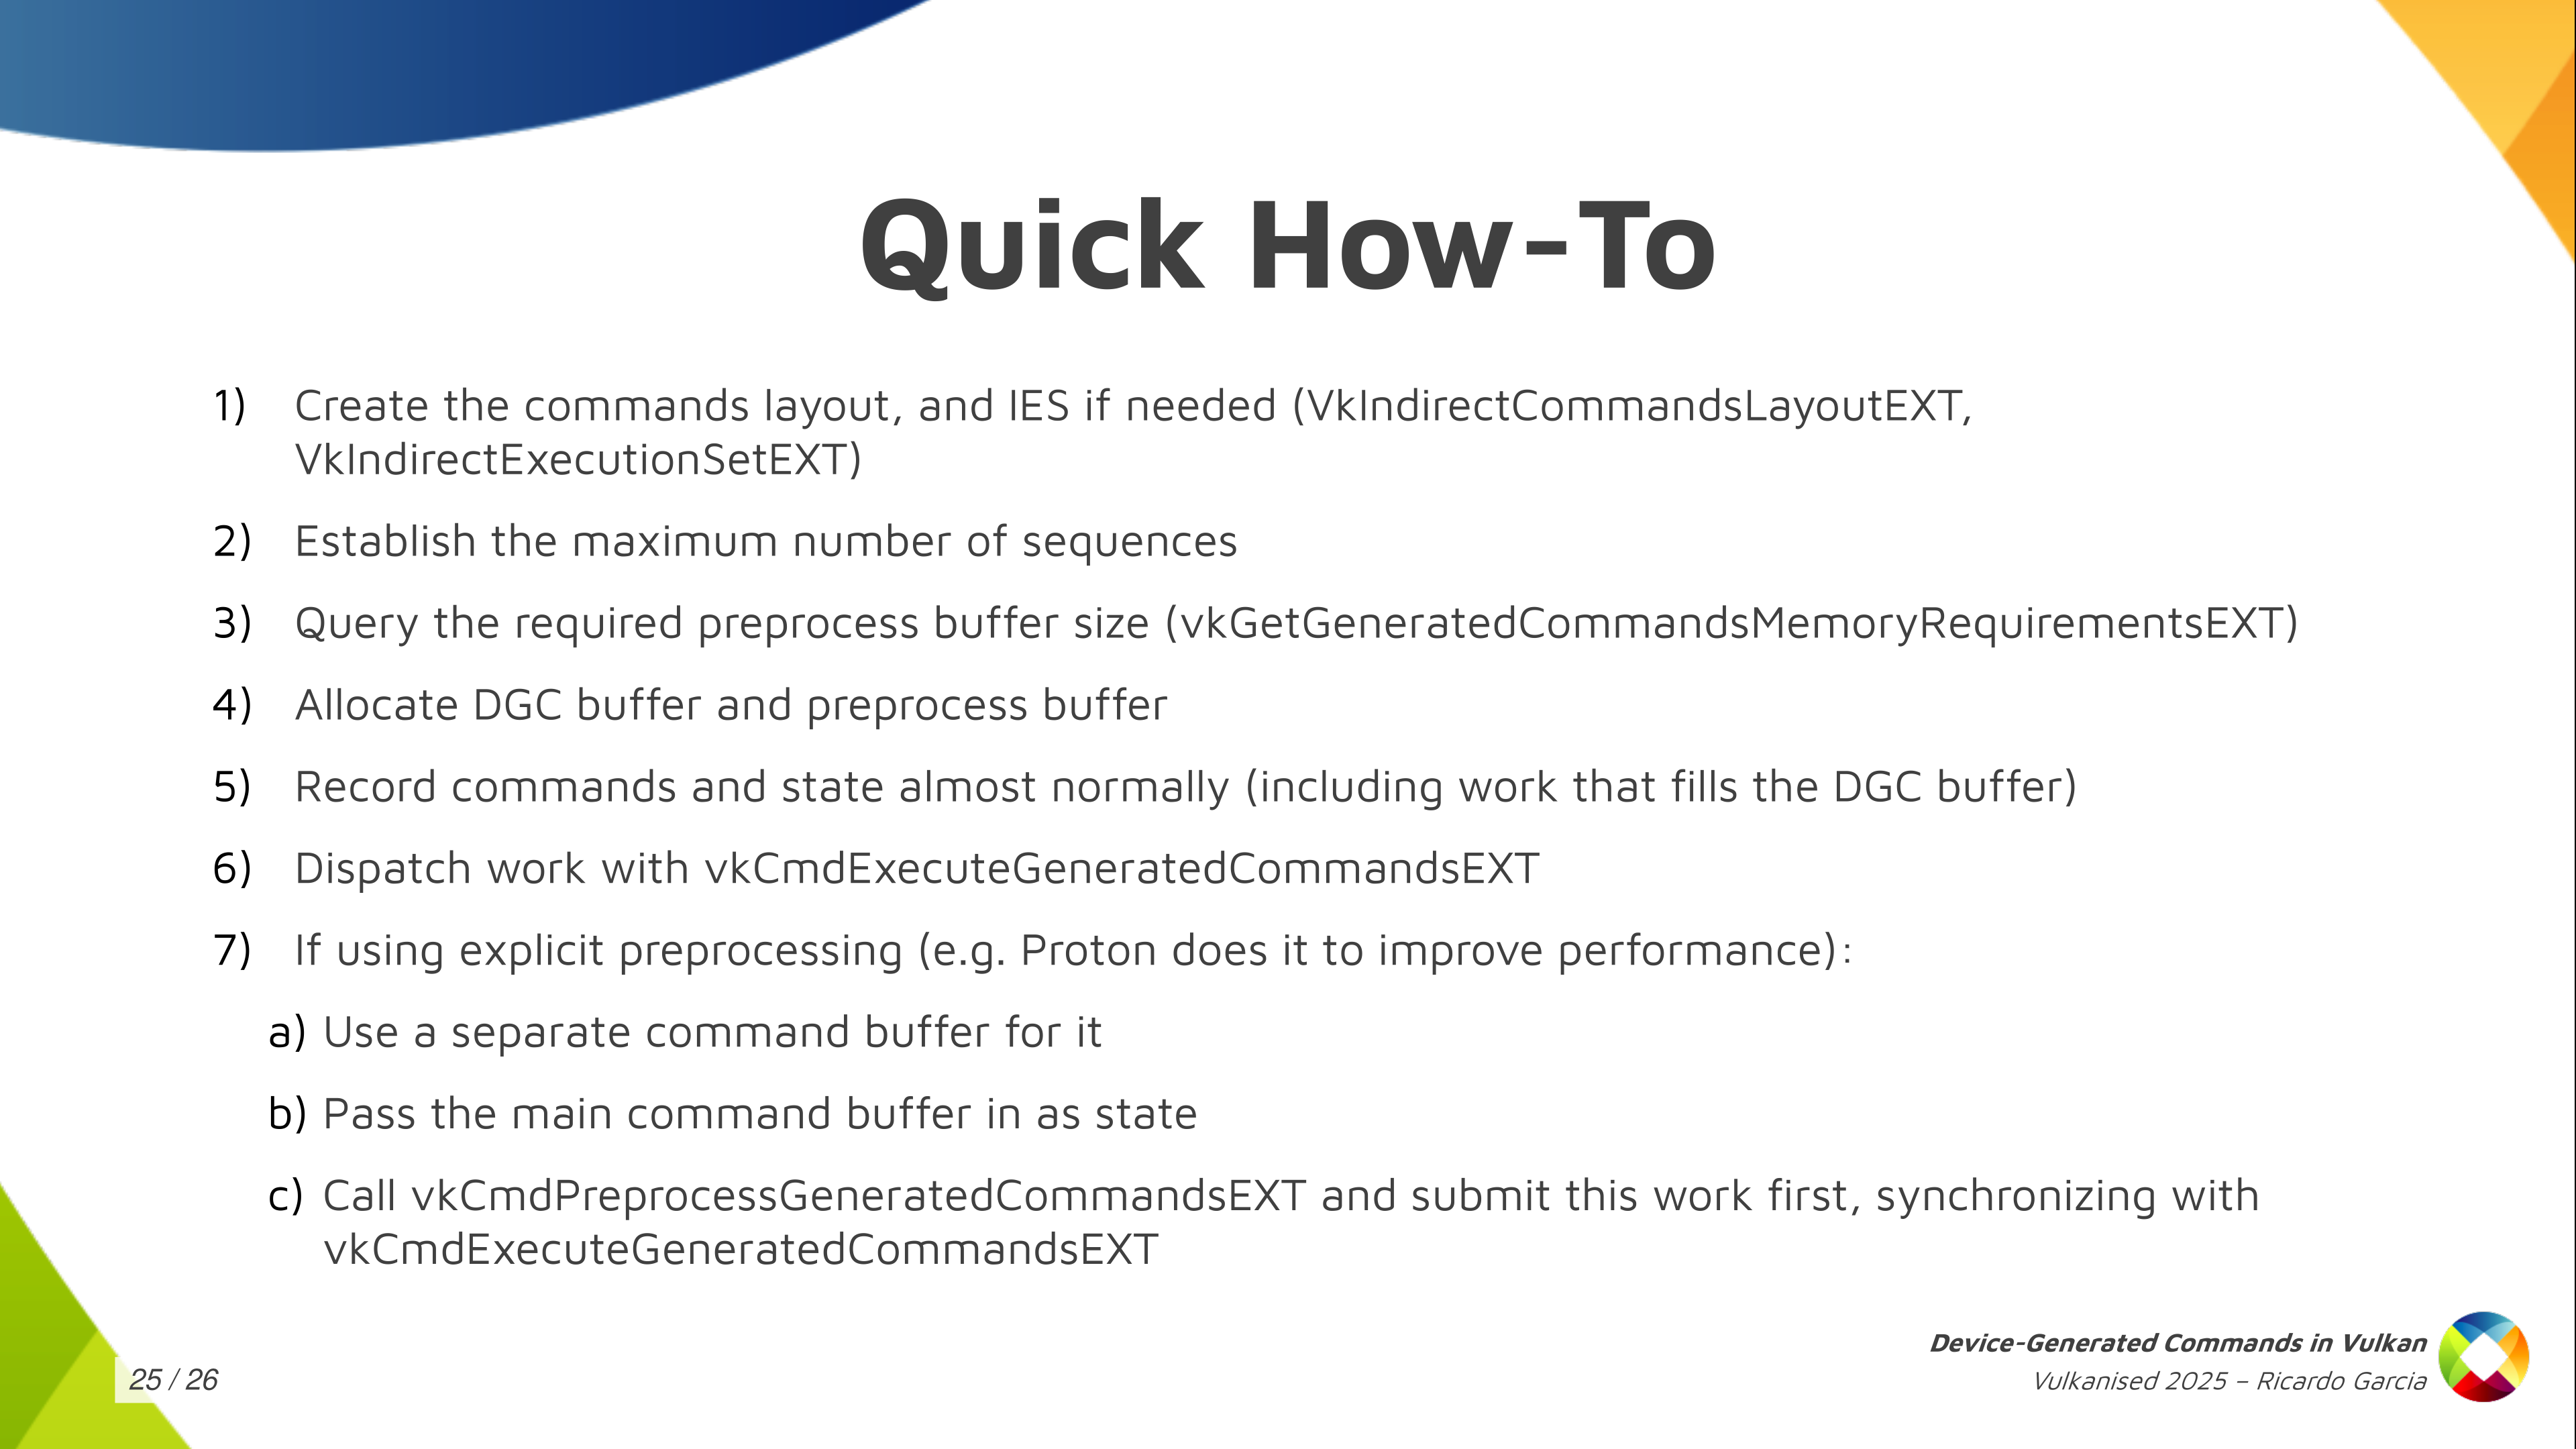
The quick how-to: I just wanted to get this slide out for those wanting a reference that says exactly what you need to do. All the steps that I mentioned here about creating the commands layout, the execution set, allocating the preprocess buffer, etc. This is the basic how-to.

And that’s it. Thanks for watching! Questions?
Comments
Year-end donations round, 2024 edition
Just in time before the year ends, I’ve gone ahead with my round of personal donations for 2024. I highly encourage you to do something similar and support the free and open source software and organizations that make a difference to you.
This year, my personal list consisted of:
-
Signal as every year, because I use it daily.
-
Calibre eBook Management, which my wife uses a lot.
-
The Gnome Project, which is my desktop environment these days.
-
LibreOffice because I use it very frequently and I think it’s a critical piece of software for the desktop.
-
Pi-Hole because I have one set up in my home network to block ads via DNS, so in practice it’s used every day.
-
Internet Archive, which is critical in preserving content and culture around the globe.
-
Software Freedom Conservancy because it has several important projects under its umbrella and they hit close to home now that the X.Org Foundation has chosen them as the fiscal sponsors.
Casting video files from Linux to AppleTV
A couple of weeks ago I received an AppleTV 4K as an early Christmas present. It’s a really nice device and it immediately replaced my Chromecast Ultra as the way to watch streaming content on my 15-year-old non-smart TV. Of course, the kids love it too!
Before I disconnected my Chromecast Ultra from the TV to put it back into its box, there was a small matter I needed to solve. Sometimes I watch content on my TV by casting it from my Linux PC. Most of that content are rips of my DVD collection, which is thankfully legal in Spain, as far as I know.
Using the Chromecast Ultra, I only had to configure catt once with the name given to the device and then launch catt cast VIDEO_FILE from the command line on my PC.
Like magic, the video would start playing on the TV provided it had a video and audio format the Chromecast Ultra would understand.
I was looking for a similar experience on the AppleTV, which does not support the Chromecast protocol and uses Apple’s proprietary AirPlay protocol instead.
The Concept
A web search only provided some unconvincing results with old tools that (for the most part) didn’t work, or were not as straightforward, or involved media servers and more complex setups. Long story short, if you want something that works well and is relatively easy to set up and understand in concept for us Linux nerds, the most practical solution I’ve found is to install the VLC app on the AppleTV, which has a convenient feature to play content from a remote URL. This way, you only need to serve the video file from your Linux box using HTTP. Yes, technically this is not really “casting”.
Typing URLs on the VLC app is a pain in the neck unless you pair a Bluetooth mouse and keyboard to your AppleTV, but VLC remembers a history of recently played URLs, so my final setup involves serving the content I want to play from a fixed URL. This way, I can open the VLC app, scroll down to the last played URL and hit the remote button to start playing whatever I’ve chosen to watch at that moment in a matter of seconds.
The URL
My URL looks like http://192.168.68.202:64004/watch.mkv.
Let’s take that bit by bit.
-
The protocol is HTTP since I’m serving content from the local network and there’s no SSL involved at all.
-
The host name is the local IP address of my Linux box. To make it fixed, I configured a static DHCP assignment in the router so my Linux PC always gets the same address. You only have to do that once. As an alternative, if you use a Pi-Hole as the DNS server and DHCP server, it usually makes your devices available under the name
HOSTNAME.lan, whereHOSTNAMEis the Linux box host name (seehostnamectl --helpif your distribution usessystemd). Using this method, you do not need a fixed local network IP address. Of course, a simple third alternative is using a static local IP address outside the DHCP address range, but that can be inconvenient if the Linux box is a laptop that you carry around to other networks and you prefer to use DHCP by default. -
For the port I’ve chosen 64004 as one of the ephemeral ports that’s normally always available on Linux and is easy to remember. You normally want a port that’s above 1024 so opening it for listening does not require root privileges. Another sensible classic choice is 8080, the typical alternative to HTTP port 80.
-
Finally, the file name I’ve chosen is
watch.mkvand it should be available from the root of the served content. Directory indexing is not required. VLC will parse the file contents before starting to play it, so the file does not need to be an actual MKV file despite its name.
The HTTP Server
You probably want something simple for the HTTP server, and there are several options.
Most Linux distributions have Python installed, and the http.server module includes a simple built-in HTTP server that can be used from the command line.
python3 -m http.server -d DIRECTORY PORT will serve the contents of the DIRECTORY directory using the given PORT (e.g. 8080 as we mentioned earlier).
I’m also partial to Busybox’s httpd server because it has a few extra capabilities and it allows you to customize directory indexing with a CGI script.
To use it, call busybox httpd -f -vv -p PORT -h DIRECTORY.
For most people, the Python server is a more direct and convenient option.
A simple setup is serving the contents of a fixed directory in the file system where you place a symlink named watch.mkv that points to the real file you want to serve, and you change the target of the symlink each time.
The directory could be a subdirectory of /tmp, or perhaps $HOME/public_html.
In my case I serve $HOME/Public because I use that location for serving files to the local network with multiple tools.
Then, there’s the matter of making sure the AppleTV can connect to your Linux box on the chosen port.
If your distribution uses some kind of firewall, you may have to explicitly open the port.
For example, in Fedora Workstation you could use sudo firewall-cmd --permanent --add-port=PORT/tcp as a one-time setup command with PORT being the chosen port.
Subtitles
If the file you serve contains subtitle streams, VLC lets you choose the subtitle track when playing content, so that’s good enough.
The app also has an option to look for subtitles following the same name pattern as the file being played.
For example, placing a watch.srt file next to the video file in the same directory should work.
I sometimes download SRT files from the web when the included DVD subtitles are subpar.
I’m looking at you, Paw Patrol 2-Movie Collection, and your subtitles that display too early, too late or too briefly!
Almost as disappointing as the quality of the toys.
In any case, I found it very convenient to create a proper MKV file on the fly whenever I want to watch something, embedding the subtitle stream in it if needed, and making it active by default for the most friction-less experience possible.
Note this is different from “burning” the subtitles into the video stream, which requires re-encoding.
When embedding subtitles this way, I don’t even have to bother activating them from VLC.
Creating a proper MKV file on /tmp is easy and pretty fast (seconds) if you don’t re-encode the video or audio streams.
For that, I wrote the following script and named it ffmpeg-prepare-watch.sh.
Note you can change WEBSERVER_PORT, WEBSERVER_ROOT and the way the HTTP server is launched as mentioned above.
Conclusion
The user experience is now precisely as I like it: simple and understandable, despite using the command line.
When I want to “cast” something from my Linux PC, I call ffmpeg-prepare-watch.sh VIDEO_FILE SUBTITLES_FILE.
This will create /tmp/watch.mkv very quickly, and $HOME/Public/watch.mkv is a symlink to it.
Once ffmpeg finishes, I answer "y" to the prompt to start the web server, which will serve the contents of $HOME/Public over HTTP.
Finally, I start playing the last URL from the VLC AppleTV app.
The whole process takes a few seconds and is as convenient as using catt was before.
My XDC 2024 talk about VK_EXT_device_generated_commands
Some days ago I wrote about the new VK_EXT_device_generated_commands Vulkan extension that had just been made public. Soon after that, I presented a talk at XDC 2024 with a brief introduction to it. It’s a lightning talk that lasts just about 7 minutes and you can find the embedded video below, as well as the slides and the talk transcription if you prefer written formats.
Truth be told, the topic deserves a longer presentation, for sure. However, when I submitted my talk proposal for XDC I wasn’t sure if the extension was going to be public by the time XDC would take place. This meant I had two options: if I submitted a half-slot talk and the extension was not public, I needed to talk for 15 minutes about some general concepts and a couple of NVIDIA vendor-specific extensions: VK_NV_device_generated_commands and VK_NV_device_generated_commands_compute. That would be awkward so I went with a lighning talk where I could talk about those general concepts and, maybe, talk about some VK_EXT_device_generated_commands specifics if the extension was public, which is exactly what happened.
Fortunately, I will talk again about the extension at Vulkanised 2025. It will be a longer talk and I will cover the topic in more depth. See you in Cambridge in February and, for those not attending, stay tuned because Vulkanised talks are recorded and later uploaded to YouTube. I’ll post the link here and in social media once it’s available.
XDC 2024 recording
Talk slides and transcription
Hello, I’m Ricardo from Igalia and I’m going to talk about Device-Generated Commands in Vulkan. This is a new extension that was released a couple of weeks ago. I wrote CTS tests for it, I helped with the spec and I worked with some actual heros, some of them present in this room, that managed to get this implemented in a driver.
Device-Generated Commands is an extension that allows apps to go one step further in GPU-driven rendering because it makes it possible to write commands to a storage buffer from the GPU and later execute the contents of the buffer without needing to go through the CPU to record those commands, like you typically do by calling vkCmd functions working with regular command buffers.
It’s one step ahead of indirect draws and dispatches, and one step behind work graphs.
Getting away from Vulkan momentarily, if you want to store commands in a storage buffer there are many possible ways to do it. A naïve approach we can think of is creating the buffer as you see in the slide. We assign a number to each Vulkan command and store it in the buffer. Then, depending on the command, more or less data follows. For example, lets take the sequence of commands in the slide: (1) push constants followed by (2) dispatch. We can store a token number or command id or however you want to call it to indicate push constants, then we follow with meta-data about the command (which is the section in green color) containing the layout, stage flags, offset and size of the push contants. Finally, depending on the size, we store the push constant values, which is the first chunk of data in blue. For the dispatch it’s similar, only that it doesn’t need metadata because we only want the dispatch dimensions.
But this is not how GPUs work. A GPU would have a very hard time processing this. Also, Vulkan doesn’t work like this either. We want to make it possible to process things in parallel and provide as much information in advance as possible to the driver.
So in Vulkan things are different. The buffer will not contain an arbitrary sequence of commands where you don’t know which one comes next. What we do is to create an Indirect Commands Layout. This is the main concept. The layout is like a template for a short sequence of commands. We create this layout using the tokens and meta-data that we saw colored red and green in the previous slide.
We specify the layout we will use in advance and, in the buffer, we ony store the actual data for each command. The result is that the buffer containing commands (lets call it the DGC buffer) is divided into small chunks, called sequences in the spec, and the buffer can contain many such sequences, but all of them follow the layout we specified in advance.
In the example, we have push constant values of a known size followed by the dispatch dimensions. Push constant values, dispatch. Push constant values, dispatch. Etc.

The second thing Vulkan does is to severely limit the selection of available commands. You can’t just start render passes or bind descriptor sets or do anything you can do in a regular command buffer. You can only do a few things, and they’re all in this slide. There’s general stuff like push contants, stuff related to graphics like draw commands and binding vertex and index buffers, and stuff to dispatch compute or ray tracing work. That’s it.
Moreover, each layout must have one token that dispatches work (draw, compute, trace rays) but you can only have one and it must be the last one in the layout.
Something that’s optional (not every implementation is going to support this) is being able to switch pipelines or shaders on the fly for each sequence.
Summing up, in implementations that allow you to do it, you have to create something new called Indirect Execution Sets, which are groups or arrays of pipelines that are more or less identical in state and, basically, only differ in the shaders they include.
Inside each set, each pipeline gets an index and you can change the pipeline used for each sequence by (1) specifying the Execution Set in advance (2) using an execution set token in the layout, and (3) storing a pipeline index in the DGC buffer as the token data.
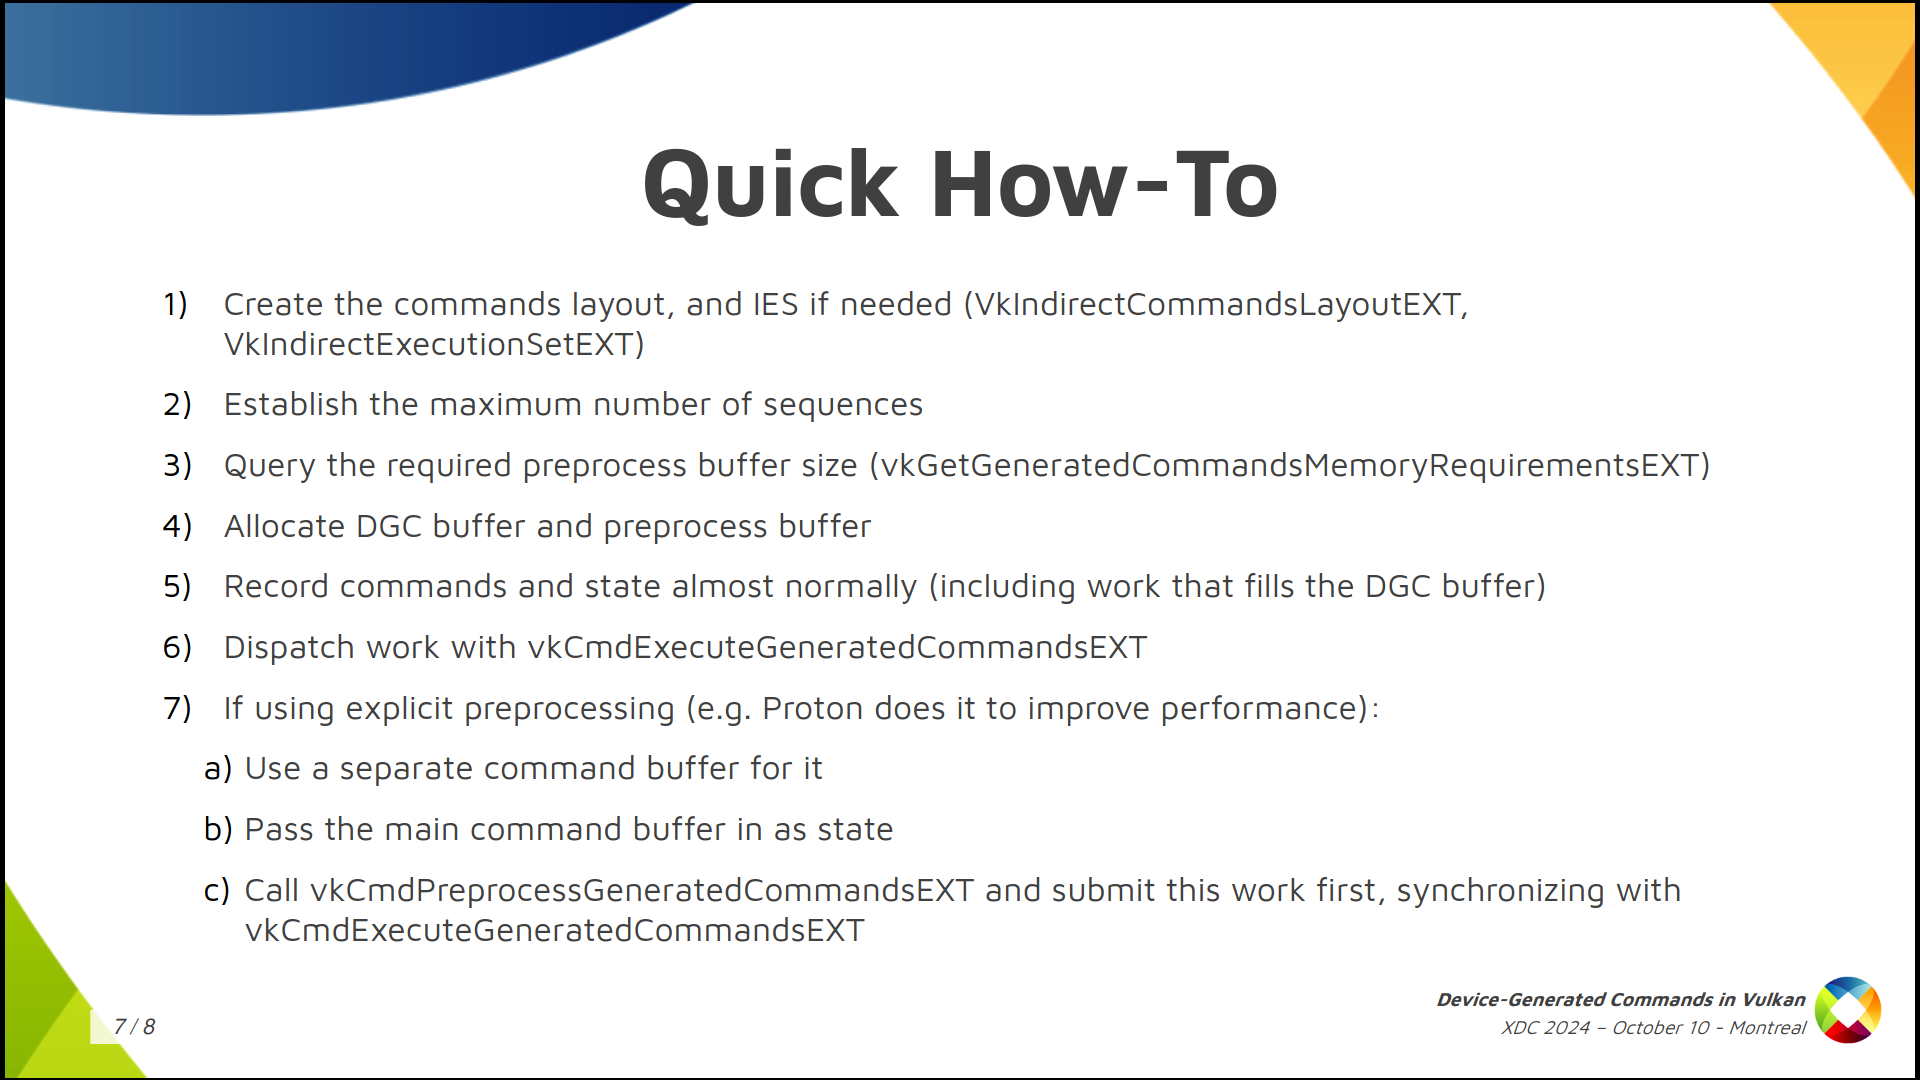
The summary of how to use it would be:
First, create the commands layout and, optionally, create the indirect execution set if you’ll switch pipelines and the driver supports that.
Then, get a rough idea of the maximum number of sequences that you’ll run in a single batch.
With that, create the DGC buffer, query the required preprocess buffer size, which is an auxiliar buffer used by some implementations, and allocate both.
Then, you record the regular command buffer normally and specify the state you’ll use for DGC. This also includes some commands that dispatch work that fills the DGC buffer somehow.
Finally, you dispatch indirect work by calling vkCmdExecuteGeneratedCommandsEXT. Note you need a barrier to synchronize previous writes to the DGC buffer with reads from it.
You can also do explicit preprocessing but I won’t go into detail here.

That’s it. Thank for watching, thanks Valve for funding a big chunk of the work involved in shipping this, and thanks to everyone who contributed!
Bespoke solution to monitor power outages at home
When I came home from a 5-days family trip this summer I immediately realized power was off in our flat. The main switch in the electricity panel was down together with one other additional switch. Everything appeared to have happened a few days before we arrived, so a few things in the fridge were ruined and most of the freezer contents had to be discarded. This was despite the fact we have relatives living close by with an emergency set of keys but, as we were completely unaware of the events, we couldn’t ask them to go check.
I thought about what happened and decided I wanted to set something up so I would get warned if power fails while I’m away. My first thoughts were using something that was available off-the-shelf, but I failed to find something cheap and easy. Fortunately, I already had a couple of things that could help me in this: a small cloud server (that hosts this blog) and a permanently-connected RPi4 that I use as a Pi-Hole at home. To be warned of a power failure, I wanted to use my RPi to ping (somehow) the cloud server from time to time and, on the cloud server, periodically check if we have received a recent ping. If too much time goes by without receiving a ping from home, we can assume something’s wrong and either we have a power outage or an Internet service outage.
The implementation would need the following things:
-
The cloud server had to be able to send me an email.
-
The cloud server could have a CGI script that, when accessed, would write a timestamp somewhere.
-
The RPi would access that CGI script once every minute, for example.
-
The cloud server would have something to check timestamps periodically, then email me if it’s been too long without a ping.
The difficulty is that I’m not a web developer, plus I’m using nginx on the cloud server and nginx doesn’t support CGI scripts, which complicates things a bit. However, I made all of this work and wanted to share my scripts in case someone finds it useful.
Sending emails from the server
This one is easy because I was already using something similar to monitor disks on a few computers using smartd.
When smartd detects a disk may be about to fail, it can be told to email root, and we can use $HOME/.forward to redirect the email with a script.
The script, as in this case, can use msmtp, which is a nice program that lets you send emails from the command line using an SMTP server.
Thanks to Fastmail, I generated a new set of credentials for SMTP access, installed msmtp in the cloud server and created a config file for it in /etc/msmtprc.
Note running msmtp --version will report the right system configuration file name.
The configuration file looks like this:
account default
host SERVER
port PORT
auth on
user USERNAME
password PASSWORD
tls on
tls_certcheck on
tls_starttls off
tls_trust_file /etc/ssl/certs/ca-bundle.crt
syslog on
timeout 30
In my case, SERVER is smtp.fastmail.com, PORT is 465 and USERNAME and PASSWORD are the ones I created.
The TLS trust file has that path in Fedora, but it may be different on other distributions.
With that configuration all set, I created the following script as /usr/local/bin/pingmonitor-mail:
#!/usr/bin/env bash
FROM=YOUR_EMAIL_ADDRESS
TO=YOUR_EMAIL_ADDRESS
DATE="$( TZ=Z date -R )"
SUBJECT="$1"
BODY="$2"

msmtp -f "$FROM" "$TO" <<EOF
From: $FROM
To: $TO
Date: $DATE
Subject: $SUBJECT

$BODY
EOF
It expects the subject of the email as the first argument and typically a sentence for the body as the second argument. I ran it a few times from the command line and verified it worked perfectly.
CGI script to record ping timestamps
As mentioned before, nginx does not support CGI.
It only supports FastCGI, so this is slightly more complicated than expected.
After a few tries, I settled on using /var/run/pingmonitor as the main directory containing the FastCGI socket (more on that later) and /var/run/pingmonitor/pings for the actual pings.
I thought a bit about how to record the ping timestamps.
My initial idea was to save it to a file but then I started overthinking it.
If I used a file to store the timestamps (either appending to it or overwriting the file contents) I wanted to make sure the checker would always read a full timestamp and wouldn’t get partial file contents.
If the CGI script wrote the timestamp to the file it would need to block it somehow in the improbable case that the checker was attempting to read the file at the same time.
To avoid that complication, I decided to take advantage of the file system to handle that for me.
/var/run/pingmonitor/pings would be a directory instead.
When the CGI script runs, it would create a new empty file in that directory with the timestamp being the name of the file.
The checker would list the files in the directory, convert their names to timestamps and check the most recent one.
I think that works because either the file exists or it does not when you list the directory contents, so it’s atomic.
If you know it’s not atomic, please leave a comment or email me with a reference.
For the FastCGI script itself, I installed the fastcgi Python module using pip.
This allowed me to create a script that easily provides a FastCGI process that launches before nginx, runs as the nginx user and creates the timestamp files when called.
Take a look below:
#!/usr/bin/env python
import os
import fastcgi
import sys
import pwd
import grp
import time
import pathlib

RUN_DIR = '/var/run/pingmonitor'
PINGS_DIR = os.path.join(RUN_DIR, 'pings')
USER='nginx'
GROUP='nginx'
ONE_SECOND_NS = 1000000000

# Create run and pings directory. Not a problem if they exist.
os.makedirs(RUN_DIR, mode=0o755, exist_ok=True)
os.makedirs(PINGS_DIR, mode=0o755, exist_ok=True)

# Get UID and GID for nginx.
uid = pwd.getpwnam('nginx').pw_uid
gid = grp.getgrnam('nginx').gr_gid

# Make the directories be owned by the nginx user, so it can create the socket
# and ping files.
os.chown(RUN_DIR, uid, gid)
os.chown(PINGS_DIR, uid, gid)

# Switch to the run (base) directory to create the socket there.
os.chdir(RUN_DIR)

# Become the nginx user.
os.setgid(gid)
os.setuid(uid)

@fastcgi.fastcgi()
def pingmonitor():
    timestamp = time.time_ns() // ONE_SECOND_NS
    filename = '%016d' % (timestamp,)
    path = os.path.join(PINGS_DIR, filename)
    pathlib.Path(path).touch()
    sys.stdout.write('Content-type: text/plain\n\n')
    sys.stdout.write('OK\n')
Apart from directory creation and user switching logic at the beginning, the interesting part is the pingmonitor function.
It obtains the epoch in nanoseconds and converts it to seconds.
The file name is a zero-padded version of that number, which is is then “touched”, and a reply is served to the HTTP client.
Not pictured, is that by decorating the function with @fastcgi.fastcgi(), a socket is created in the current directory (/var/run/pingmonitor) with the name fcgi.sock.
That socket is the FastCGI socket that nginx will use to redirect requests to the FastCGI process.
Also, if you run that file as a script, the decorator will create a main loop for you.
I saved the script to /usr/local/bin/pingmonitor.cgi and set up a systemd service file to start it.
The systemd unit file is called called /etc/systemd/system/pingmonitor.service:
[Unit]
Description=FastCGI Ping Monitor Service
After=network.target

[Service]
Type=simple
Restart=always
RestartSec=1
ExecStart=/usr/local/bin/pingmonitor.cgi

[Install]
WantedBy=nginx.service
To hook it up with nginx, I created a block in its configuration file:
        location /cgi-bin/RANDOM_STRING-pingmonitor.cgi {
            # Document root
            root DOCUMENT_ROOT;
            # Fastcgi socket
            fastcgi_pass unix:/var/run/pingmonitor/fcgi.sock;
            # Fastcgi parameters, include the standard ones
            include /etc/nginx/fastcgi_params;
            # Adjust non standard parameters (SCRIPT_FILENAME)
            fastcgi_param SCRIPT_FILENAME $document_root$fastcgi_script_name;
        }
I used a StackOverflow question as a reference for this.
In the nginx configuration block you can see I’m using RANDOM_STRING as part of the CGI script URL, which is a long random string.
This is because I didn’t want that URL to be easily discoverable.
Its location is basically a secret between my server and my RPi.
After setting everything up I accessed the URL with my browser multiple times, confirmed the timestamp files were being created, etc.
Accessing the CGI script periodically
This is the easy part that goes in the RPi.
I could’ve used a systemd timer but went with a service instead (like the guy pushing all shapes through the same hole), so the main part is a script that pings the URL once a minute, saved as /usr/local/bin/pingmonitor-pinger.sh.
#!/usr/bin/env bash
while true; do
    sleep 60
    curl --silent --max-time 30 -o /dev/null URL
done
And the corresponding systemd service file called /etc/systemd/system/pingmonitor-pinger.service:
[Unit]
Description=Ping Monitor Pinger Service
After=network.target

[Service]
Type=simple
Restart=always
RestartSec=1
ExecStart=/usr/local/bin/pingmonitor-pinger.sh

[Install]
WantedBy=multi-user.target
Checking timestamps periodically
This part goes into the cloud server again.
The script tries to send a single email when it detects pings are too old (1000 seconds, more or less reasonable limit chosen arbitrarily), and another one if the pings come back.
It’s also in charge of removing old ping files.
I could have removed all existing files with each check, but I decided to arbitrarily keep the last 10 in case it was useful for something.
To send emails, it uses /usr/local/bin/pingmonitor-mail as described above.
I saved it under /usr/local/bin/pingmonitor-checker.py.
#!/usr/bin/env python
import glob
import os
import time
import subprocess
import sys

PINGS_DIR = '/var/run/pingmonitor/pings'
MAIL_PROGRAM = '/usr/local/bin/pingmonitor-mail'
MAX_DIFF = 1000 # Seconds.
SLEEP_TIME = 60 # Seconds.
MAX_FILES = 10
ONE_SECOND_NS = 1000000000

def get_epoch():
    return time.time_ns() // ONE_SECOND_NS

def print_msg(msg):
    print('%s' % (msg,), file=sys.stderr)

os.makedirs(PINGS_DIR, mode=0o755, exist_ok=True)
os.chdir(PINGS_DIR)

start_time = get_epoch()
ping_missing = False

while True:
    now = get_epoch()

    # List of files with a numeric name.
    filenames = glob.glob('0*')

    # Check the last timestamp. If no files exist yet, wait at least from the start
    # of the script.
    if len(filenames) == 0:
        last_timestamp = start_time
    else:
        filenames.sort()
        most_recent = filenames[-1]
        last_timestamp = int(most_recent, base=10)

    current_diff = now - last_timestamp

    # Remove old files.
    if len(filenames) > MAX_FILES:
        kept_files = filenames[-MAX_FILES:]
        for fn in filenames:
            if fn not in kept_files:
                os.remove(fn)

    if current_diff > MAX_DIFF and (not ping_missing):
        ping_missing = True
        subject = '[pingmonitor] No pings for %d seconds' % (MAX_DIFF,)
        body = 'Last timestamp: %s' % (time.ctime(last_timestamp),)
        print_msg('%s; %s' % (subject, body))
        subprocess.run([MAIL_PROGRAM, subject, body])

    elif current_diff < MAX_DIFF and ping_missing:
        ping_missing = False
        subject = '[pingmonitor] Ping recovered'
        body = 'Last timestamp: %s' % (time.ctime(last_timestamp),)
        print_msg('%s; %s' % (subject, body))
        subprocess.run([MAIL_PROGRAM, subject, body])

    time.sleep(SLEEP_TIME)
Again, such an script could be run as a systemd timer, but I decided to write it as a loop and use a service instead, called /etc/systemd/system/pingmonitor-checker.service.
[Unit]
Description=Ping Monitor Checker Service
After=pingmonitor.service
Wants=pingmonitor.service

[Service]
Type=simple
Restart=always
RestartSec=1
ExecStart=/usr/local/bin/pingmonitor-checker.py

[Install]
WantedBy=multi-user.target
Final thoughts
After setting that up, I checked it works by experimenting with a few timeouts and stopping and starting the pinger service on the RPi. I’m pretty happy with how things turned out, given that this sits outside my usual domain. With an unreliable Internet connection at home, what I did may not be suitable for you if all you’re interested in are the actual power outages. In my case, Internet outages are very infrequent so I’m willing to live with a few false positives if that means I won’t waste the contents of my fridge and freezer again.